Working with CSV files
Sharperlight has been designed to both create and read CSV files in various formats.
This article will focus on the various options available when dealing with CSV files but very often these same processes can be applied to XML and JSON file formats too.
Please note that CSV files do not have a concept of Data Types which meansen r
Options for CSV
• Query CSVs in Query Builder using the System / CSV File Table
• In Query Builder Preview there is a Save As CSV menu option
• Scheduler Query or Publisher save as CSV file
• Scheduler Writeback with a CSV file as the source
• Web Channel right click menu Save as CSV and Excel CSV on tables and grids
• Web Channel RESTful server CSV URL options
• Command Line to save Queries and Publisher reports as CSV files
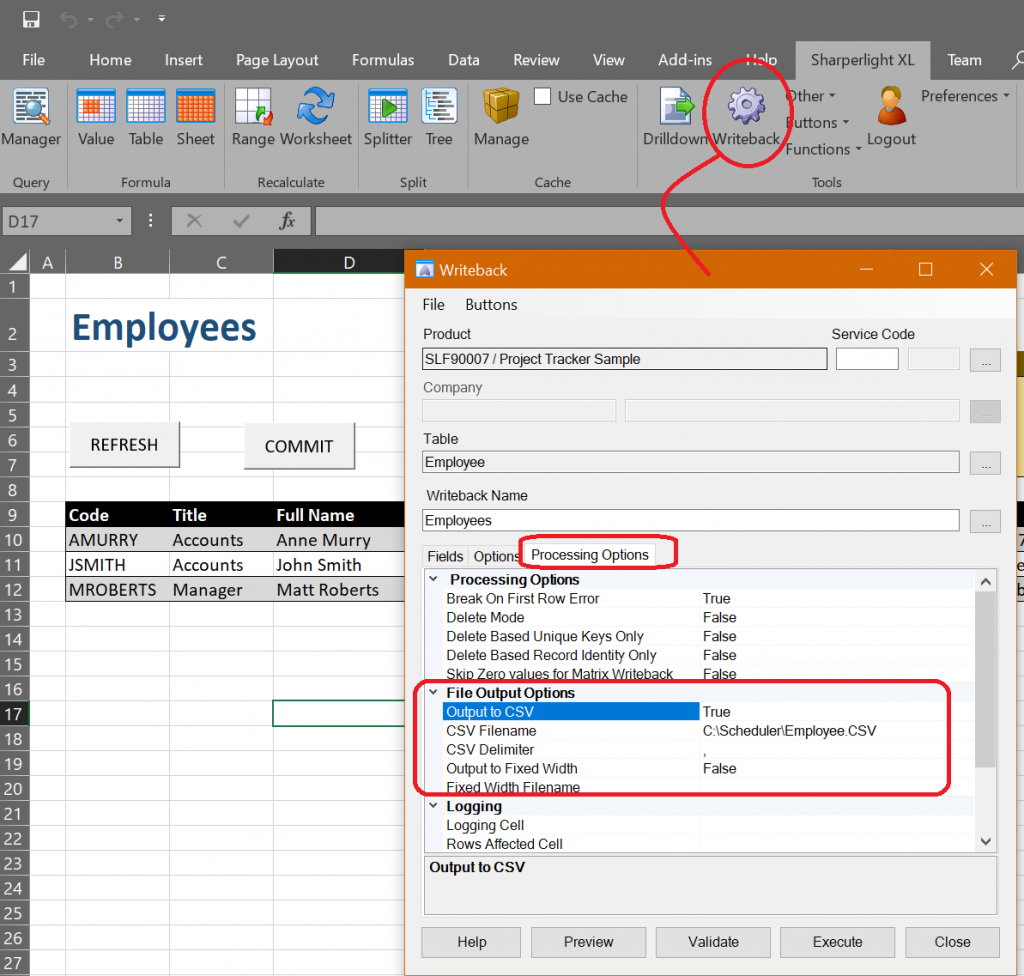
• Excel Writeback can redirect output to a CSV file instead of a Datamodel Table
Querying CSV Files with Query Builder
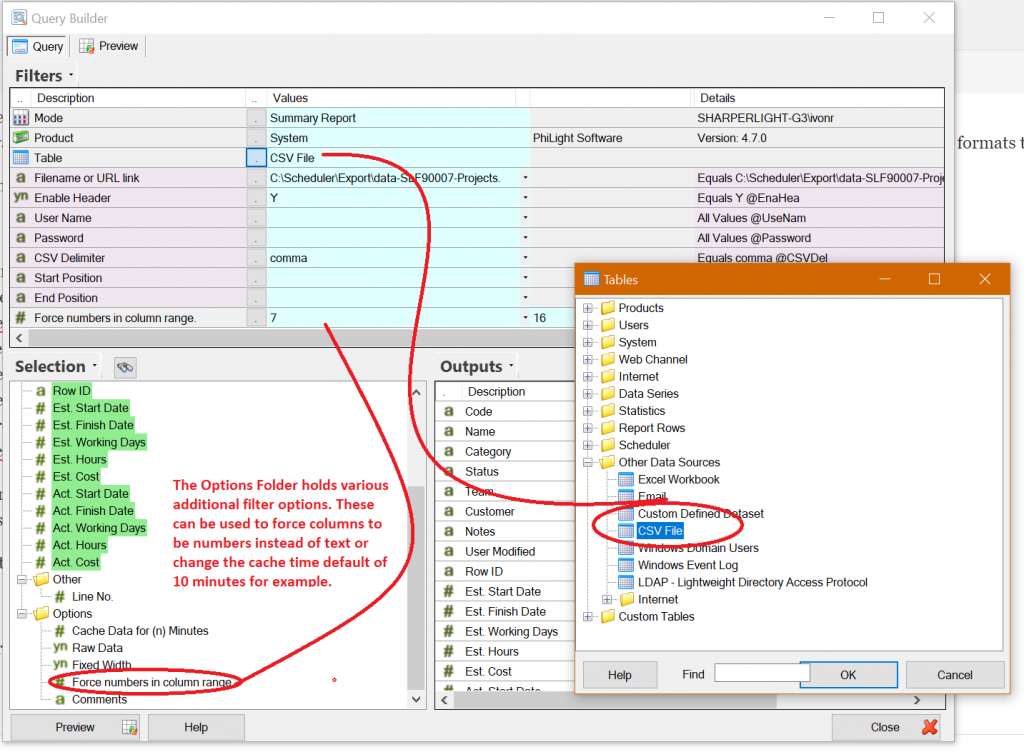
In Query Builder select the Project System and the Table CSV File. Use the button on the filter ilename or URL Link to browser to the file if it’s in the file System. Remember if the file is in the file system then that file location will also need to be visible to the Application Server Service. For this reason it’s better to avoid file paths like C:\ but instead use paths like file://SharedNetworkFolder/data.csv.
CSV files do not have a concept of data types so by default all the fields will be read in as text columns. You can force a range of columns to be numbers by using the Force number in column range filter option which can be found in the Options folder. Also you can suffix the CSV header columns with the data type to assist the Query Builder. For example if you had Columns like EmployeeNo,Name, DateStart, DateEnd,DOB,Rate you could set the data type on the head like this. EmployeeNo::Integer,Name, DateStart::Date, DateEnd::Date,DOB::Date,Rate::Number. Another way to convert the text columns into a data type is to use expressions to do the conversion. For example an expression to convert the CSV text into a date would be Date( {%DOB} ) and a number conversion would look like this Val( {%Rate} )
Note for performance reasons the query data set is cached for 10 minutes by default based on the unique filter criteria. This can be changed by using the filter options again.
If the CSV is on the internet or intranet (Cloud) enter the URL address instead of the file path .
If the source CSV file is fixed width then set the CSV Delimiter to the keyword fixed in which case the Header will be used to determine the columns width given that it is padded with spaces.
The System table CSV File does have limits which a maximum of 32 text, number or date columns. The number of rows depends on how big the data is on a single row.Generally it will be around 5000 to 9000 rows of data. If you have more columns or rows then look at the other options of creating a CSV Datamodel with Studio or using Scheduler to writeback the CSV data into a Materialised Query Table.
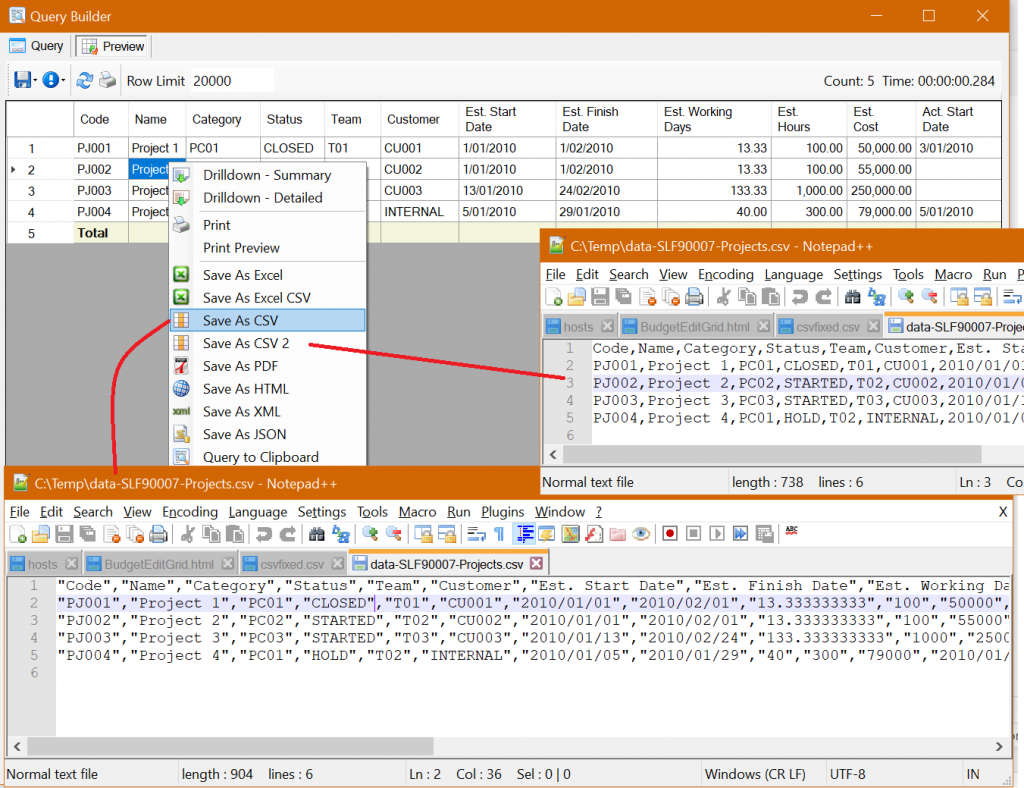
Query Builder Preview Save As CSV Menu
The Query Dataset can be save in three CSV file formats using the preview right click menu. Save as CSV does a standard CSV with quotes around all the values and a comma separator. Save as CSV 2 does not put quotes around the values but one must be careful with this format as it is easily broken when data contains commas or quotes.
The Save as Excel CSV creates a CSV file that Excel will understand and open directly which any mapping due to the BOM marker at the start of the file.
Scheduler Query or Publisher save as CSV file
The actions of Query and Publisher Save As can be used to create CSV files using various formats and encoding.
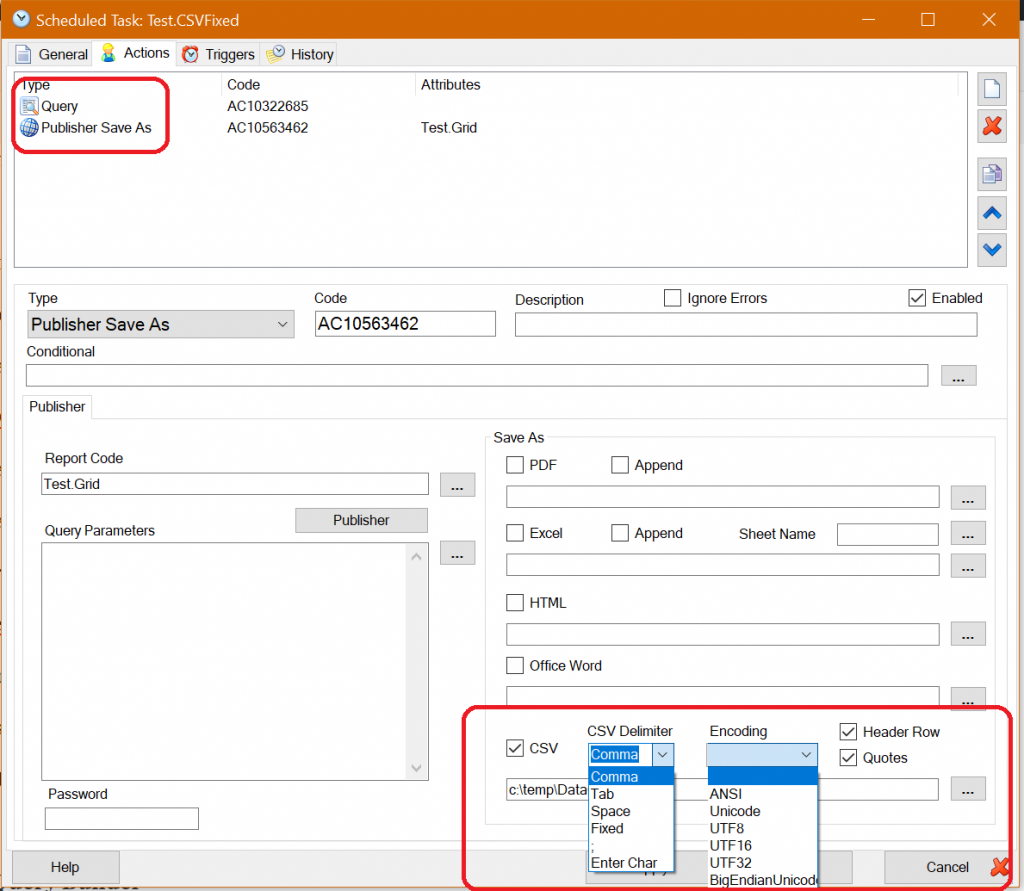
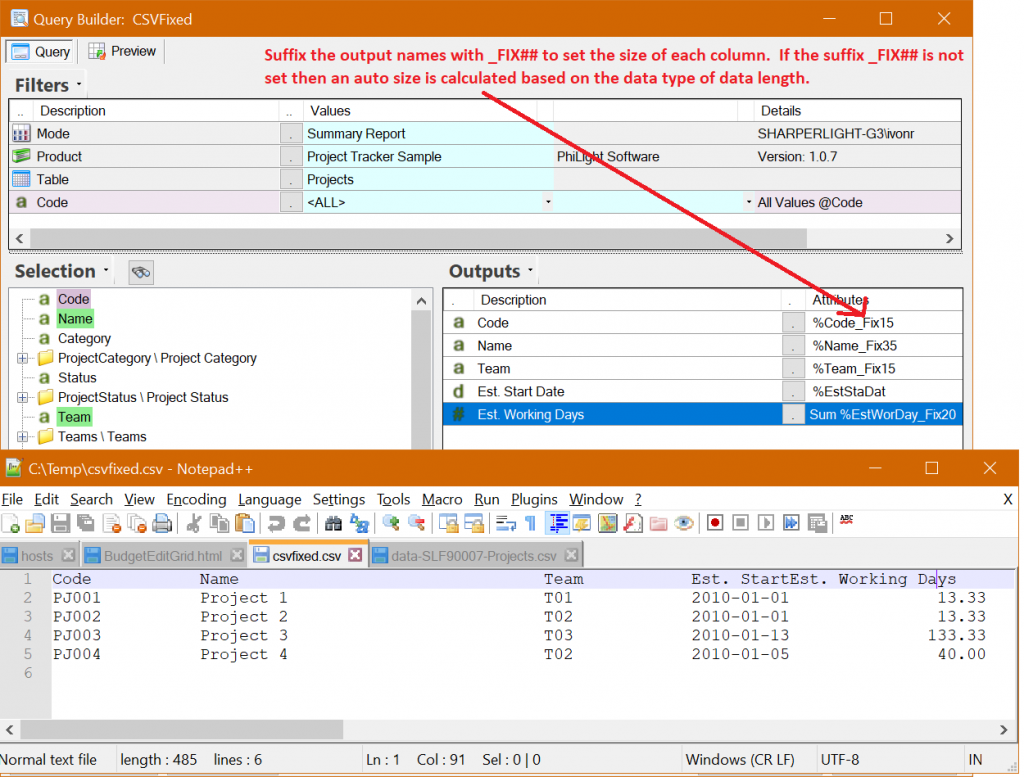
If a fixed width CSV file is required then the Query output names will need to be suffixed with the length of the fields _FIX## and the Delimiter set to Fixed.
If the output names are not suffixed with the length of the field then it is automatically calculated based on the data type or data length. Numbers will be padded on the left side and if the Number format is active on the output then the number of decimal places is used to format the number.
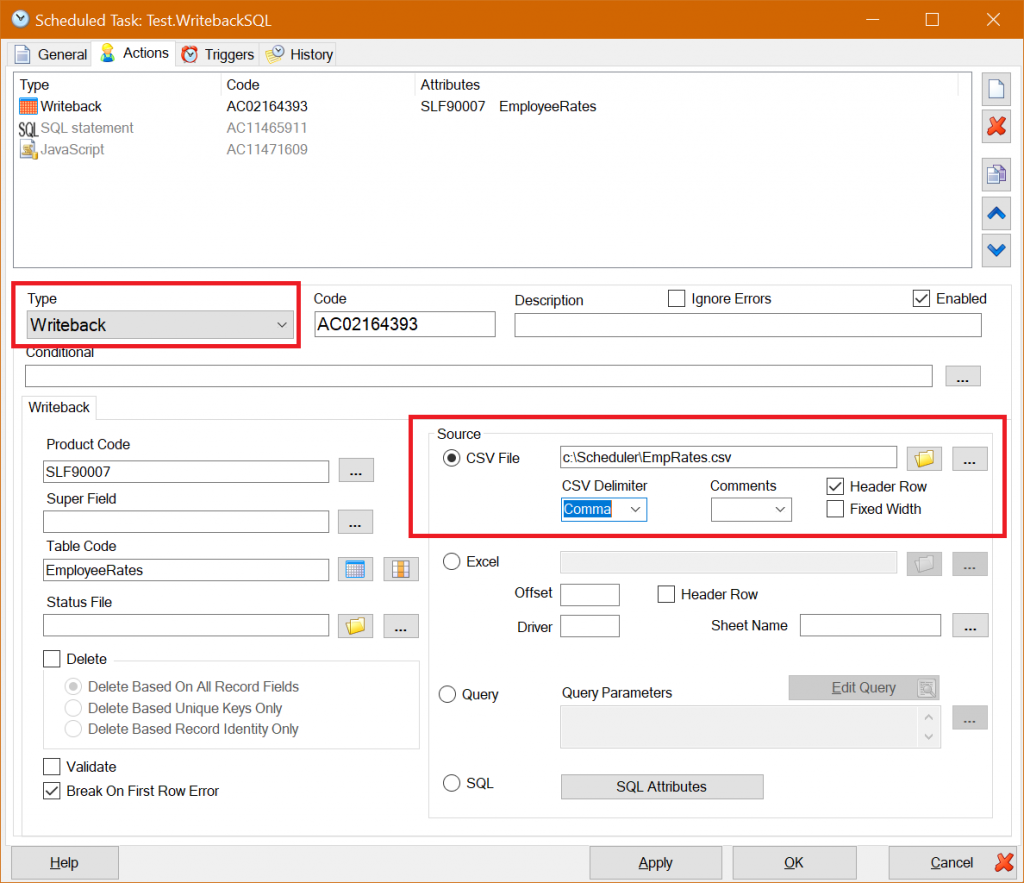
Scheduler Writeback with a CSV file as the source
Read and CSV file and transfer the data into a Database table or object in a Datamodel.
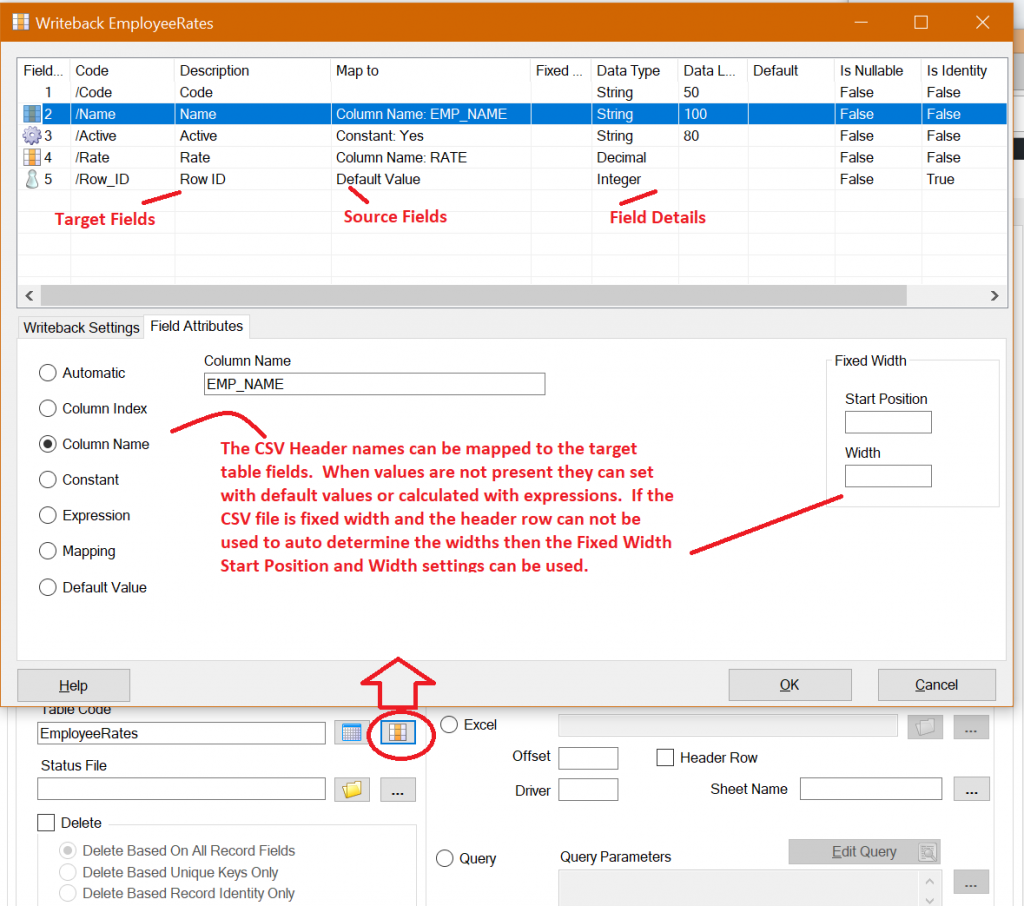
Writeback Mapping
The CSV Header names or ordinal positions can be mapped to the target table fields. When values are not present they can set with default values or calculated with expressions. If the CSV file is fixed width and the header row can not be used to auto determine the widths then the Fixed Width Start Position and Width settings can be used. Remember to also tick the Fixed Width checkbox near the Header checkbox to turn on Fixed Width mode.
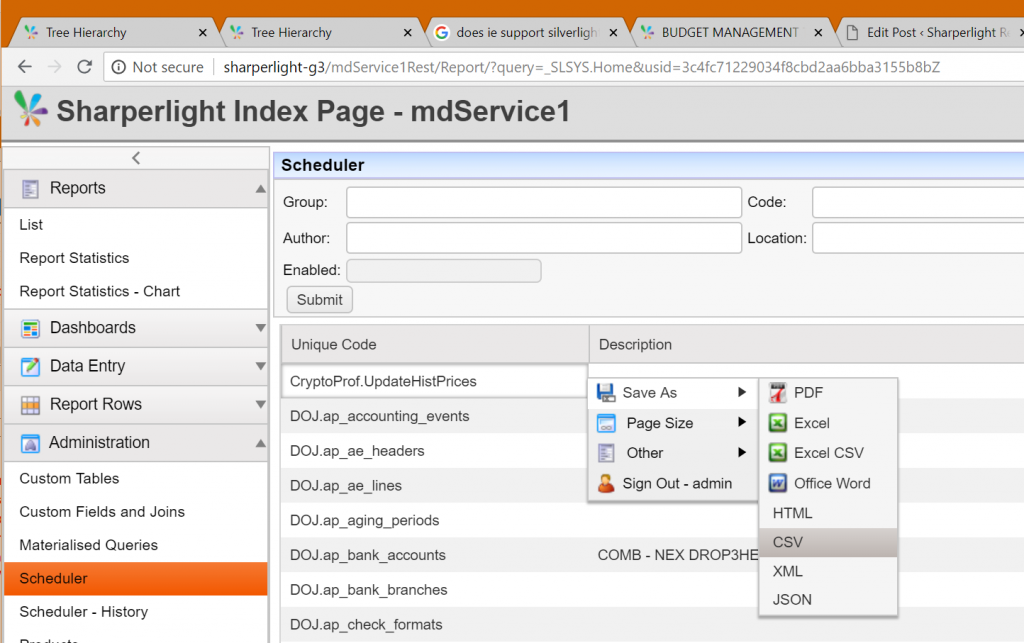
Web Channel right click menu Save as CSV and Excel CSV
The Save as Excel CSV file version has a BOM header which assists Excel in opening the CSV file directly without any mapping or selecting file types.
Web Channel RESTful server CSV URL options
Use the RESTful Service API to download of CSV file in the designed format by using URL parameters
Please see the RESTful Service API details on DataSource.
Command Line to save Queries and Publisher reports as CSV files
Excel Writeback can redirect output to a CSV file
Excel writebacks normally write data back into a Datamodel Table but the results can be redirected to a CSV file. The options can be found on the Writeback Processing Options tab. The file name can be a cell reference to a cell in the worksheet if you want the user to change the output location.