Design a HTML Invoice Form
Use Microsoft Excel or Publisher to design a HTML Invoice Form that Publisher transfers data into
It is possible to use Publisher to transfer the Query data into a HTML template to achieve Form based reporting and also custom Dashboards. In this example we will use Excel to create and design an Invoice Form that is then saved as HTML and imported into Publisher’s Custom HTML section. To transfer Query output data into the Excel Worksheet special Tags are used {*Row.OutputName} where the Output Name is the same as defined in the Query. The special Tags are simply repeated when there is more than one row of data to be displayed as in the Invoice line details. When there are fewer Invoice Lines details than the reserved slots in the Invoice Form the remaining are automatically blanked out.
For the more advanced users this same concept can be used to create Custom Dashboards using HTML created in third party tools that can target not only Browsers but also Smart devices. In these cases special tags such as {*Data.JSON} allow you to easily obtain the Query data as JSON arrays in JavaScript.
The basic steps to create a Custom HTML Form are as follows
- Start Publisher and create a new Query that retrieves all the required output information
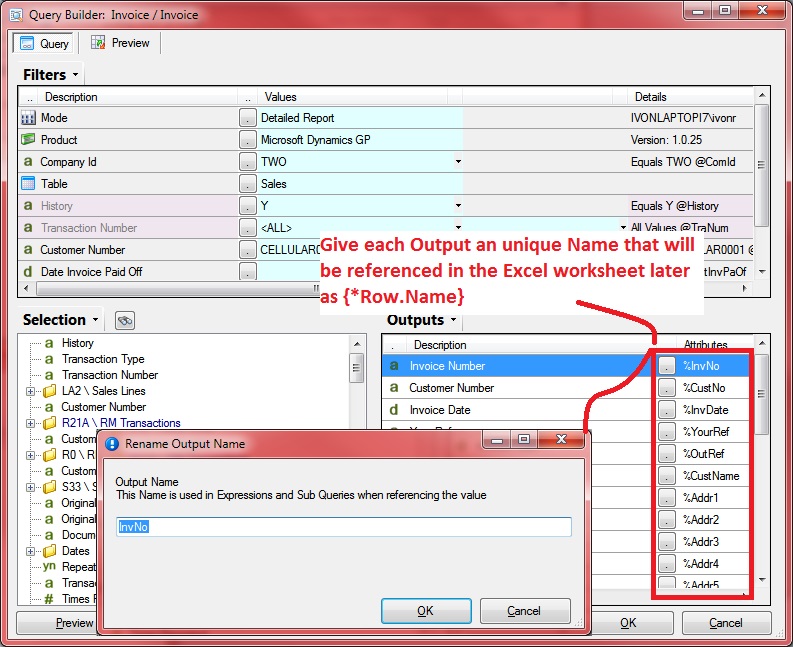
- Give each Query Output a unique name. This will be referenced later in the Worksheet
- If the Invoice values require any special Formatting use the Query Builder Output Attributes to set things like the currency symbol
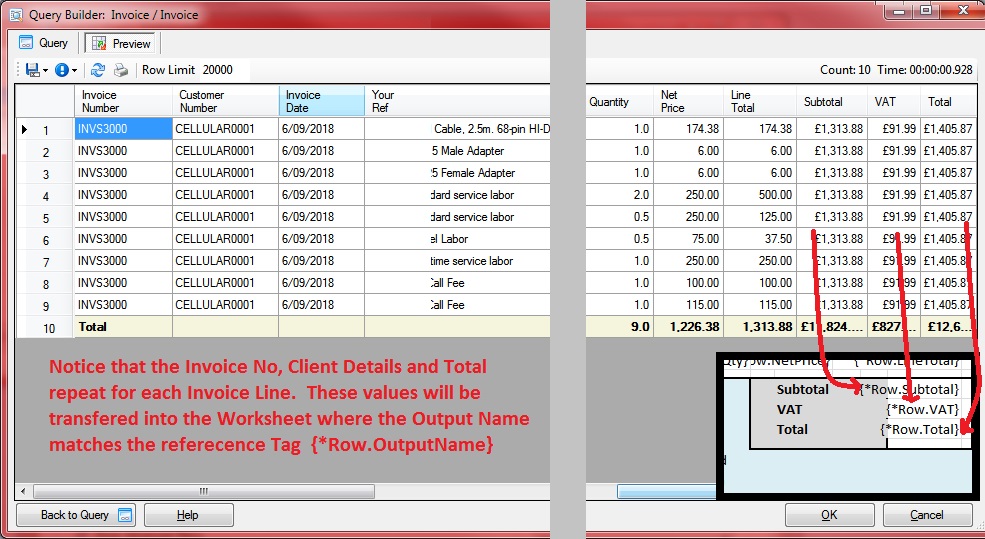
- Design the Query Output so that information such as the Invoice No. and Total are repeated for each Invoice Line Item.
- Start Excel or Publisher and begin designing the Form.
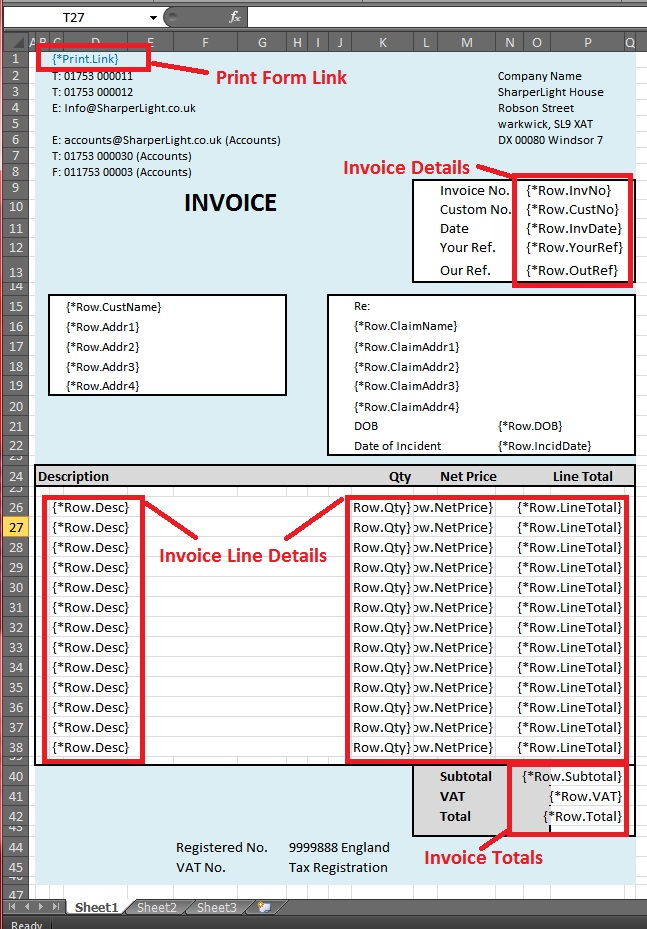
- Where Query data is required use the special Tags {*Row.OutputName}
- Use Excel or Publisher formatting to right align any special Tags that are going to display numbers
- Save Excel / Publisher for as a normal file
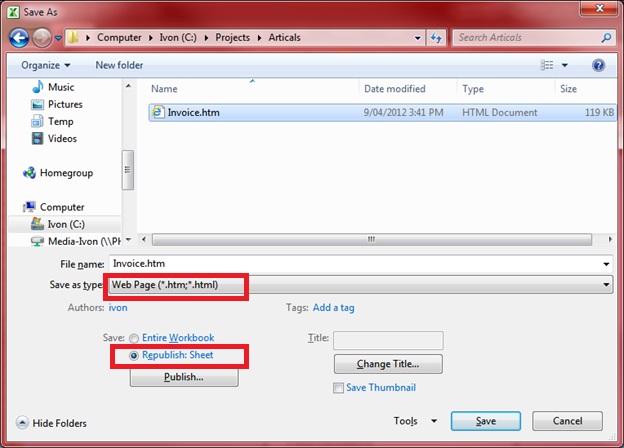
- Now use Excel / Publisher Save As HTML and select Republish Sheet
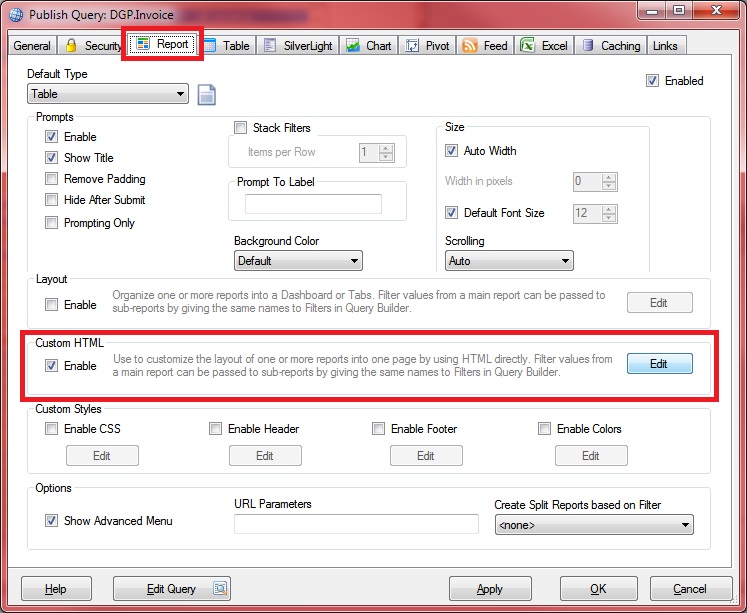
- In Publisher go to the Report Tab and enable Custom HTML and click the Edit button.
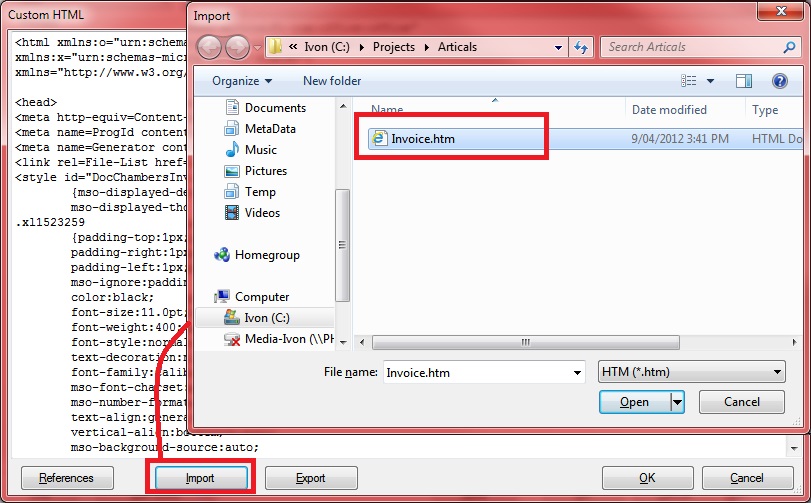
- Use the Import button to browse for the Invoice html file created by Excel
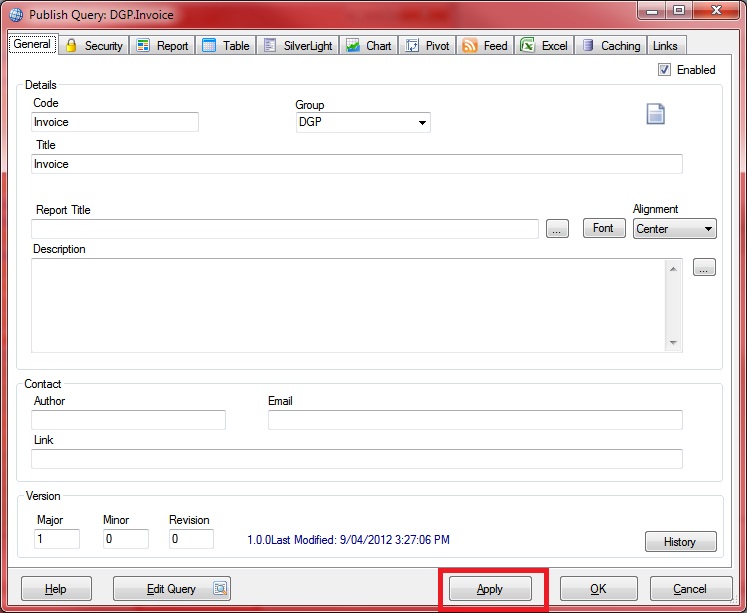
- Give the Report a Title and Code and click the Apply button
- You can now navigate to the Published Invoice Report and test it.
- Repeat steps 6 onwards to fine tune the Form design.
Note:
This example is quite simple in that only one Invoice is displayed. If multiple Invoices are to be displayed then two Queries need to be published. The main Published Report would get all he Invoices for the selected Customer and the second hidden Report would be called from the main Report as a Sub Report. The Sub Report receives the Customer and Invoice No. details from the main Report.
Note:
This example is quite simple in that only one Invoice is displayed. If multiple Invoices are to be displayed then two Queries need to be published. The main Published Report would get all he Invoices for the selected Customer and the second hidden Report would be called from the main Report as a Sub Report. The Sub Report receives the Customer and Invoice No. details from the main Report.
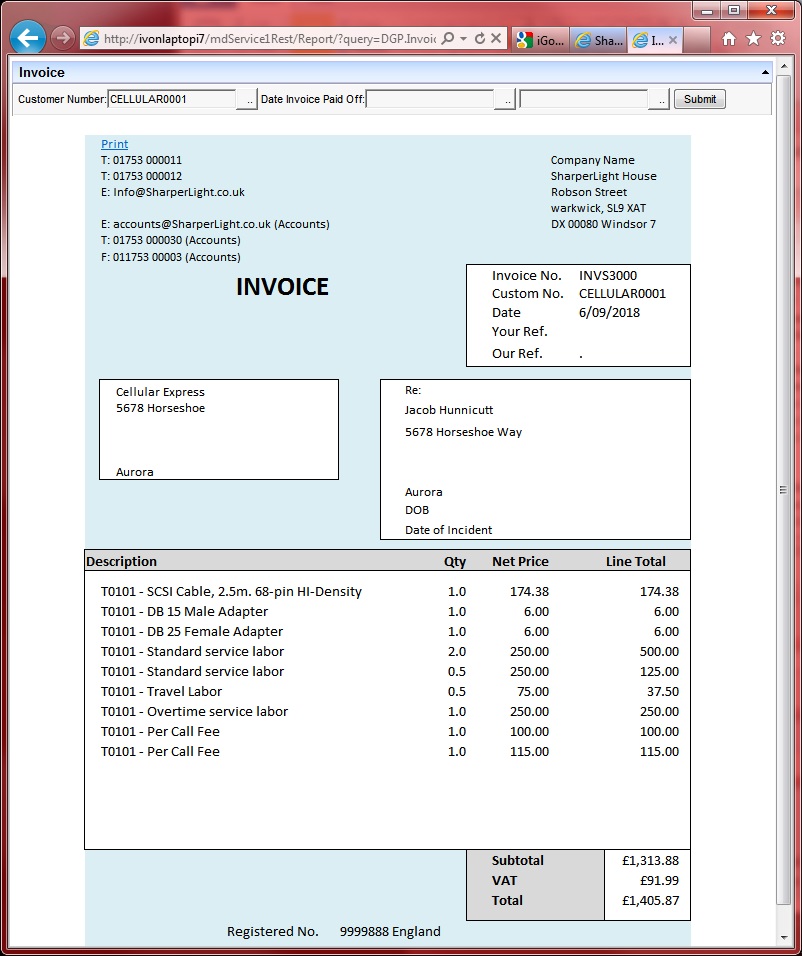
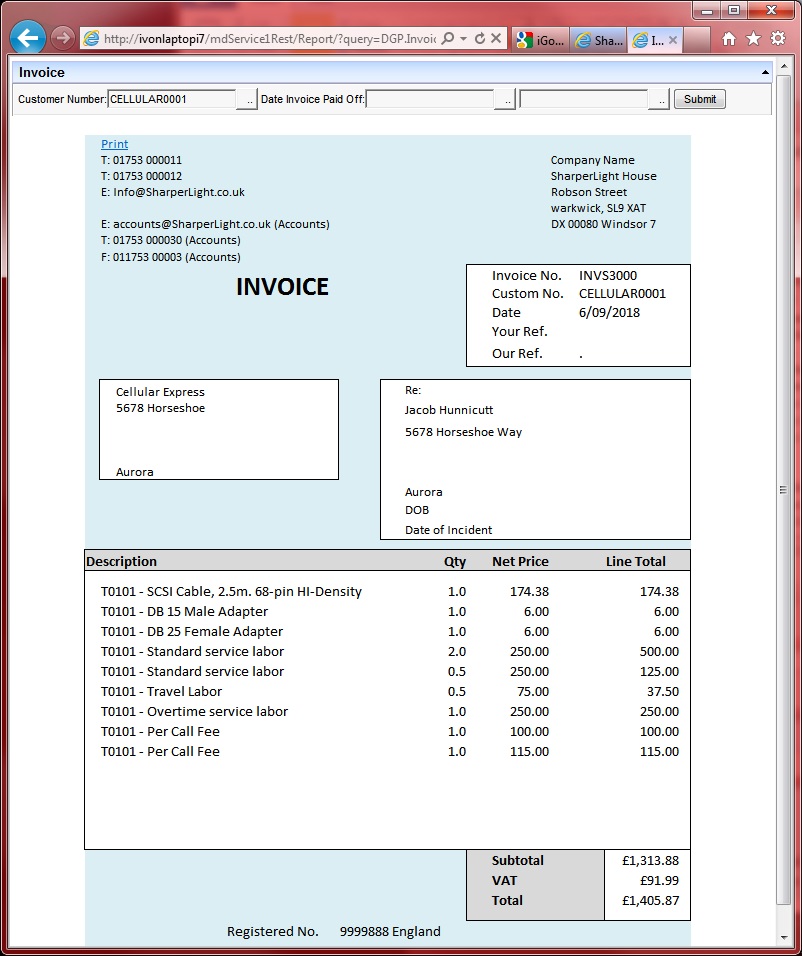
This is an example of the final Invoice Report that Publisher will display
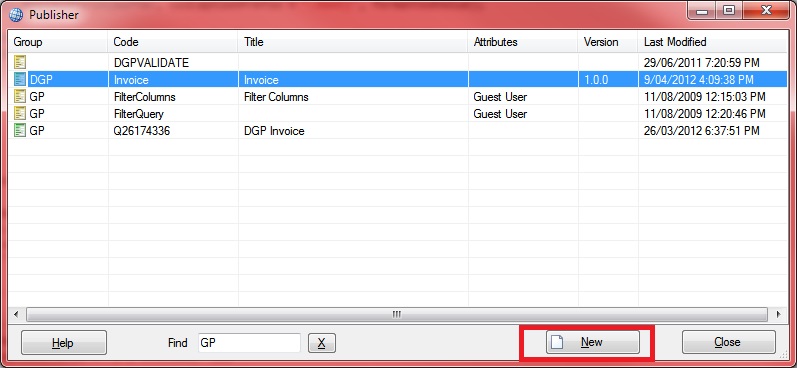
Start with Publisher and Click New
Use Query Builder to Start the basis of the Query – Give each Output a unique Name
Preview the Query Data – Notice that items such as the Invoice No., Custom Name and Total are repeated for each line of the Invoice.
Start Excel and design the Invoice Form. – Notice that the special Tags {*Row.OutputName} are placed into the cell where needed. The allow the Form to be printed use the special Tag {*Print.Link}
After saving the Excel workbook as a normal file, use the Save As HTML option with Republish Sheet to create a HTML version of the Invoice form.
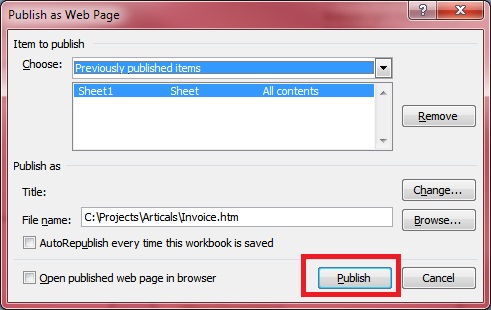
Click Publish
In Publisher on the Report Tab, enable Custom HTML and click the Edit button.
In the Custom HTML edit window click the Import button and browse for the Invoice html file
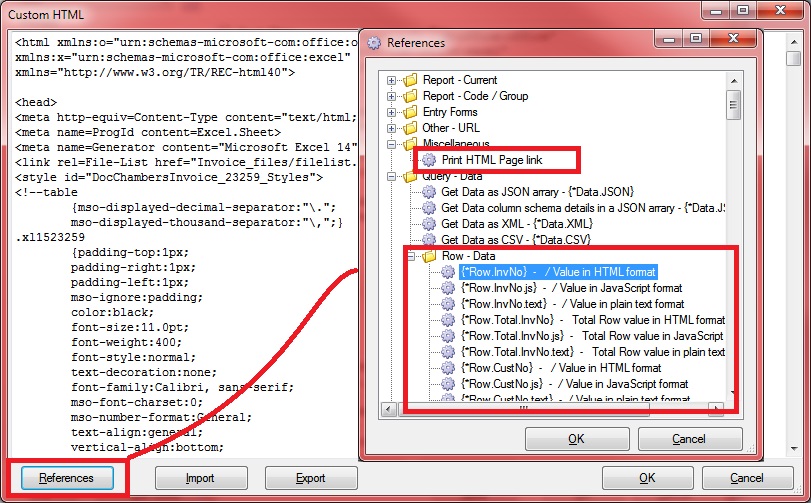
This step is not required as all the special Tags have been entered into Excel directly. However if you have created your own HTML and wish to insert data into it you use the References button to view all the different types of Tags. Probably the most interesting would be the Tag {*Data.JSON} which returns the Query data as a JSON array read for use by JavaScript. In this way all sorts of Custom Pages can be created for Web Browsers and Smart Devices.
Give the Report a Code and Title and click the Apply button
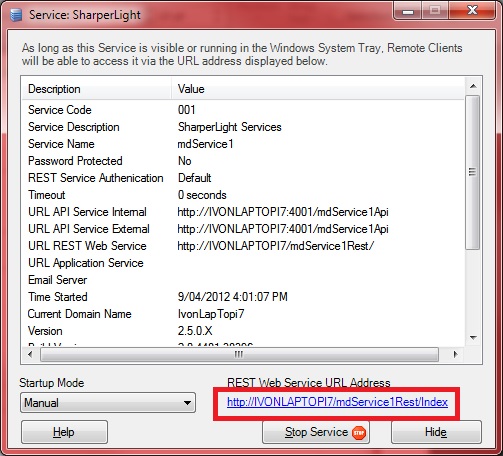
If you already have a SharperLight Service running you can skip this step. For testing you can start the Service from the SharperLight shortcut menu. Remember to right click the shortcut and select Run as Administrator. Click the Link on the Window and navigate to the Published Queries.
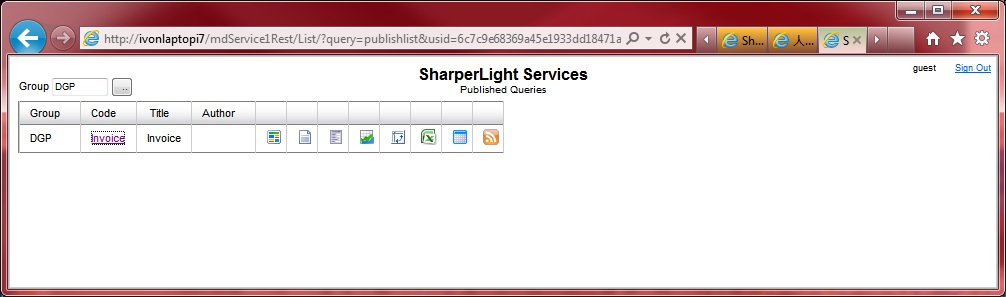
Select the Invoice Report from the Published Queries list.
Enter in the Filter details for the Invoice such as the Customer Code and Date
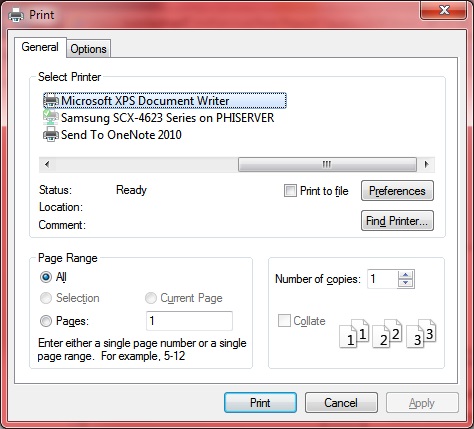
Use the Print Link to Save the Invoice as PDF, XPS or to send to a Printer. Remember that the Page margins and Numbers etc. can be configured in the Browser Printer Options
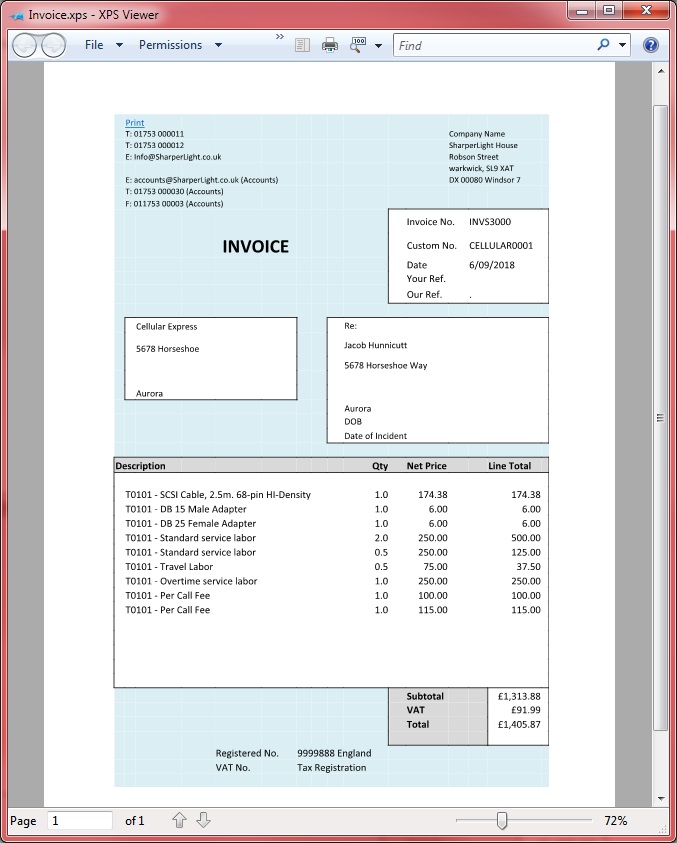
Example of a XPS file which is similar to PDF