
Page Designer – Table Group
Introduction
This post will explain what a ‘Table Group’ is in the Page Designer and how it works.
Practices
The ‘Table Group’ works similarly to the ‘GROUP BY’ clause in an SQL query, and it can be used to control how data is grouped and displayed in the report.
Before you begin, we recommend checking out these related posts:
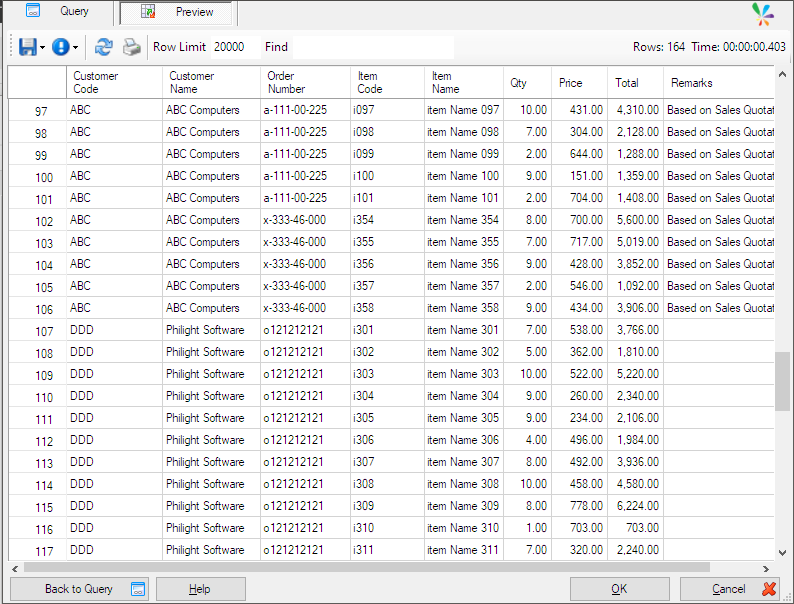
There is a dataset includes information about items sold, along with their corresponding order numbers and customer names.
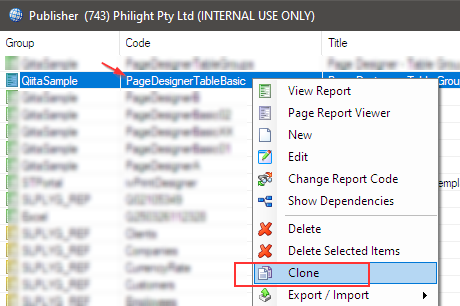
We’ll use the design created in the post ‘Page Designer – Table Basic’, so let’s start by cloning the published report, leaving the original as a backup.
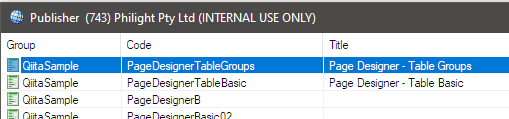
Then, rename the cloned report to ‘PageDesignerTableGroups‘ and begin using it.
Defining table groups
Our goal is to generate a PDF report where each customer’s data starts on a new page, with the customer name displayed at the top of the page based on their customer code.
Therefore, we’ll create a table group that acts as a ‘Group By Customer’.
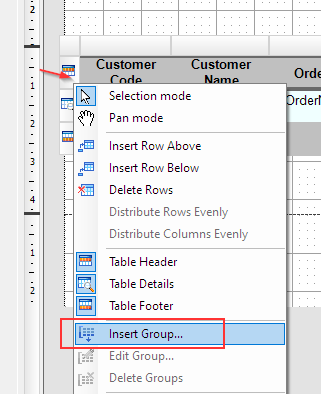
To create a group, select the entire table row, open the right-click menu, and click on ‘Insert Group…‘.
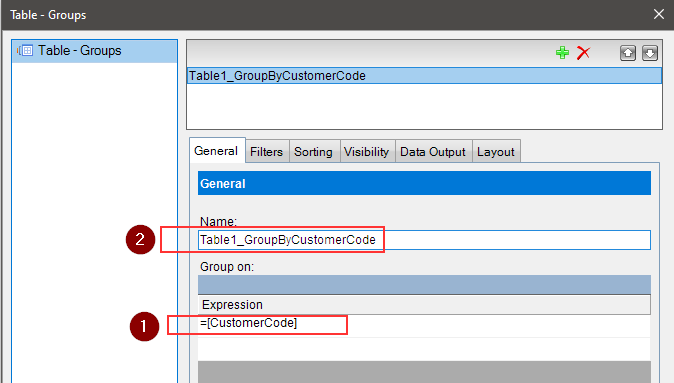
Select ‘[CustomerCode]’ from the ‘Group on:‘ dropdown list, and rename the group to ‘Table1_GroupByCustomerCode‘.
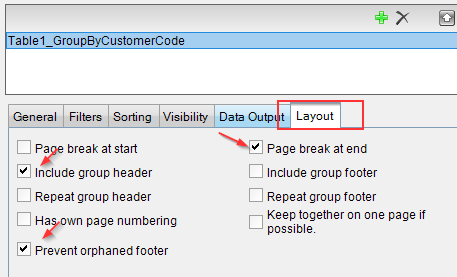
Go to the Layout tab and choose the options that ensure the table group appears at the top of each customer’s record set.
The group header row is inserted just above the table detail row.
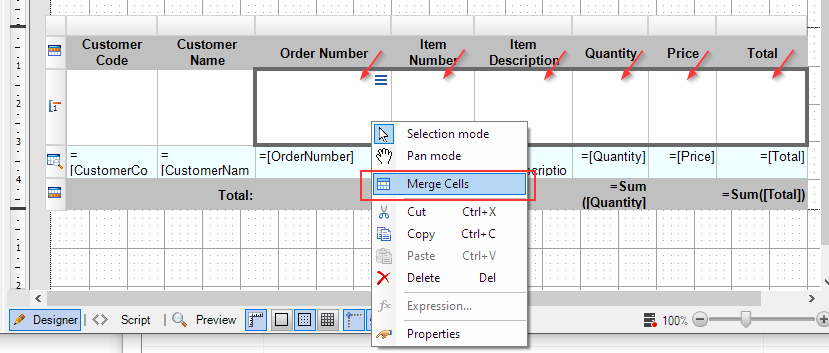
In the group header row, select the range of cells starting from ‘Order Number‘ to ‘Total‘.
Then, right-click the selected cells and choose ‘Merge Cells‘ from the context menu.
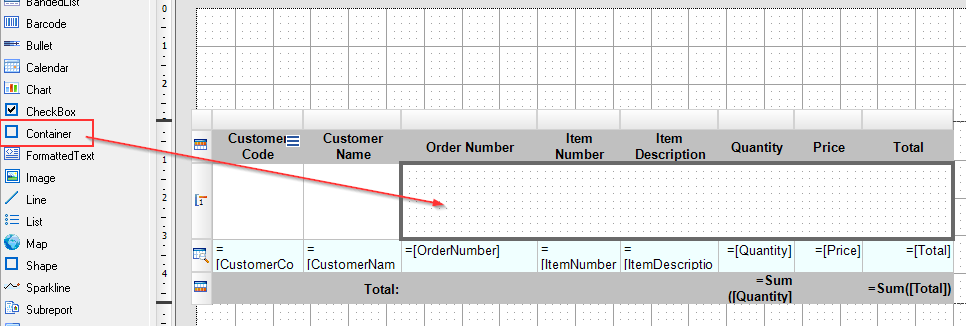
Drag the Container element from the toolbox and drop it into the merged cell you just created.
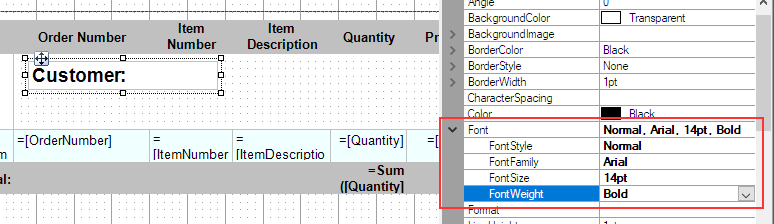
Add a TextBox to the container and set its value to ‘Customer:’. Then, configure the Font property as shown below.
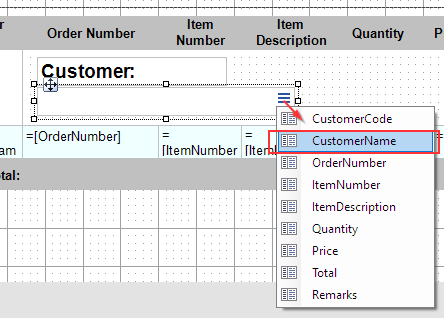
Add another TextBox and assign the ‘CustomerName’ output item from the source dataset to it.
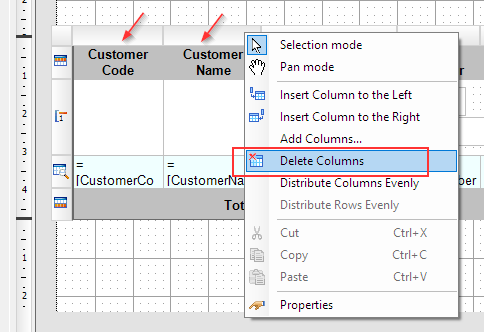
Select the ‘Customer Code’ and ‘Customer Name’ columns in the table, then right-click and choose ‘Delete Columns‘ from the context menu.
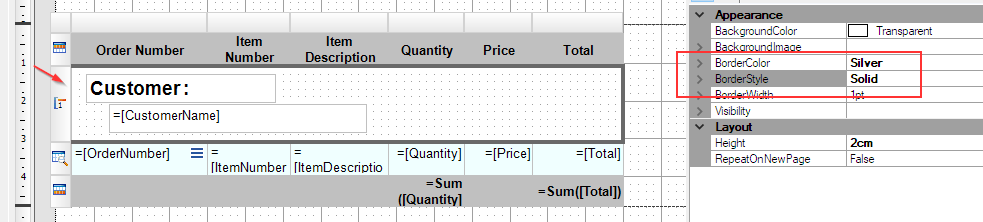
Select the entire group header row and configure the properties as shown below.
Almost it’s done so let’s preview it.
The first page for the customer ‘ABC Computers‘ displays the group header with the customer name, as per the design.
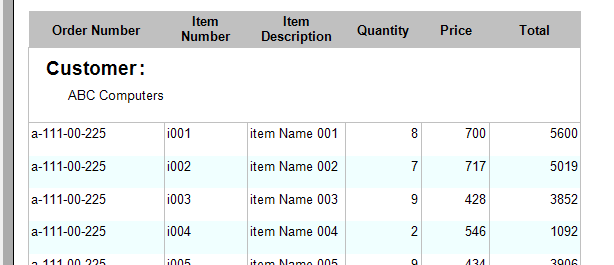
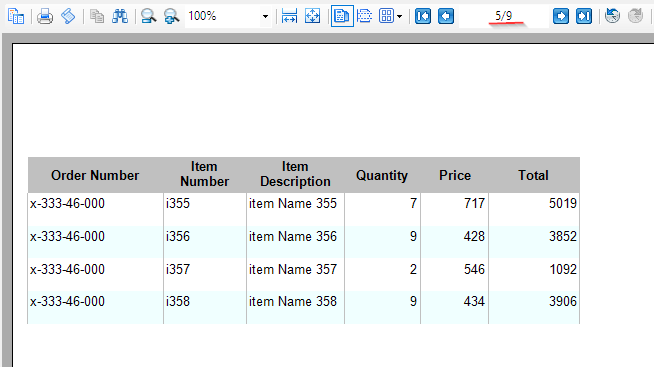
On pages following the first for the customer ‘ABC Computers’, the group header row does not appear as expected.
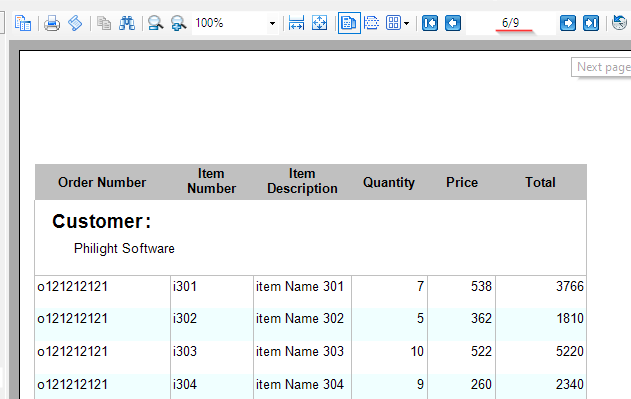
The following page, which corresponds to the first page for the customer ‘Philight Software’, displays the group header row.
At this stage, the design seems to be functioning as intended.
However, you might observe that the table header row appears above the group header row on the first page of each customer’s records.
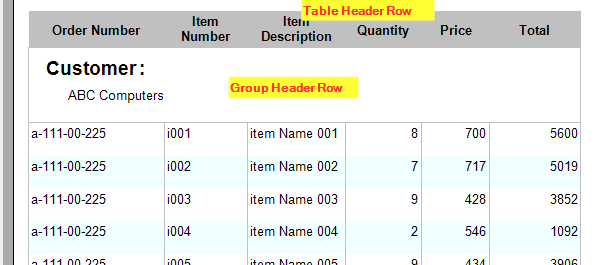
Let’s attempt to resolve this and ensure the table and group headers display correctly.
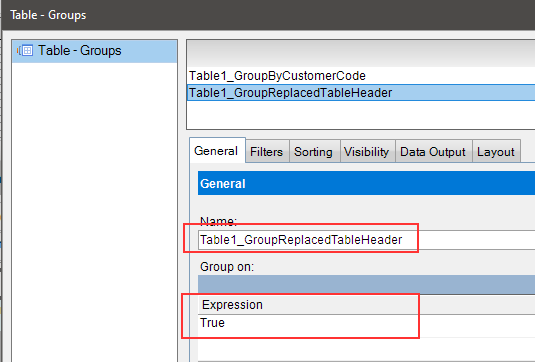
Create a new table group called ‘Table1_GroupReplacedTableHeader‘ and configure its ‘Group on’ expression to ‘True‘.
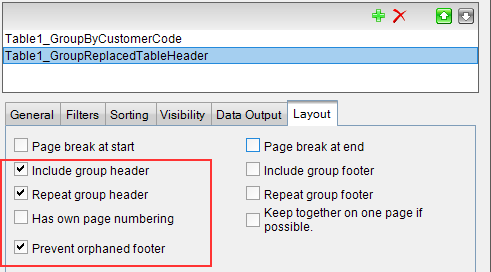
Then, go to the Layout tab and choose the options that ensure the table group appears at the top of every page.
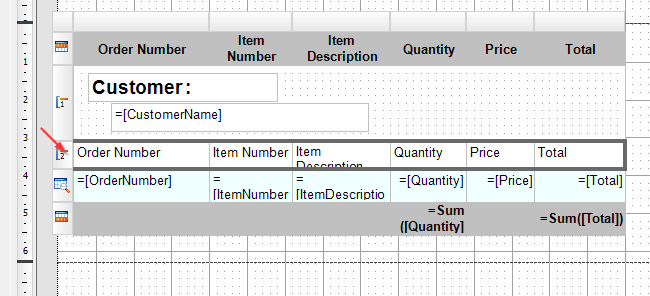
It is added as group header 2.
In the row, type the header descriptions for each column.
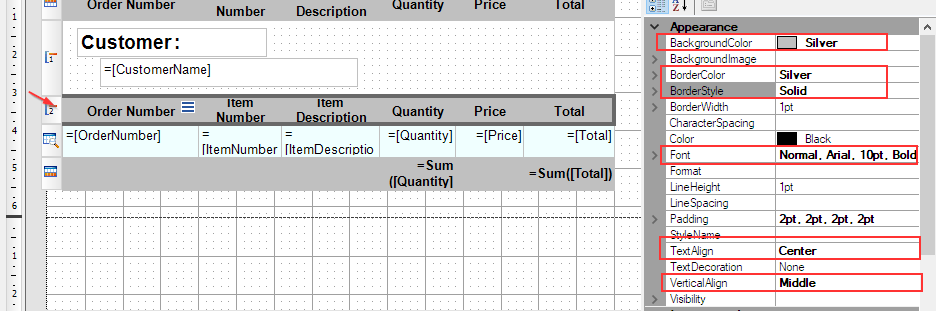
Adjust its appearance according to the settings shown below.
Finally, hide the original table header.
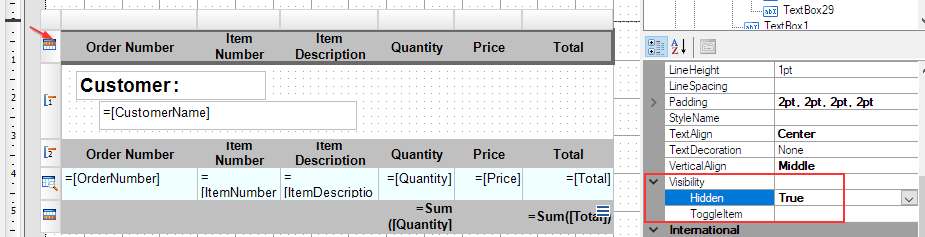
The table header, implemented as a group header, now appears properly on every page.
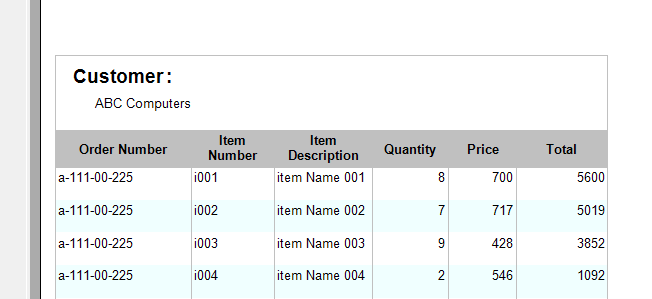
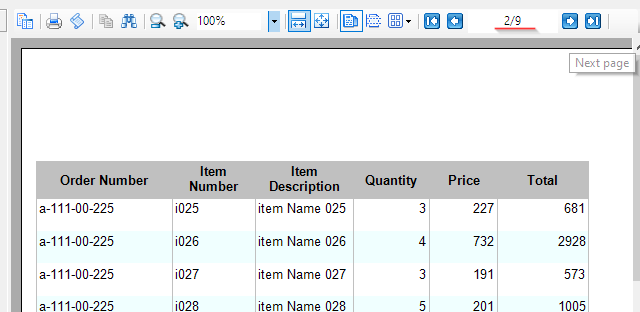
One final issue remains: the end of each customer’s record appears cluttered or unpolished.
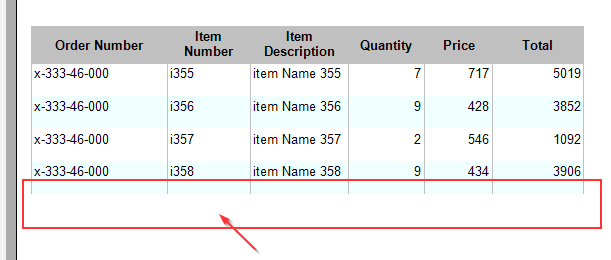
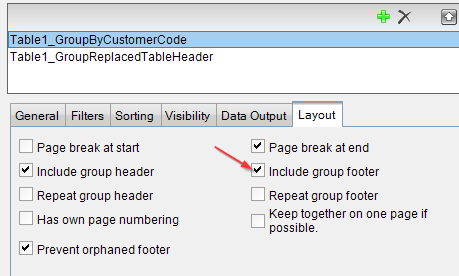
Edit the table group ‘Table1_GroupByCustomerCode‘ and check the ‘Include group footer‘ option.
The group footer row appears directly beneath the table detail row.
Adjust the row’s appearance according to the example shown below.
Type ‘Total‘ into the first cell of the group footer row. Then, set the expression ‘=Sum([Quantity])' in the Quantity cell, and ‘=Sum([Total])' in the Total cell of the same row.
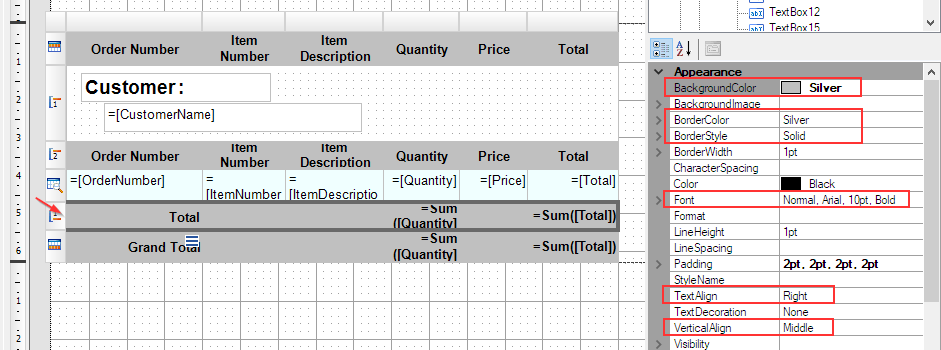
Then type ‘Grand Total‘ into the first cell of the table footer row.

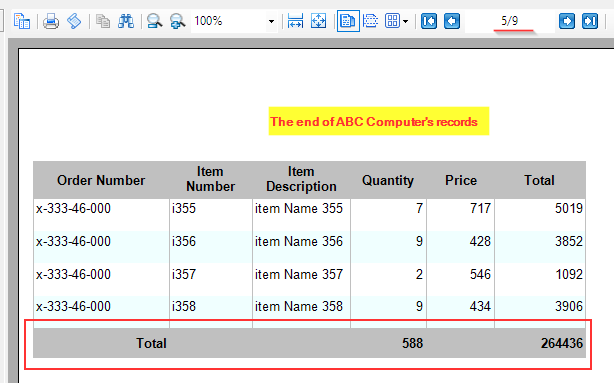
Let’s preview again.
Now, the end of each customer’s record looks much better.
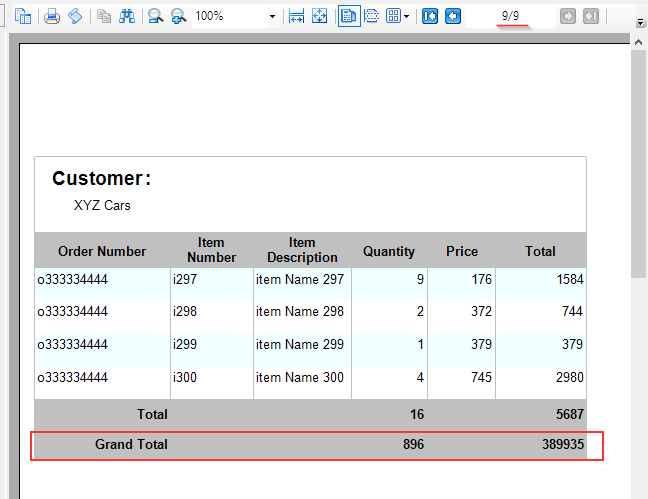
The last page of the report also looks better with the addition of the table footer row.
Afterword
We hope this guide has provided a clear understanding of how table group headers and footers are defined and function.
We think there are multiple ways to address the issue where the table header appears above the group header on the first page of each customer’s records.
We encourage you to explore and identify the most effective solution.
Download the published report with the page design.