
Controlling Dashboard Tile Refresh
Introduction
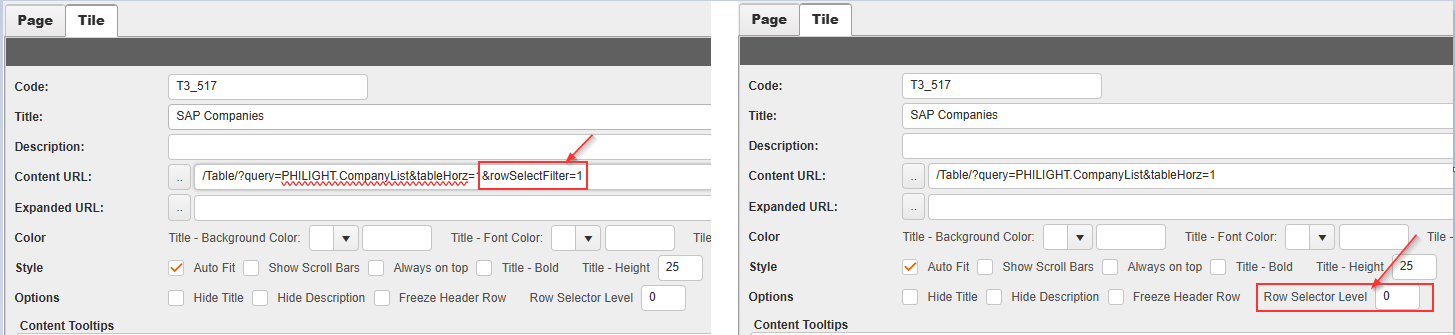
In this post, we’ll explore how slicers give you granular control over dashboard tile refresh — and how you can achieve this using one of the following methods:
- “rowSelectFilter=n” for the content URL
- “Row Selector Level” option on the tile property
Practices
We prepared these four tiles (each tile holds a report) and they make up a dashboard page.
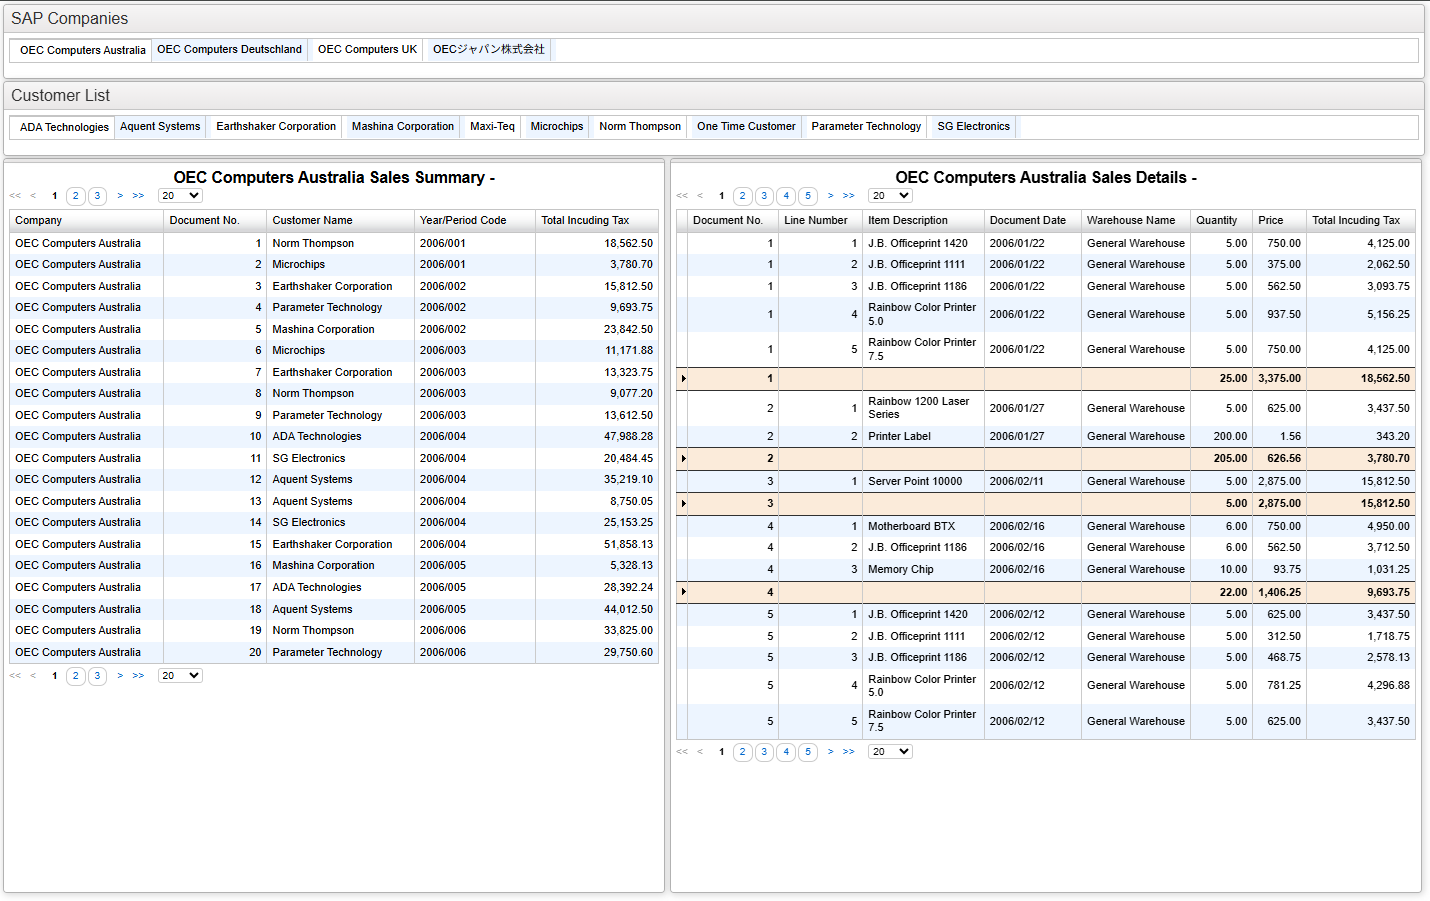
We designed the company name is passed to all other tiles when one of companies in the SAP Company List is selected. Then the customer name is also passed to the Sales Summary and Sales Details tiles, when one of customers in the Customer List is selected but the customer name is not passed to the SAP Company List tile.
Essentially, when you select a row in a report, the values from each column in that selected row are passed as filters to all other reports on the same dashboard page — but only if the column name matches the target filter field name exactly.
This functionality can be enabled only when “rowSelectFilter=n” URL parameter or “Row Selector Level” option for the tile is set, and once enabled, the tile behaves as a slicer: clicking a row in the tile applies the selected row’s values as filters to other tile’s query on the page.
The Relationship between tiles(reports)
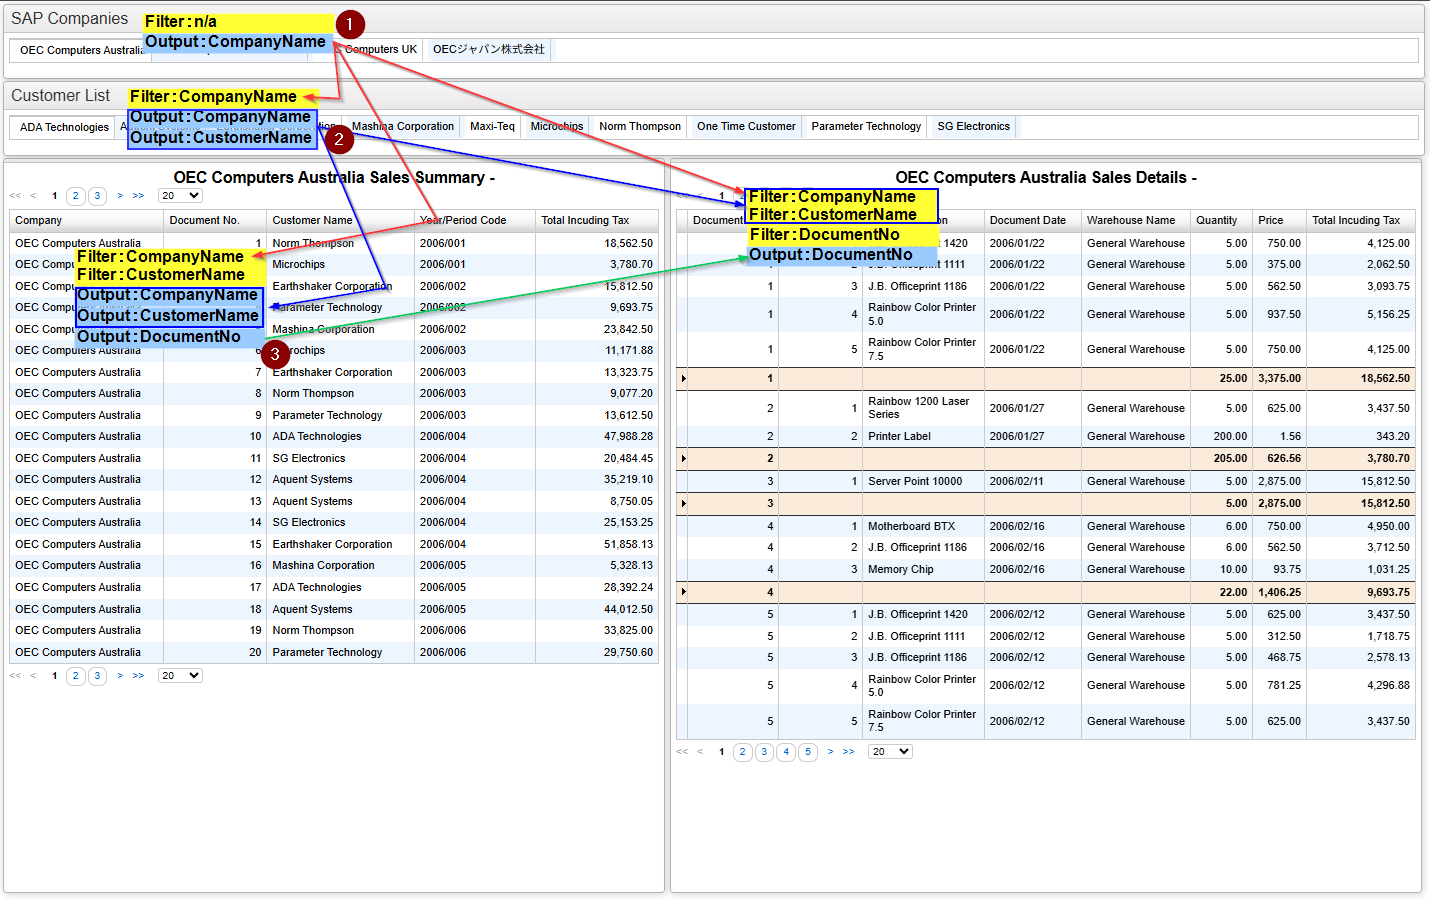
As the image above shown, the filters and the outputs of these reports are linked with their Name.
In Sharperlight, both filters and outputs in a query definition are assigned unique names. These names are used internally by the Sharperlight engine to reference and process them. The name of filter is show with ‘@‘ at the front and ‘%‘ for the output name.
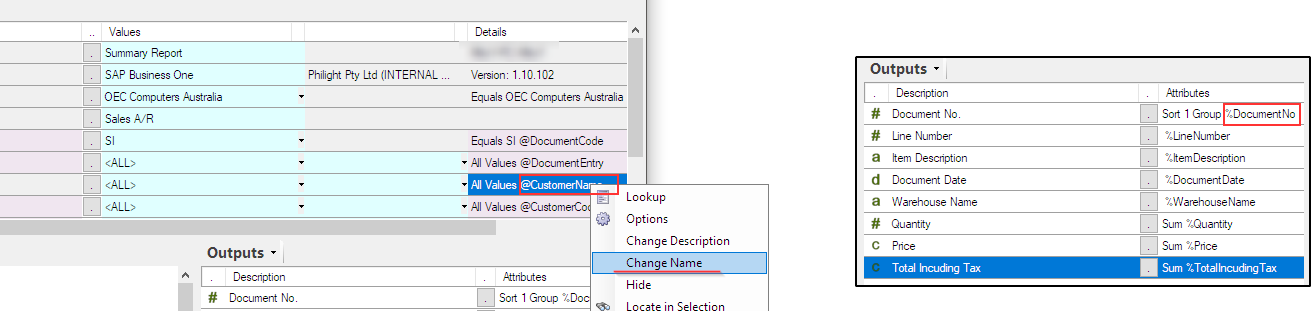
Let us explain what the image above shown.
- The value selected for the Company output is automatically passed to all filters that have the same name (CompanyName) in the query of the tiles (Reports).
- When a customer is selected from the customer list, the values of the Company and Customer outputs are automatically passed to the filters named CompanyName and CustomerName in both the Sales Summary and Sales Details queries.
- When a row in the Sales Summary report is selected, the value from the Document No column is passed to the filter named as DocumentNo in the Sales Details query.
The direction passing the values is controlled with “rowSelectFilter=n” URL parameter or “Row Selector Level” option.
How the number set with the parameter or the option works
These work by specifying a number: only tiles with the appropriate number corresponding to the slicer number will have the value selected in the slicer passed to the corresponding tile’s query and the report will be updated.
| rowSelectFilter=n or Row Selector Level |
The tile with this number is clicked | ||||||
| 0 | 1 | 2 | 3 | 4 | … | ||
| The tile(s) with this number is(are) refreshed | 0 |  |
 |
|
|
|
… |
| 1 | |
|
|
|
|
… | |
| 2 | |
|
|
|
|
… | |
| 3 | |
|
|
|
|
… | |
| 4 | |
|
|
|
|
… | |
| … | … | … | … | … | … | … | |
The table above show that when the tile with a number set is clicked (column), which tiles are refreshed (row). The icon in green means “Be refreshed” and the red cross icon means “Not be refreshed”.
Examples
Here are some examples based on the dashboard page introduced at the beginning of this post.
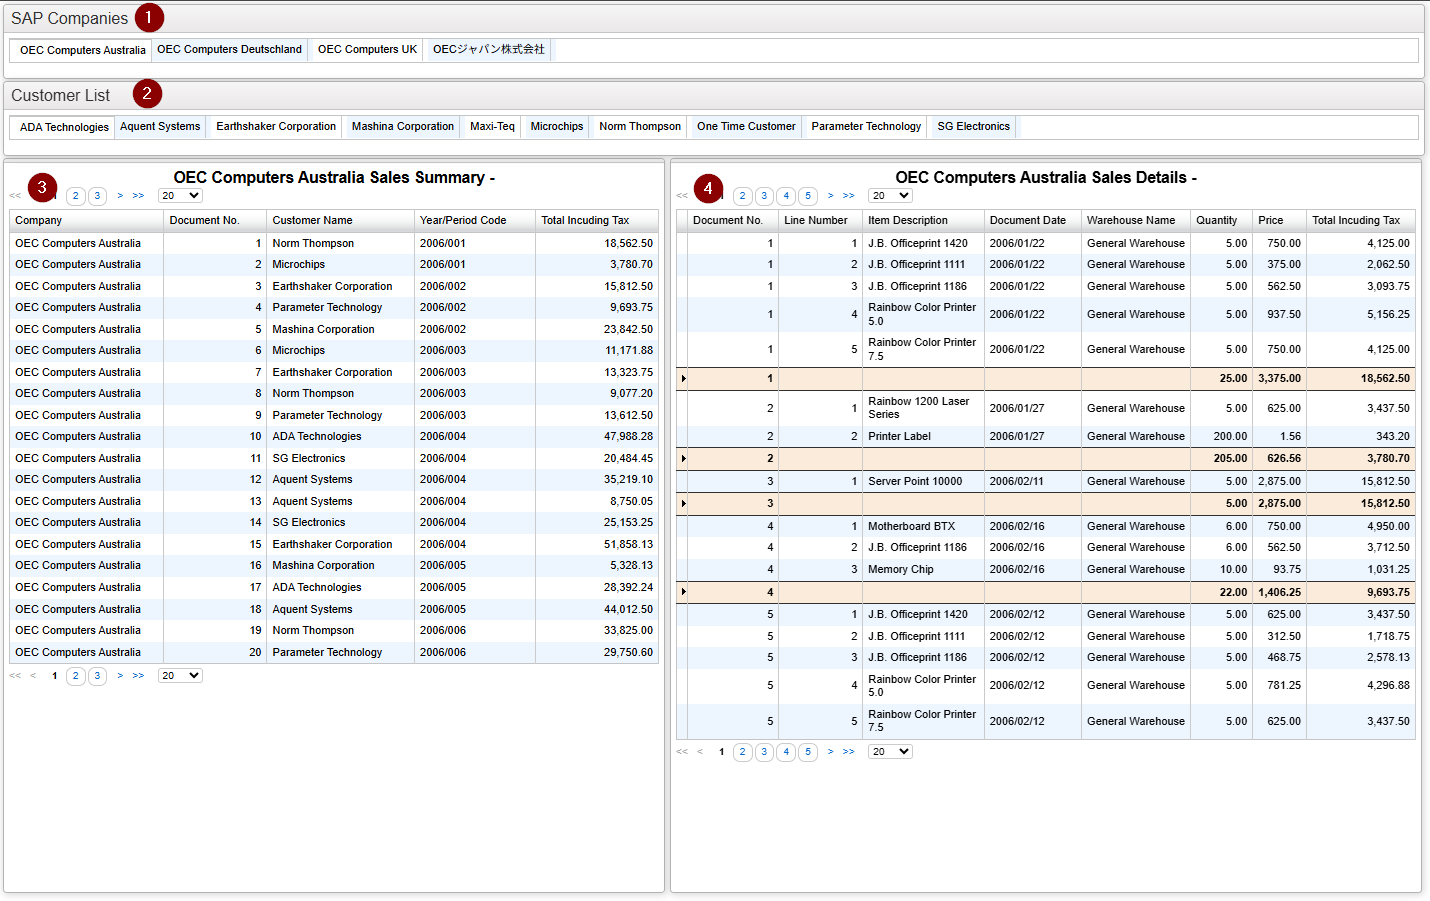
The first scenario is that one of company names (1) is clicked, the selected company name (%CompanyName) is passed to the tiles (2), (3) and (4).
Then the tiles (2), (3) and (4) are refreshed with the selected company name.
To make this works, the tiles (2), (3) and (4) must have the filter on Company Name and its name must be “@CompanyName” at least, and add “rowSelectFilter=1” to the content URL or set “1” to “Row Selector Level” option for the tile (1) to make it work as a slicer.
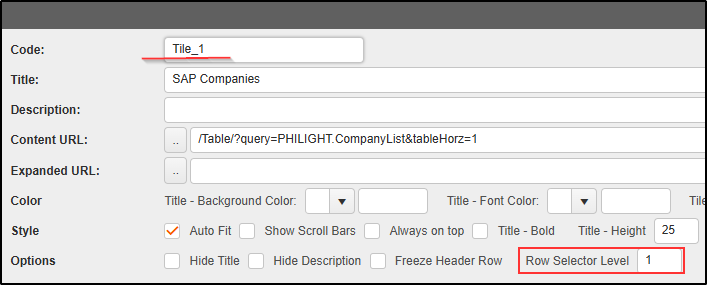
Read from the table above, we know that the tiles (2), (3) and (4) must have the number rather than “1“, i.e. 0, 2, 3, 4, …, now the first scenario works as the tiles (2), (3) and (4) has “0” as default.
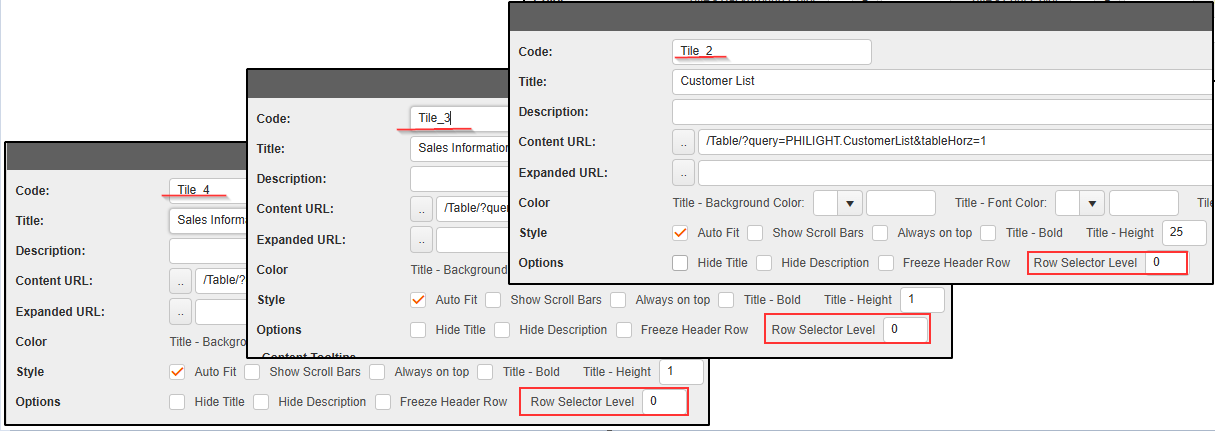
The next scenario is that when one of customer names (2) is clicked, the selected customer name (%CustomerName) is passed to the tiles (3) and (4).
Then the tiles (3) and (4) are refreshed with the passed customer name.
To make this works, the tiles (3) and (4) must have the filter on Customer Name and its name must be “@CustomerName” at least, and add “rowSelectFilter=2” to the content URL or set “2” to “Row Selector Level” option for the tile (2) to make it work as a slicer.
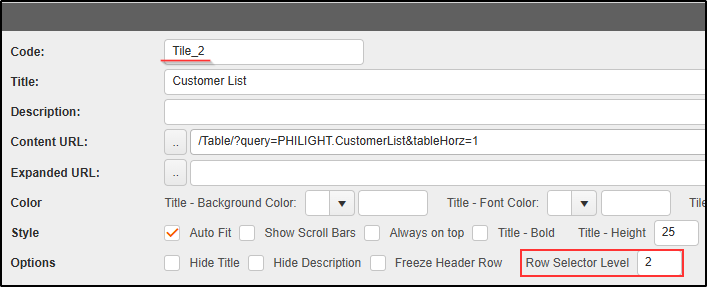
You can read with the table above, you must set “2” for tile (2) because if it is left with the option number “0“, it will not function as a slicer.
The reason why we cannot set “1” for tile (2) to enable the functionality is that the functionality which the tile (2) is refreshed when tile (1) is clicked will be lost as the the number set to the option for the both tiles are the same.
The tile (3) and (4) have still “0” as default.
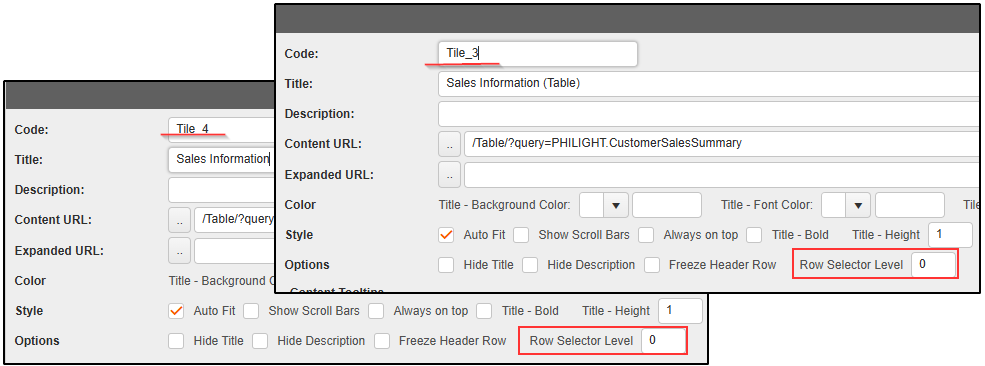
The final scenario is that when one of sales summary rows (3) is clicked, the document number (%DocumentNo) on the selected row is passed to the tiles (4).
Then the tiles (4) is refreshed with the passed document number.
To make this works, the tiles (4) must have the filter on Document Number and its name must be “@DocumentNo” at least, and add “rowSelectFilter=3” to the content URL or set “3” to “Row Selector Level” option for the tile (3) to make it work as a slicer.
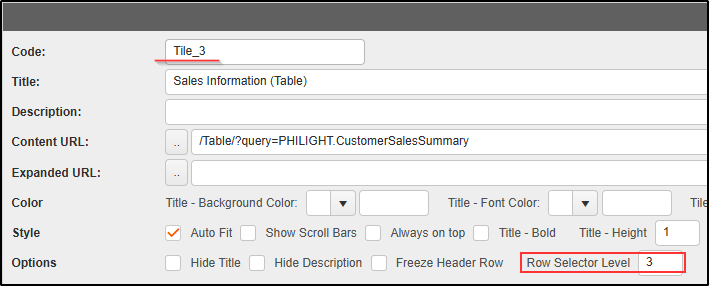
You can read with the table above, you must set “3” for tile (3) because if it is left with the option number “0“, it will not function as a slicer.
The reason why we cannot set “1” or “2” for tile (3) to enable the functionality is that the functionality which the tile (3) is refreshed when tile (1) or tile (2) is clicked will be lost as these numbers are already used in the tile (1) and tile (2).
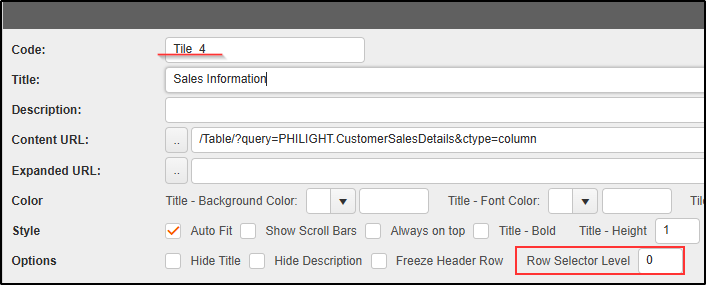
The tile (4) has still “0” as default so it doesn’t work as a slicer.
Afterword
There is another option for creating reports using slicers called the “Filter Panes,” but we hope that the features we’ve introduced here will add new features and flexibility to your report design.