
Resources in a Published Report
Introduction
The Sharperlight published report primarily displays the result of the query in formats such as table, chart, and more. Furthermore, it offers customisable features, including the ability to fully customise it using HTML file.
In this post, I’ll show you how to import a file into a published report as a resource and use it.
Practices
A published report and a HTML file are required.
Query of the Published Report
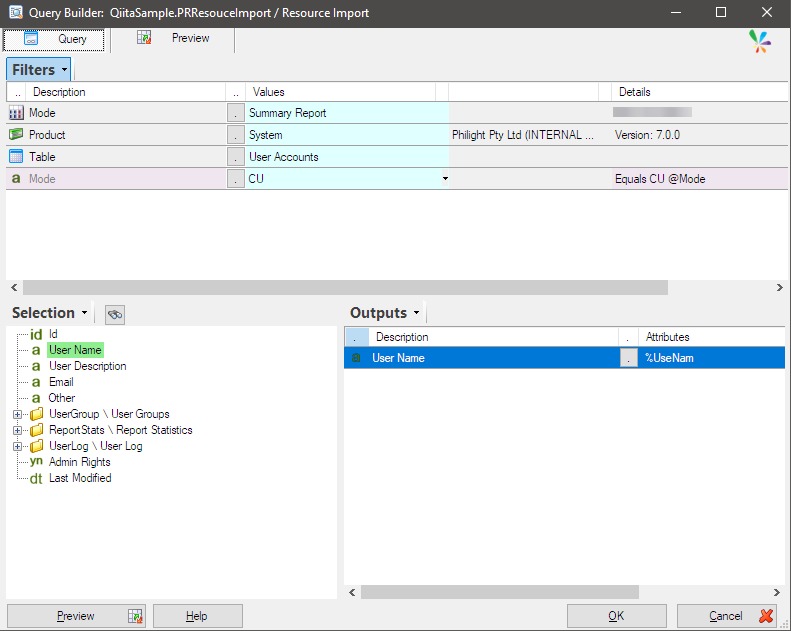
The report will be a fully customized report with an HTML file at this point, so it doesn’t necessarily require a query. However, the query definition is compulsory, so I defined a simple query.
Set the “Mode” filter to hidden because I don’t want it to be displayed when the report is viewed in a web browser.
The query returns just a single row with the name of the currently logged-on user.
Resources
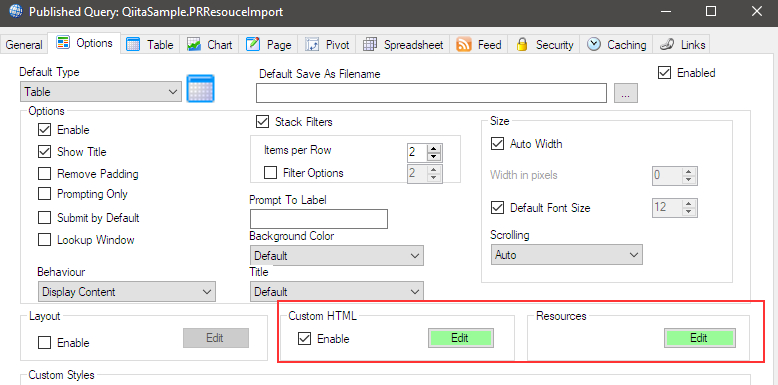
An HTML file will be imported as a resource for the published report and will be used it in the Custom HTML option.
We can write HTML code directly into the Custom HTML option, but for this post, it is used as a resource.
The HTML code is as follows:
<!DOCTYPE html>
<html>
    <head>
        <title>Sharperlight</title>
	<meta charset="utf-8"/>
	<base href="{*Url.Root}"/>
	<link rel="shortcut icon" type="image/x-ico" href="favicon.ico"/>
	<link rel="icon" type="image/x-ico" href="favicon.ico"/>
    </head>
    <body>
	<style type="text/css">
	</style>

        <!-- Display page headings here -->
        <div class="header">
	    <h1>Sharperlight.com</h1>
	    <p>Importing a resource to a published report</p>
            <div id="DateTimeLoaded"></div>
        </div>

	<!-- The script description -->
        <script>
	    const now = new Date();
            const currentDateTime = now.toLocaleString();
	    document.getElementById("DateTimeLoaded").innerHTML = "This page was loaded at " + currentDateTime;
        </script>
    </body>
</html>
Importing the HTML file as a resource
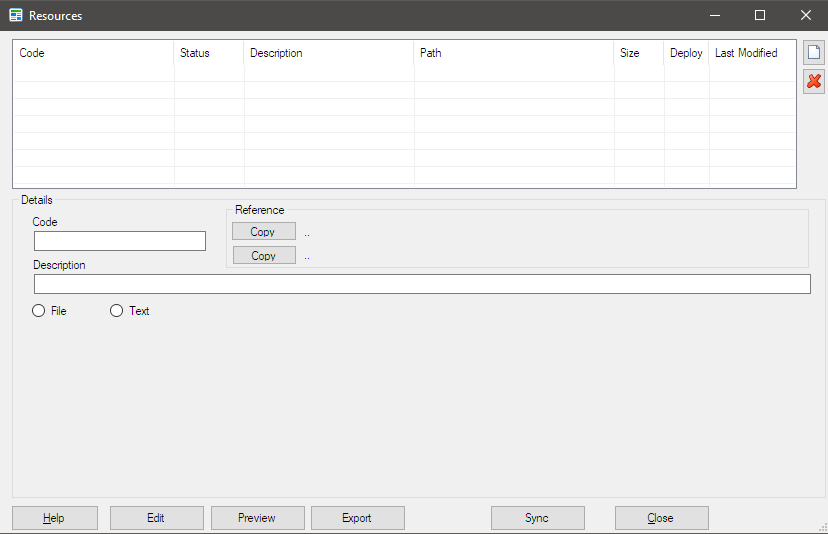
Use Edit button for Resources option to open this dialog.

Click the New icon on the right-hand side to add a new resource. The reference code is also generated at this time.
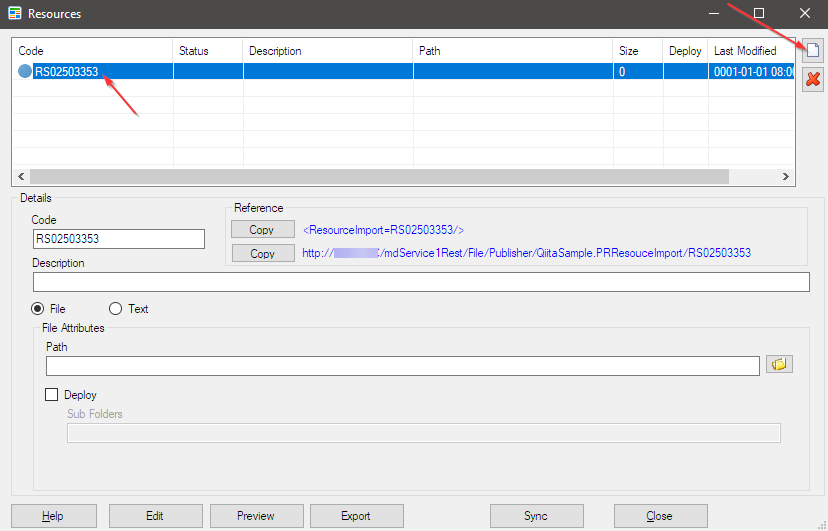
For File Attributes Path, browse the HTML file prepared and select it.
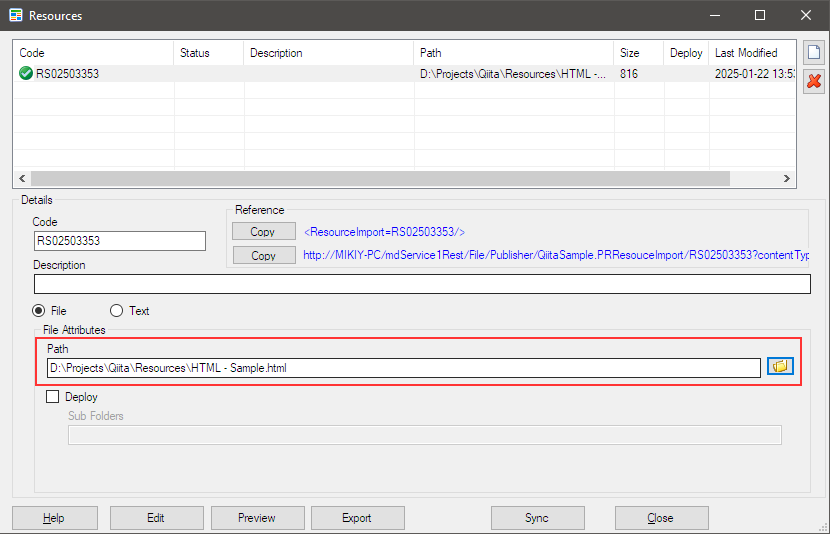
Copy the reference code, and click the Close button to save it.
Defining Custom HTML
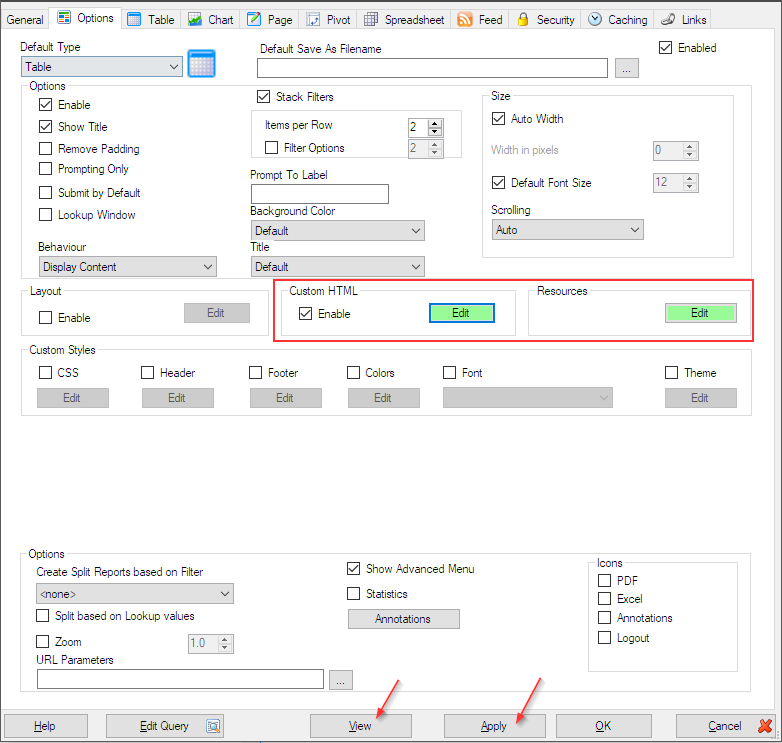
Enable the option and open the editor by clicking the Edit button. Then remove the template in the editor, and paste the reference code you copied into it.

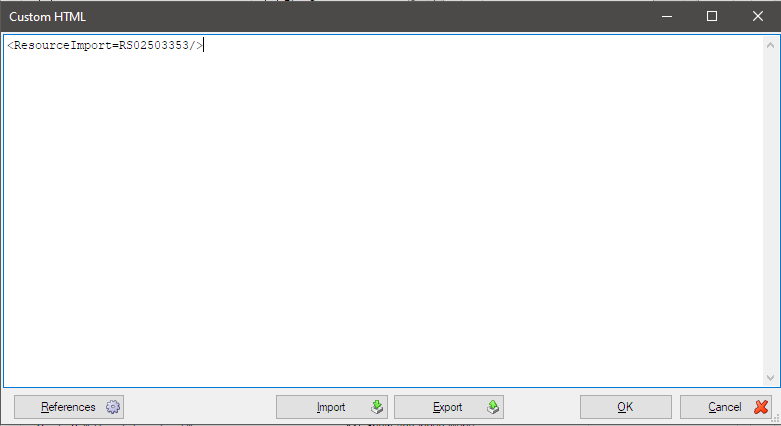
Click the OK button to save it.
Now the HTML file is included in the report and is used in the Custom HTML option. Click the Apply button to save the report.
Next, use the View button to display it in the browser, ensuring that the Sharperlight service is running.
The report is displayed like this: it shows the HTML code itself and does not display the result of the query defined, because the Custom HTML option is being used.
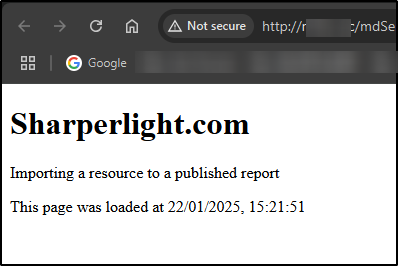
When the HTML file is updated and the file remains in the same folder as it was originally imported, the report can be updated by simply resaving it, without the need to reimport the file.
The Sync button in the Resource dialog also updates the changes.
Afterword
It makes resource management easier and I hope it also helps meet your business needs.