
Custom Fields that extend the Datamodel
Custom Fields allow you to extend the Datamodel with new custom SQL columns that have not been defined in the Master version. If a new version of the Datamodel is installed the Custom Field that have been defined and stored in the SharperLight database will be merged with the new version on start-up.
Custom Fields very useful when new types of derived data is required such as Quantity * Cost or some other criteria that is unique to the Clients environment. By using Custom Fields one can avoid using much Query Builder Output Expressions, also because the Custom Field is based on SQL it will be possible to sort and also filter by the new Field. The description and extended description can be set to help give the user more information about how your new Field works and how it is different some simular looking Fields that may exist.
Once a Custom Field has been defined it will appear wherever the Table it has been defined under appears, even when the Table appears a Sub-Table under another Table.
The basic steps for creating Custom Fields are as follows
1) Ensure you have permissions to Add Custom Joins and Fields in Site Setup
2) Start Query Builder and select the root Table or Find the Target Table under a Folder
3) Select a Field where you would like to anchor the new Field in the Selection List
4) Right Click and Select Customize – Add Field
5) Set the Code, SQL Column, Data Type, SQL Date Type, Lookup and Descriptions in the Property Grid
6) Save
7) Test new Field in Query Builder
8) If the new Field is also required in the Web Channel the Sharperlight Service will need to be restarted before it will be loaded
Check permissions in Site Setup
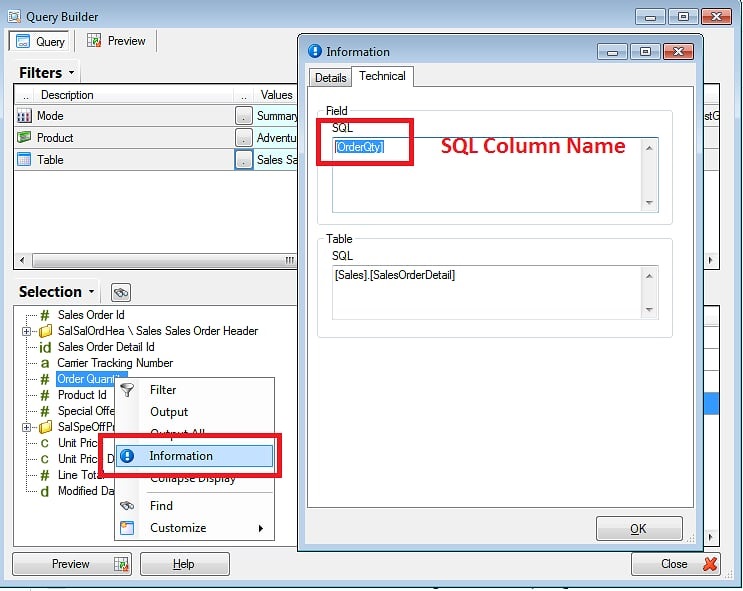
In Query Builder determine the names of the various SQL Columns by using the Right Click Information menu option, then selecting the Technical Tab. This is helpful when you want to combine various SQL Columns using CASE statements or simply doing calculations
In Query Builder Select the location where the Field will be inserted and Right Click select Customize – Add Field

Set the various Property settings for the Field

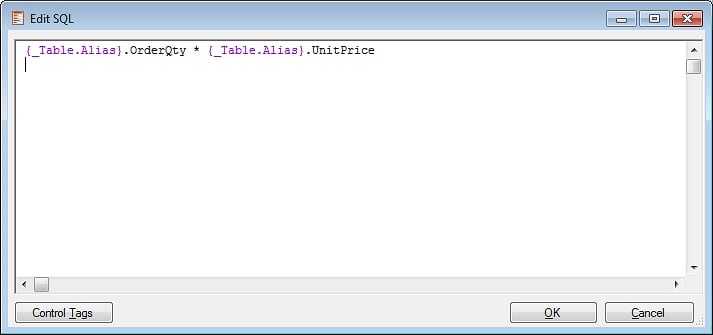
When setting the SQL Column details remember to include the {_Table.Alias} tag that is resolved by the engine at runtime to ensure the column get the correct Table Alias
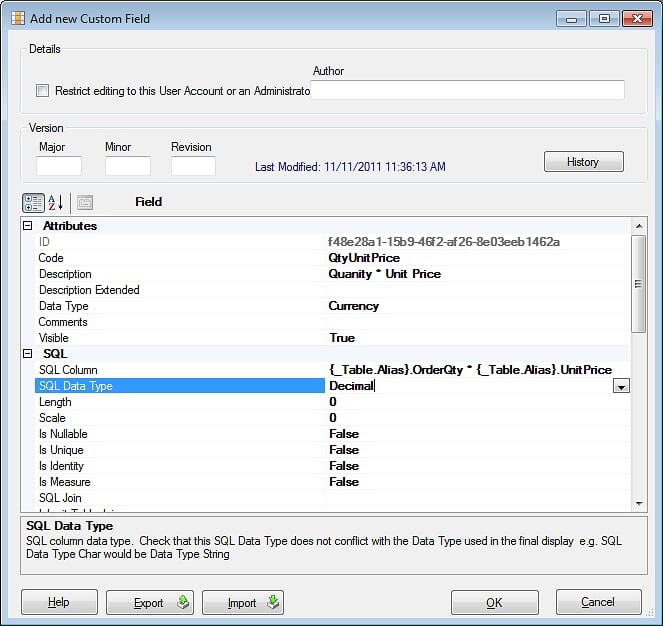
Give the Field a unique code, Description, set the SQL Data Type and Data Type and if required override the default Lookup logic. Click OK to save the Field
The Custom Field appear in Blue Text and can now be used for Testing
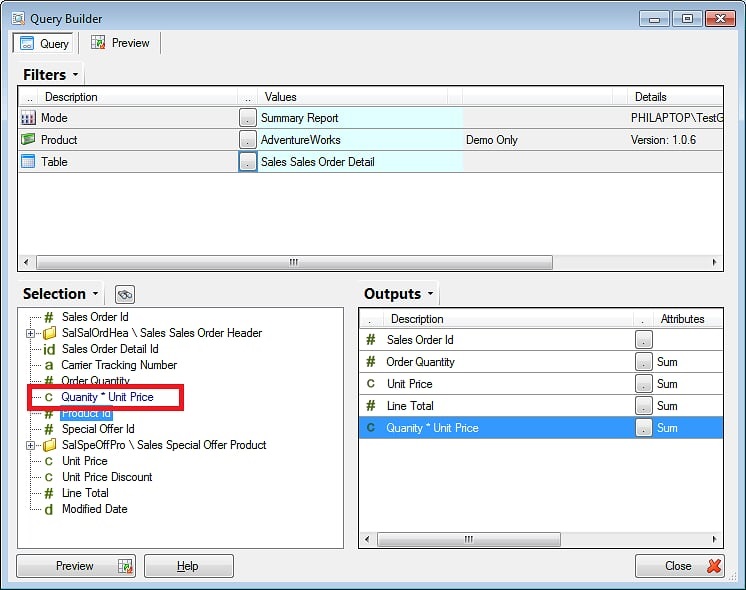
Preview a Test Query and select the Information Icon – Detailed Query Information to view the SQL generated by the engine. If you have used the Custom Fields in the outputs or filters you should see it appear in the SQL statement. If you cannot see the SQL statement please check your permissions in Site Setup
