
Page Designer – Advanced
Introduction
This post demonstrates how to create a business-style document by applying the techniques covered in the previous posts listed below.
- Page Designer – Query and Table
- Page Designer – Header and Footer
- Page Designer – Images
- Page Designer – Table Basic
- Page Designer – Table Group
Practices
We are planning for updating the design created with the post ‘Page Designer – Table Group‘.
Each unique customer and order number combination will include a group header and footer; however, these will only appear on the first page of the group if the records extend over multiple pages.
The page header will include the company logo and relevant company information.
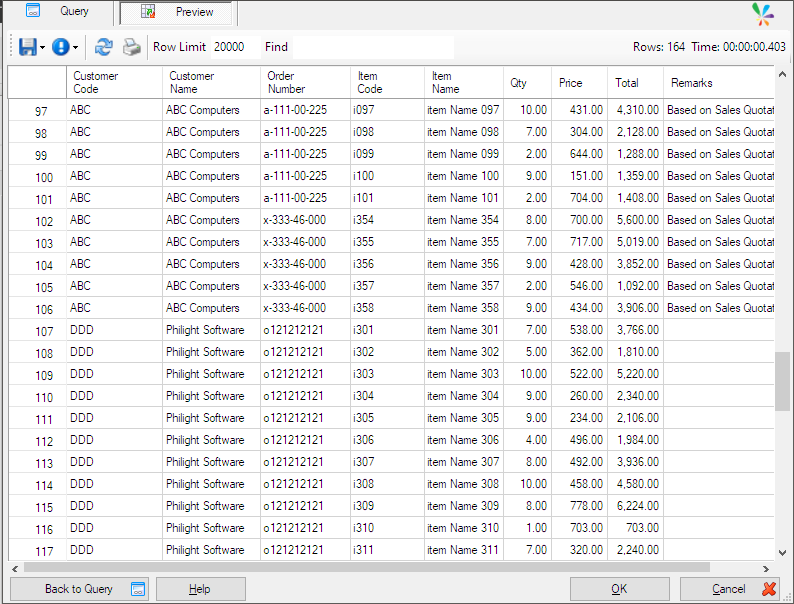
For this post, the dataset from the previous post has been updated.
We’ll use the design created in the post ‘Page Designer – Table Group‘, so let’s start by cloning the published report, leaving the original as a backup.
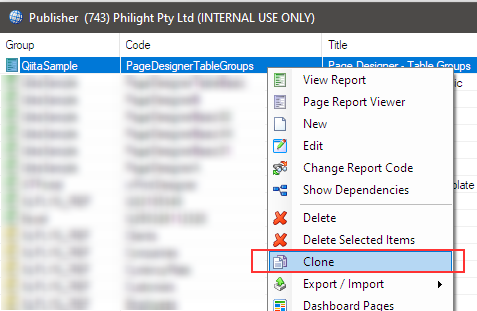
Then, rename the cloned report to ‘PageDesignerAdvanced‘ and begin using it.

Adding a new table group
When you open the page design, you’ll find a table group named ‘Table1_GroupByCustomerCode‘ that serves as a ‘Group By CustomerCode’.
An additional table group will be added to group the data by both CustomerCode and OrderNumber.
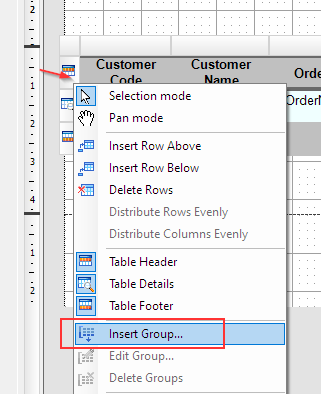
To create a group, select the entire table row, open the right-click menu, and click on ‘Insert Group…‘.
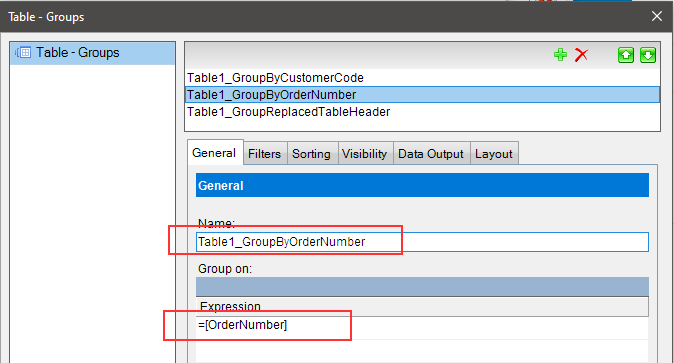
Select ‘[OrderNumber]’ from the ‘Group on:‘ dropdown list, and rename the group to ‘Table1_GroupByOrderNumber‘.
The new table group header and footer are inserted.
The new group header will display customer information, the order number, invoice number, and other related details
The new group footer will display summarized information for each customer and order combination.
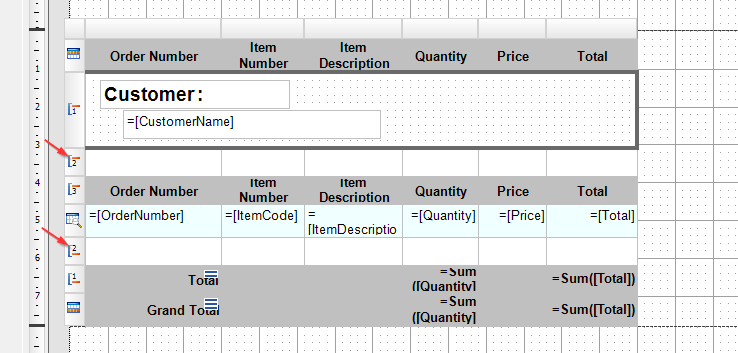
Configuring the Group Header
Merge all cells in the group header and place a container element.
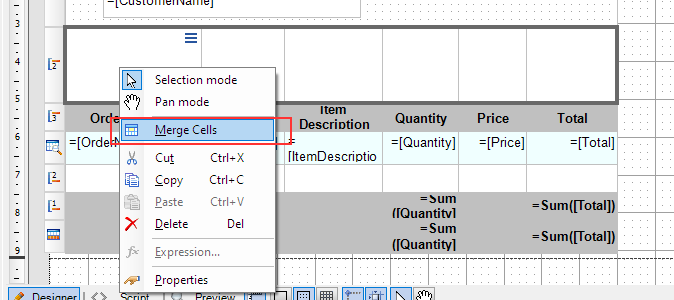
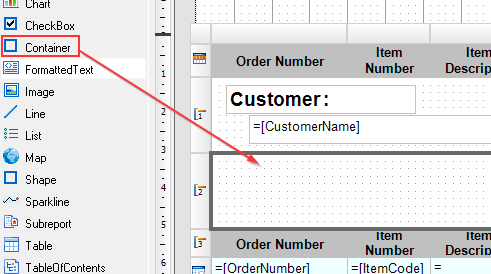
Move textboxes in the ‘Table1_GroupByCustomer‘ header to the new group header.
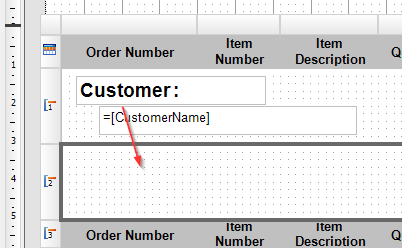
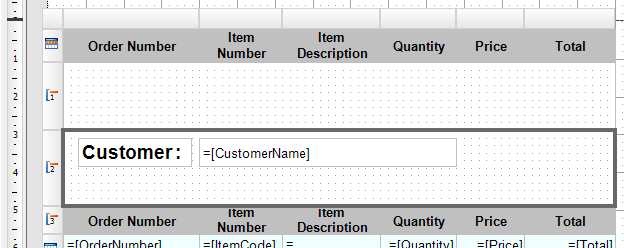
Delete the ‘Table1_GroupByCustomer‘ header.
Insert the necessary elements into the new group header and format it neatly to present customer, order, and invoice details clearly.
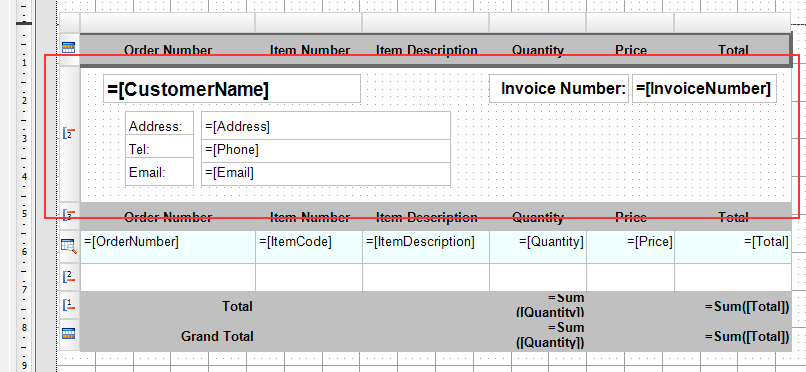
This header will appear at the beginning of each unique customer and order number combination.
Adding another New Group
To ensure the order number appears at the top of every page, add a new table group specifically for this purpose.
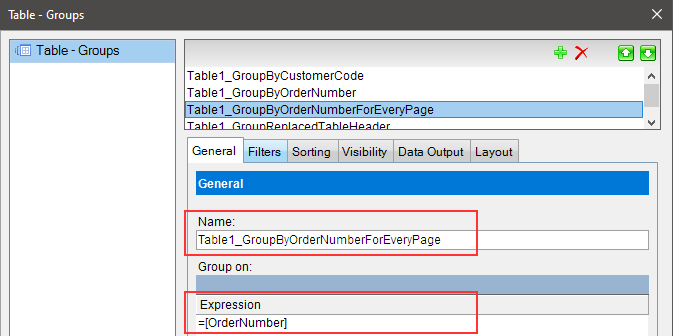
Select all cells in the new group header row, merge them into a single cell, and insert a Container element inside it.
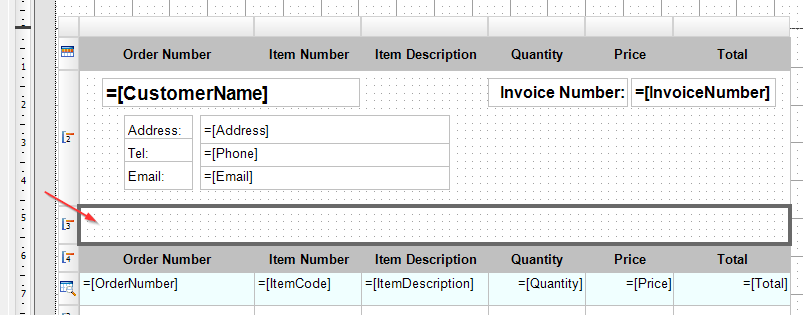
Insert the necessary elements for showing order number into the new group header.
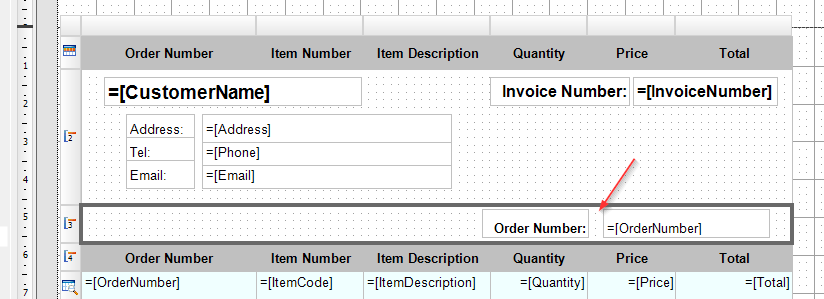
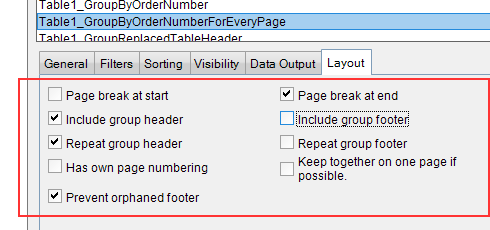
Adjust the layout properties as shown below, making sure the header appears on every page and the footer is removed.
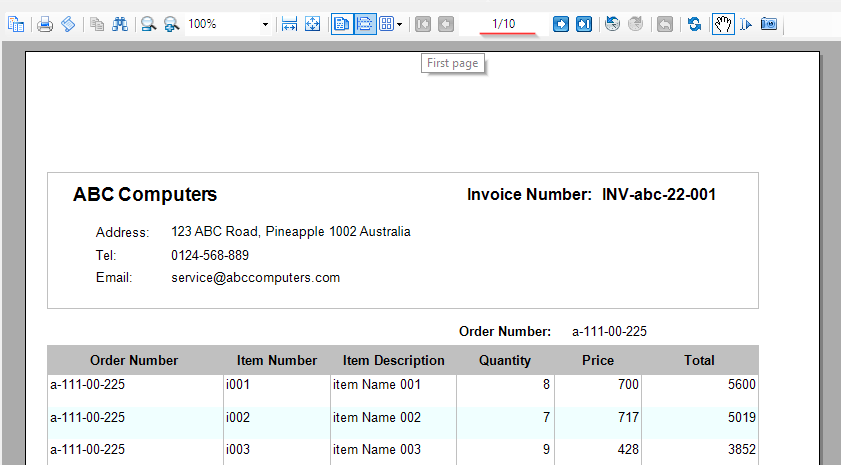
Preview the report to check the results of the configuration up to this point.
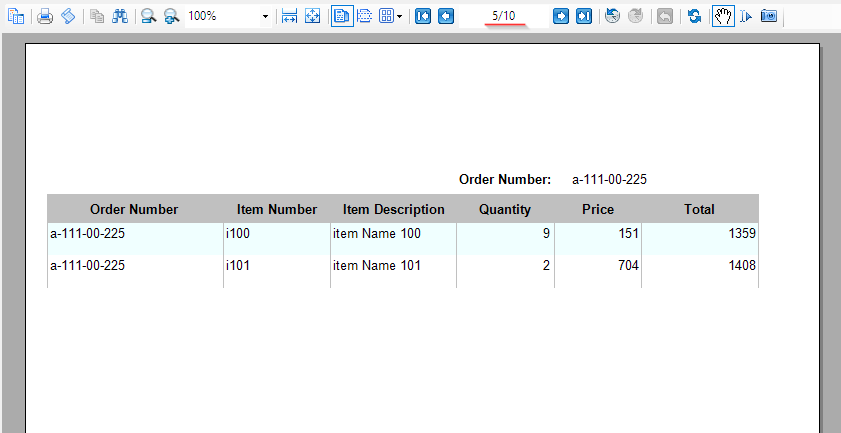
Configuring the End of the Group
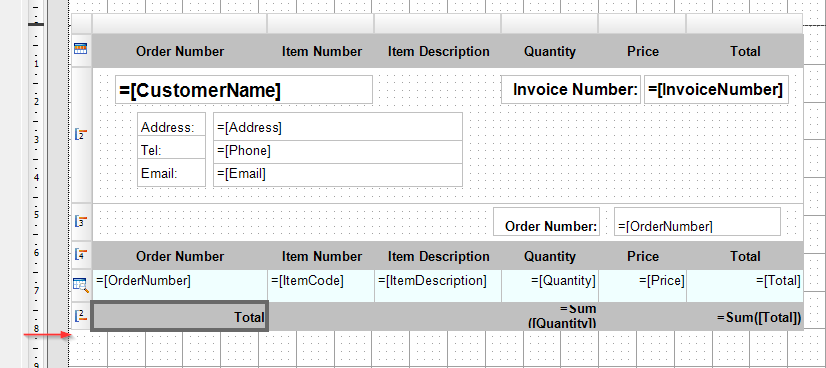
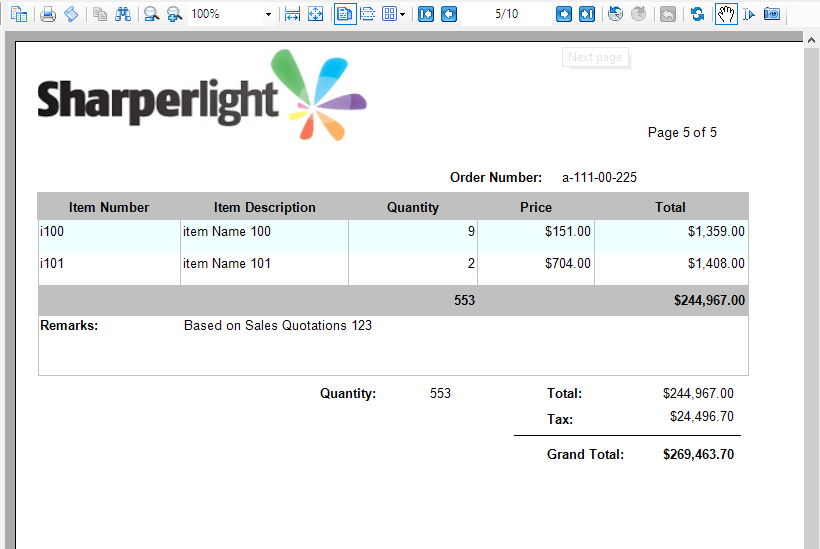
You may notice that the last page shown above is not properly formatted or doesn’t close as expected.
Let’s fix it.
You can utilize the group footer ‘Table1_GroupByOrderNumber’ and configure it according to the settings below.
The footer will be displayed at the conclusion of each unique customer and order number combination.
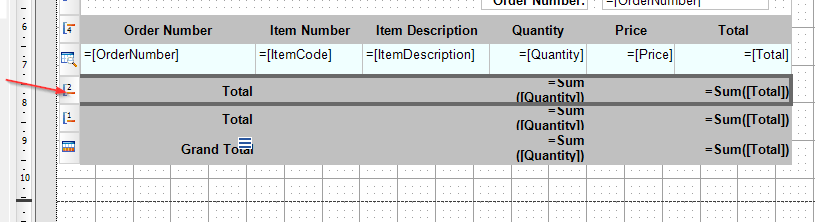
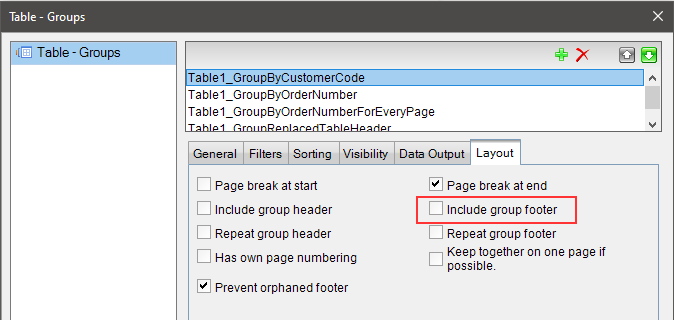
The ‘Table1_GroupByCustomerCode‘ group footer appears below the ‘Table1_GroupByOrderNumber‘ footer for each customer, but since it is no longer required, hide it.
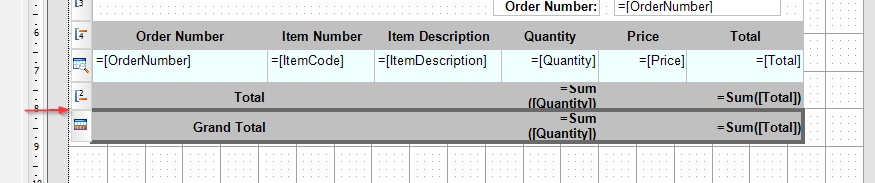
Since the table footer is no longer required, it should be removed.
Configuring Multiple Group Footers
Now, let’s apply the final styling to dress up the conclusion of each customer and order number group.
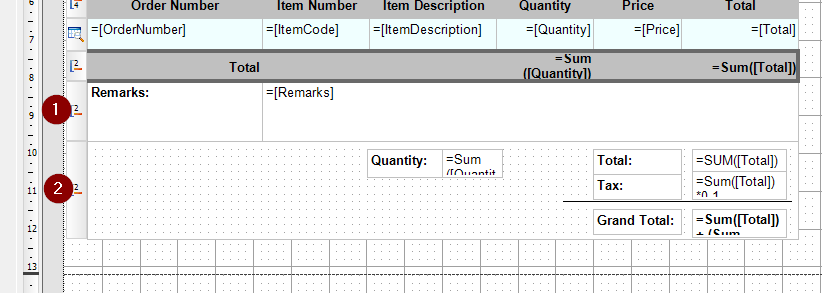
Add two more group footers to the ‘Table1_GroupByOrderNumber‘ group footer, ensuring they are identical in structure and formatting.
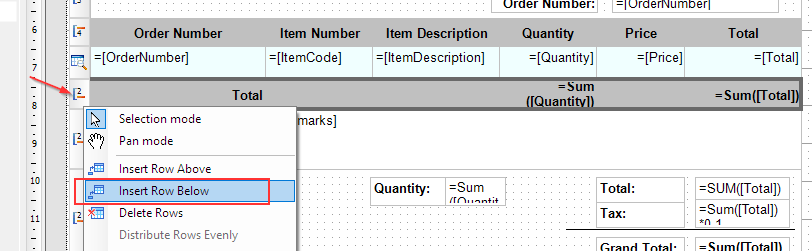
Select the existing ‘Table1_GroupByOrderNumber‘ group footer, then use ‘Insert Row Below‘ from the context menu. Repeat the step twice to create two identical footers.
Configure the first additional footer to display ‘Remarks‘.
For the second additional footer, set it up to show the grand total information.
These formulas displayed in the second footer are show beow.
- Total: ‘=Sum([Total])’
- Tax: ‘=Sum([Total]) * 0.1’
- Grand Total: ‘= Sum([Total]) + ( Sum([Total]) * 0.1 )’
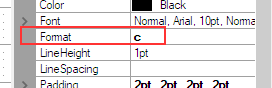
Ensure that the format for all currency fields is set to ‘Currency’ for proper display.
Setting up the Page Header
Insert the company logo and page number details into the page header to enhance the document’s professionalism.
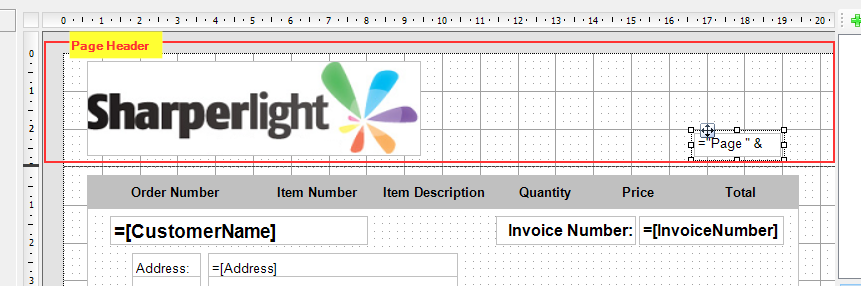
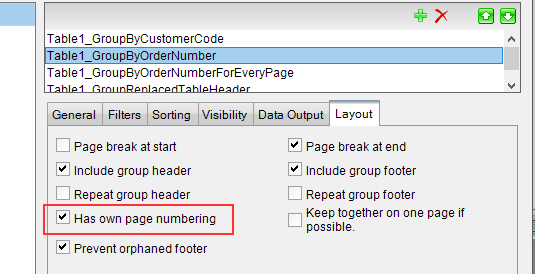
Access the settings for the table group ‘Table1_GroupByOrderNumber‘ and check the ‘Has own page numbering‘ option to activate separate page numbering for each group.
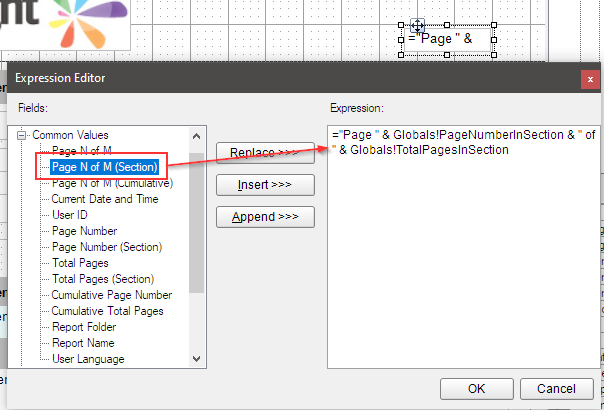
Then, insert a TextBox into the page header and configure its expression to display ‘Page N of M (Section)’ for section-based page numbering.
Finally, remove the Order Number column from the table since it’s no longer required.
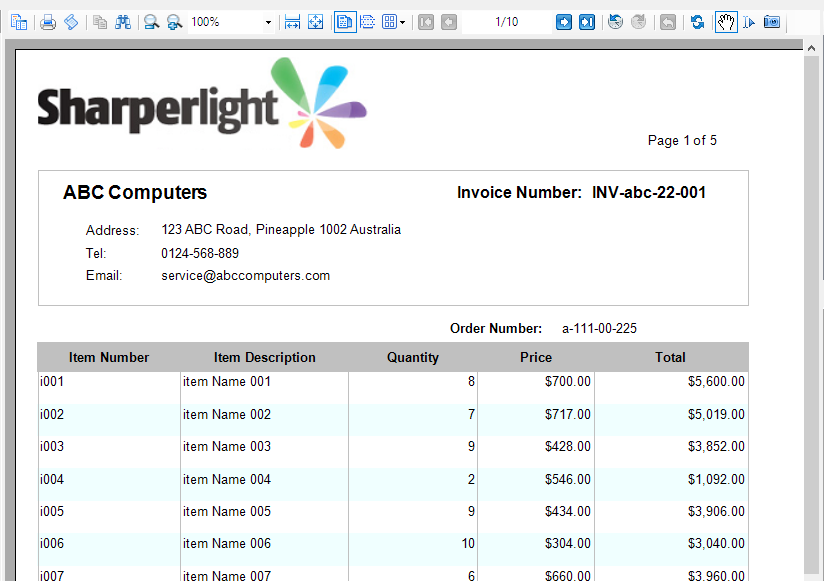
Now it’s completed so let’s preview it.
Afterword
Although this has been a long article, we hope it has provided valuable insights and inspiration for designing your business documents.
There are various approaches to designing documents like this, and we encourage you to explore and identify the most effective solution for your specific requirements.
Download the published report with the page design.