
Branding & Styling – Menu for the Published Reports
Introduction
This post is a spin-off of “Branding with Custom Headers, Styling and Images”, focusing specifically on how to customize the header of the Report Menu page.
Practices
Report Menu
Let’s create a report menu. Please refer to the post “Menu for the Published Reports“.
Following the instructions in the post ‘Menu for the Published Reports’ usually results in many reports being nested under the ‘Reports’ group. To keep this example clear, we have reduced the selection to just two reports.
Now that the report menu is set up, we’ll show you how to customize its header.
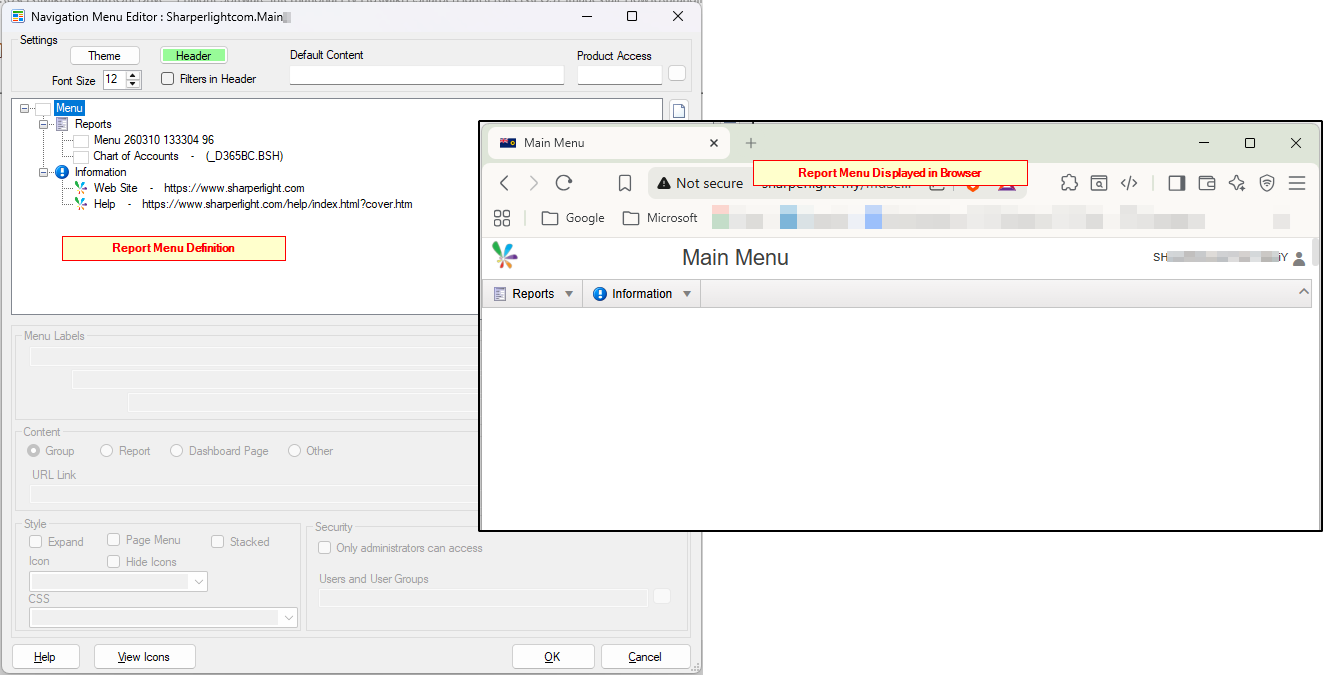
Custom Styles – Header (Default Template)
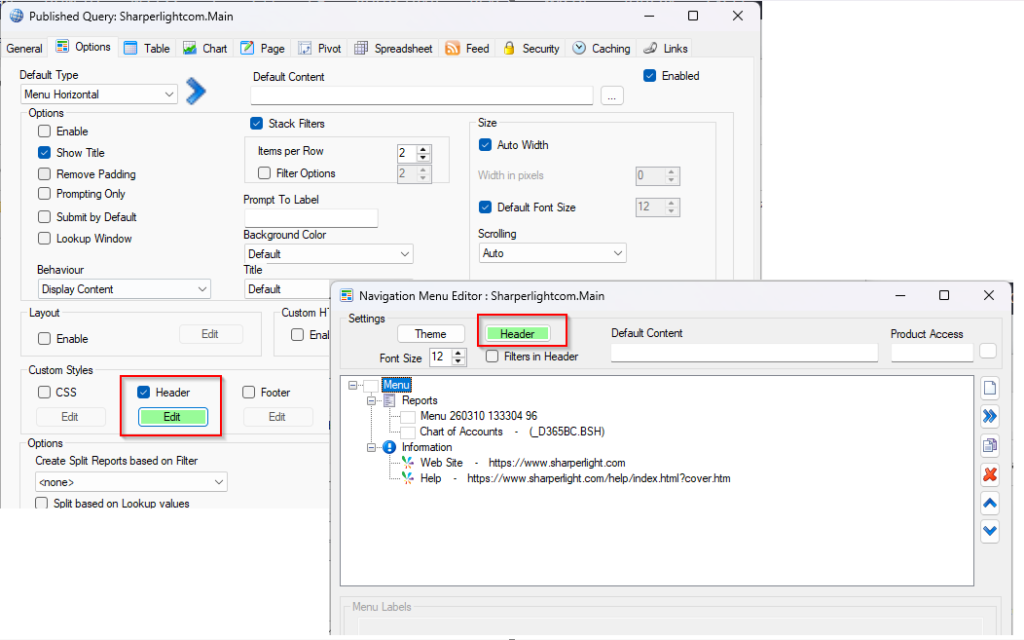
The header style is defined in the Header property of the Report Menu published report, which can be accessed from the two locations shown below.
The header of the default Report Menu is styled using an HTML and CSS template.
<div id="slBanner" style="padding:0 0 0 5px;margin:0;margin-bottom:0px;margin-top:0px;background-color:#FFFFFF;color:#404040;">
<table style='margin: 0;padding: 0; width:100%'>
<tr>
<td style='margin: 0; padding: 0; width: 190px;'>
<!--Change the href url address to point to your company web page-->
<a id="slLogoLink" href="#" onclick="window.open(window.location.href, '_blank'); return false;" style="border-style: none">
<!--Change the src url address containing your company logo-->
<img id="logo" src='{*Url.Root}/Image/?icode=SharperLight_big' title="{*Dictionary.Code.Version} {*Application.Version}" height='32' width='32' style="border-style: none; cursor: copy;" />
</a>
</td>
<td id="slBannerTitle" style='font-size: 1.80em; font-weight: normal; vertical-align: middle;'>
{*Publisher.Menu.Title}
</td>
<td style='font-size:1.35em;padding-top:6px;font-weight: Normal;vertical-align:middle;'>
</td>
<td id="slbannerSignOn" style='font-size:11px;font-weight: Normal;padding:0;margin:0;margin-top:0px;vertical-align:middle;text-align:right;'>
{*User}
<a href="{*Url.Root}UserLogoff/?redirectSimple={*Url.Root}/UserLogon/?redirectSimple={*Url.Current.Report}" style='color:inherit;' target="_parent">
<div id='slSignOutIcon' title="{*Dictionary.Code.UserSignOut}" class='k-icon k-i-user' style='margin-top:2px;margin-right:3px;'></div>
</a>
</td>
<tr>
</table>
</div>Customized Header
We are going to achieve the following by customizing the template.
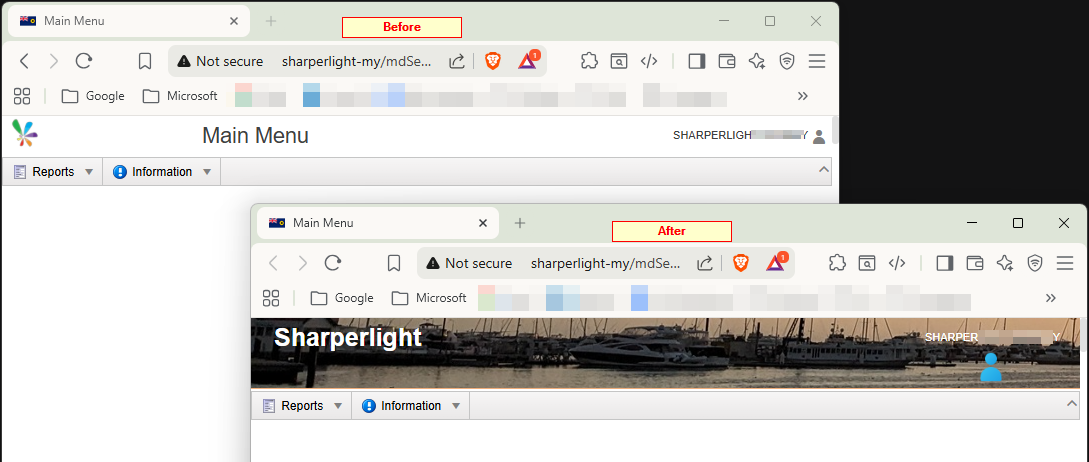
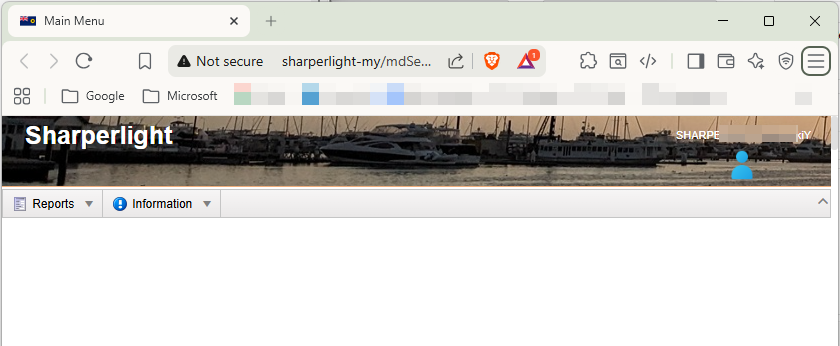
Once customized, the menu features a background image and a new user icon
The image file and the icon file can be placed in “C:\ProgramData\Sharperlight\MetaData\Custom\“.
- ReportMenu_Banner.jpg
- ReportMenu_UserLogonIcon.png
ReportMenu_Banner.jpg is an image file and it is used as the background image.

ReportMenu_UserLogonIcon.png is an image represent the user icon at the top-right hand corner.

The HTML and CSS for the header after customized is like this.
<div id="slBanner" style="height: 71px;padding:0 0 0 0;margin:0;margin-bottom:0px;margin-top:0px;background-color:#EFAE7C;color:#404040;">
	<div id="slBannerBody">
		<!--Change the href url address to point to your company web page-->
    		<a id="slLogoLink" href="#" onclick="window.open(window.location.href, '_blank'); return false;" style="border-style: none">
        		<!--Change the src url address containing your company logo-->
        		<img id="slBannerBodyImage" src='File/Custom/ReportMenu_Banner.jpg' title="{*Dictionary.Code.Version} {*Application.Version}"/>
    		</a>
	</div>
	<div id="slBannerTitle">{*Publisher.Report.Title}</div>
	<table id="slBannerSignOut">
		<tr><td>{*User}</td></tr>
        	<tr><td>
			<a href="{*Url.Root}UserLogoff/?redirectSimple={*Url.Root}/UserLogon/?redirectSimple={*Url.Current.Report}" style='color:inherit;' target="_parent">
            			<div id="slBannerSignOutUserIconContainer" title="{*Dictionary.Code.UserSignOut}">
					<img id="slBannerSignOutUserIcon" src='File/Custom/ReportMenu_UserLogonIcon.png' />
				</div>
        		</a>
		</td></tr>
	</div>
</div>

<style>
#slBannerBody{
	margin: 0;
	padding: 0;
	width:100%;
}
#slBannerBodyImage{
	height='70px';
	width='2000px';
	border-style: none;
	cursor: grab;
}
#slBannerTitle{
	position: absolute;
    	left: 23px;
    	top: 5px;
    	color: white;
    	font-size: 25px;
	font-weight: bold;
	font-family: inherit;
}
#slBannerSignOut{
	position: absolute;
    	right: 17px;
    	top: 10px;
    	font-size: 11px;
    	font-weight: Normal;
    	padding: 0;
    	margin: 0;
    	margin-top: 0px;
    	vertical-align: middle;
    	text-align: center;
	color: white;
}
#slBannerSignOutUserIconContainer{
	margin-top:2px;
	margin-right:3px;
}
#slBannerSignOutUserIcon{
	width: 36px;
	height: 36px;
}
</style>
As you can see, the HTML <style> tag is used to specify the position, size, color, etc. of an HTML element.
Also, instead of defining these styles in the Header property, you can also define them in the CSS property in the report menu.
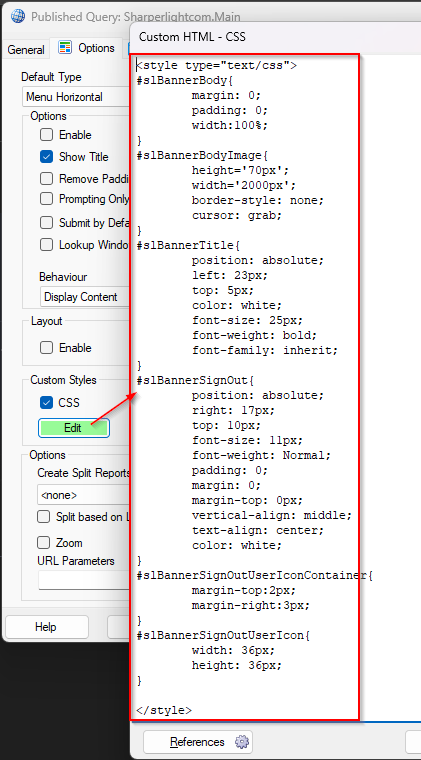
Then we got this finally.
Afterword
We hope this article helps you style your report pack.
Other References: