
Querying JSON
Sharperlight contains a feature which allows users to query JSON files via a URL link. The file can either be stored locally or sourced through the web. Users will then be able to sort through the data, set different starting positions, expand headers and pull out the data that they require.
Please see below for a quick guide on how to get started.
- In query builder, set the Product to System and the table to Web Page Table, CSV, JSON, XML or Odata. For the purpose of this article, we will be focusing on JSON, however, most of the instructions are applicable to the other content types. For more information on querying Web Page Tables, please click here.

- Enter the URL link for the JSON file (or Web Page Table, CSV, XML, Odata). Set the Content Type filter to the file type.

- Depending on the source (i.e. URL link), users might need to add a username and password or set an Authentication Type (i.e. basic authentication, Azure AD, Microsoft Graph, etc.). For more information on setting up Azure AD authentication, please click here. This might be necessary if the data source is on the internet versus a local file system. If the file source has specific extra authentication requirements (e.g. secret key needs to be in the header), there are fields under the Authorization folder in the Selection area that can be brought up to the filter area and filled in, which will enable the specific authentication requirements.
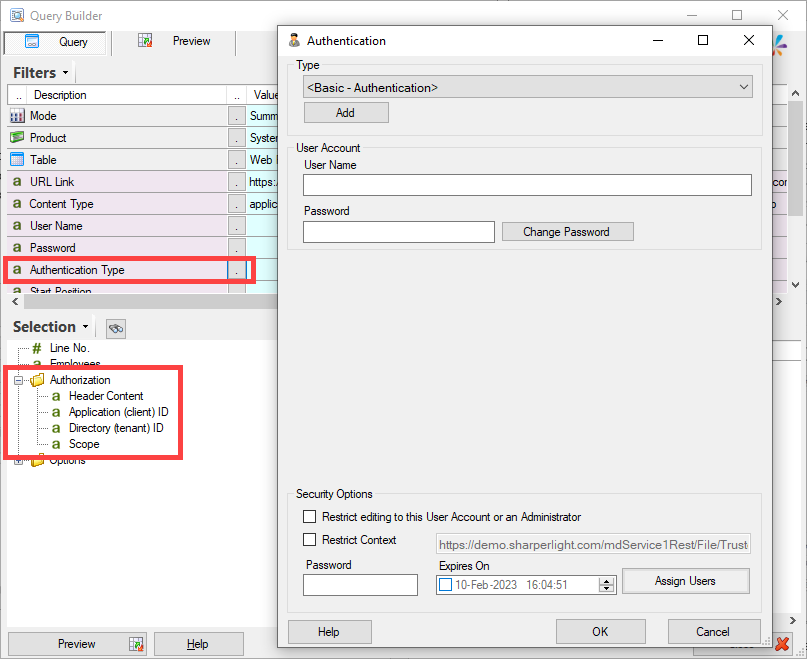
- Once the above details have been added, the Selection area should populate with the header fields.

- However, only one field was retrieved from the JSON file (i.e. “Employees”). This is because in the JSON file, the outermost (highest layer) header is “Employees”.

- If we were to output the “Employees” field and preview the query at the moment, all the data would be contained within one field.
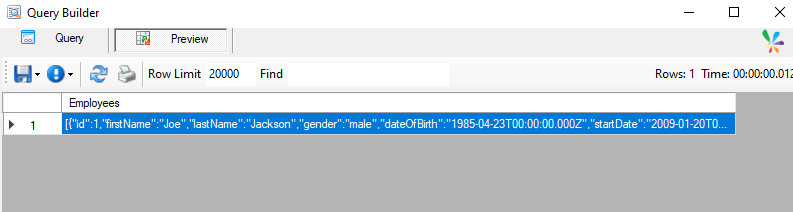
- This is not very readable. We would like to retrieve the data within the “Employees” header and have those sub headers displayed as different columns. To do so, drag the “Employees” field into the Start Position filter. The Selection area will refresh and display all the sub headers within “Employees”.
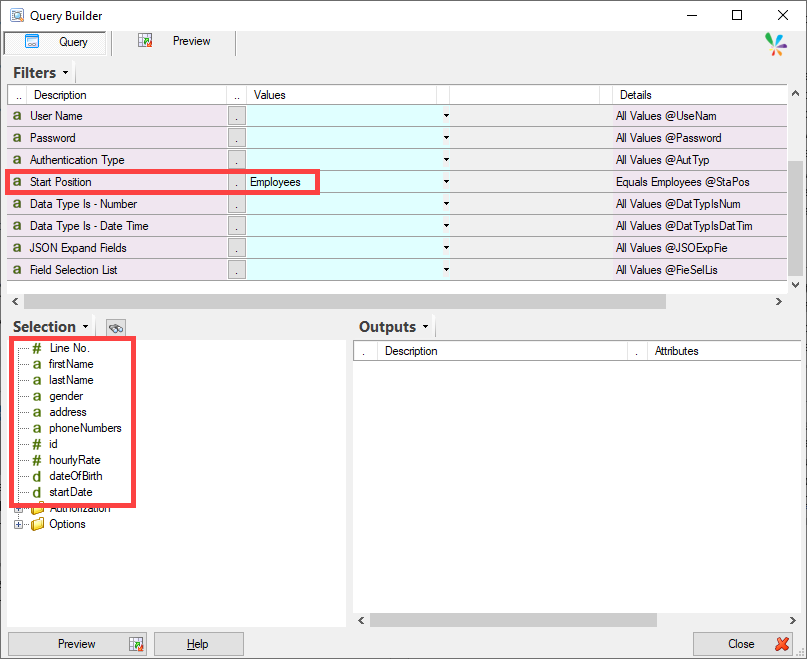
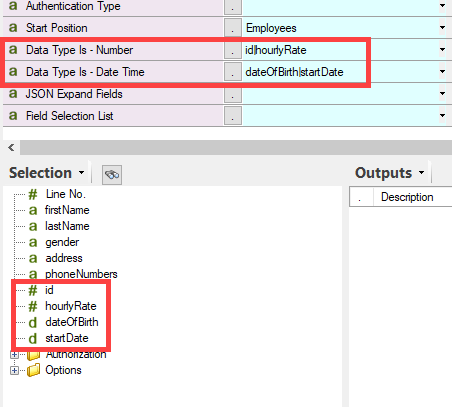
- Notice that the fields in the Selection area are automatically set to different data types (i.e. Number, text and date), Sharperlight will automatically analyse the data and set the data type, however, users are able to change the type via the Data Type Is filters. Simply drag the filter from the Selection area into the filter and the type will be changed. Each field should be separated by a “|” (should happen automatically).
- Now lets output all the fields and preview. Immediately, we can see a vast improvement from the previous preview with just the “Employees” field. However, the “address” and “phoneNumbers” fields are still very conjested.

- Ideally, we would want each of the sub headers within those fields to be separated out and displayed in their own columns. We want to expand the address and phoneNumber fields, pull out their sub-headers and the data within them. Drag the address and phoneNumber fields from the Selection area into the JSON expand fields filter. This will populate the Selection area with the additional sub-header fields.
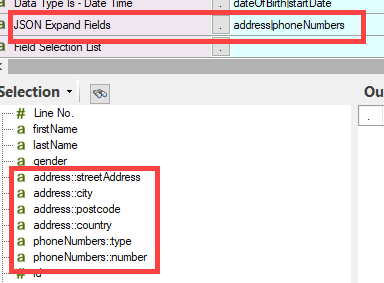

- When previewing the query, the address looks good, each section is correctly extracted and displayed. However, the phoneNumbers are incorrect. In the previous preview and the JSON snippet, we can see that there are 3 types of phone numbers (i.e. home, mobile and office), but at the moment, this preview is only showing one.
- This is because the phoneNumbers header/field is slightly more complex than address, which is solely comprised of subheadings. If we look at both the previous preview and the JSON snippet, we can see a difference between the address and phoneNumbers fields’ formatting. The phoneNumbers field makes use of “[ ]” brackets, which indicates that it actually contains an array (list) of items/objects. Each of these objects contain the sub headers: type and number.
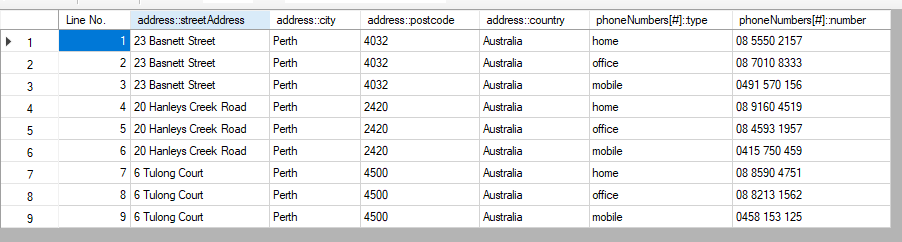
- In the JSON Expand Fields filter, add a “[#]” to the end of phoneNumbers.

- Now when we preview the query, we will have a different line for each of the objects in phoneNumbers and all the data will be presented.
- To prevent the query from throwing an error or breaking if the JSON source file ever gets updated, it is important we use the Field Selection List filter. This is essential, because the fields that are currently available in the Selection area are generated because the data exists in the JSON file, however, if changes were ever made to that file and the data for the field is no longer available, the current query would have a few issues. For example, if the JSON file was updated to remove the date of birth header, the current query which still has date of birth outputted will not know that the header has been removed and will just assume that the next available header is actually the date of birth, as the system works by indexing (the order of the headers).
- To prevent this issue and the potential breaking of the query, right click the Selection Area and select Configuration Snapshot, this essentially locks in the current outline of the JSON file. Whenever the query is run in the future, no matter if the JSON file’s contents has been edited and headers have been temporarily/permanently removed, those fields will always be in the Selection area and it’s value will be “null” if it is no longer available in the JSON file.

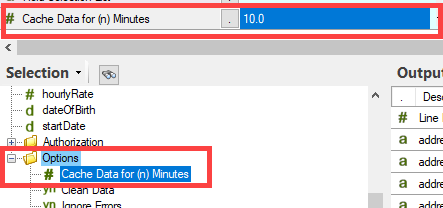
- Constantly querying a URL can be time consuming and sometimes unnecessary, especially if the data rarely changes. Hence, the optional use of the Cache Data for (n) Minutes field. Drag the field up to the filters area and set a time frame.
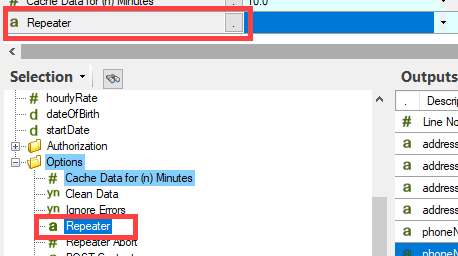
- The repeater field is a very useful tool. Not so much for querying JSON payloads, but for other content types, such as a web page table. It is perfect for situations where the query needs to be iterated over a set of values. For example, the query might need to be repeated for each client ID, as the web page table might be filtered based on that field. Drag the Repeater field to the filter section and create a subquery.

- In the subquery, output the list of values to be iterated over (e.g. client IDs). This might require another URL query.
- The URL then needs to be edited to contain the Repeater filter (i.e. https…/ClientID?={@Repeater}). Once that is set, the query will then automatically loop through the outputted values from the sub query.
