
Save as JSON and extend the JSON format
Introduction
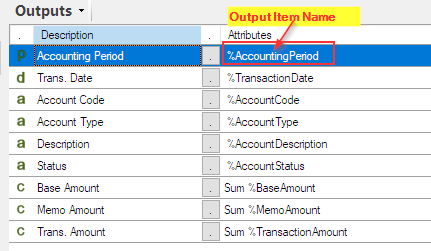
You can create datasets using the query builder and save them in various formats such as CSV, XML, and JSON. In this post, we will focus on saving in JSON format. Since datasets created with the query builder are flat tables, field records are typically saved as JSON arrays, and the field names will use the output names specified in the query. If sub-classes or sub-arrays are needed in the JSON object, you can assist with JSON rendering functionality by extending the output item name attributes.
Practices
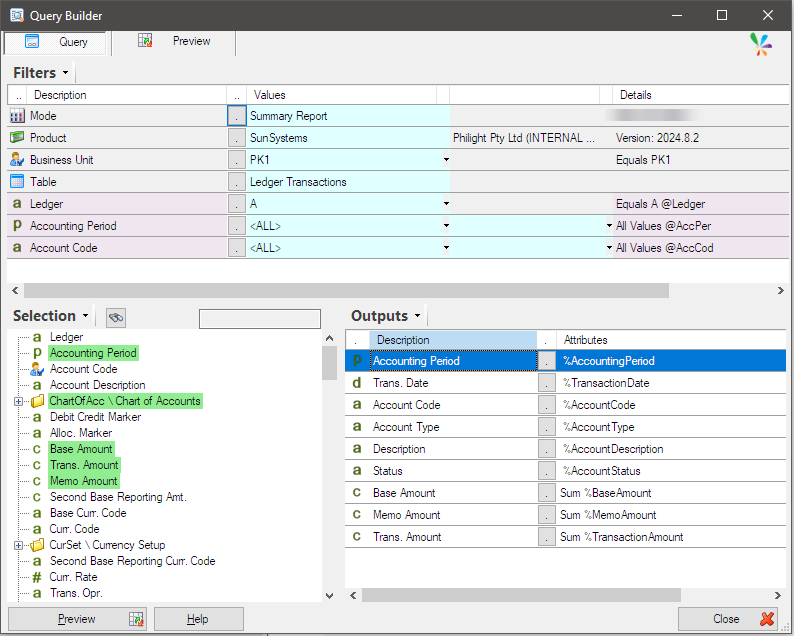
Here, we will look at several patterns for creating queries using SunSystems in the product (data model) to extract datasets and save them as JSON. We will use a query like the image shown below.
Save as JSON – Normal
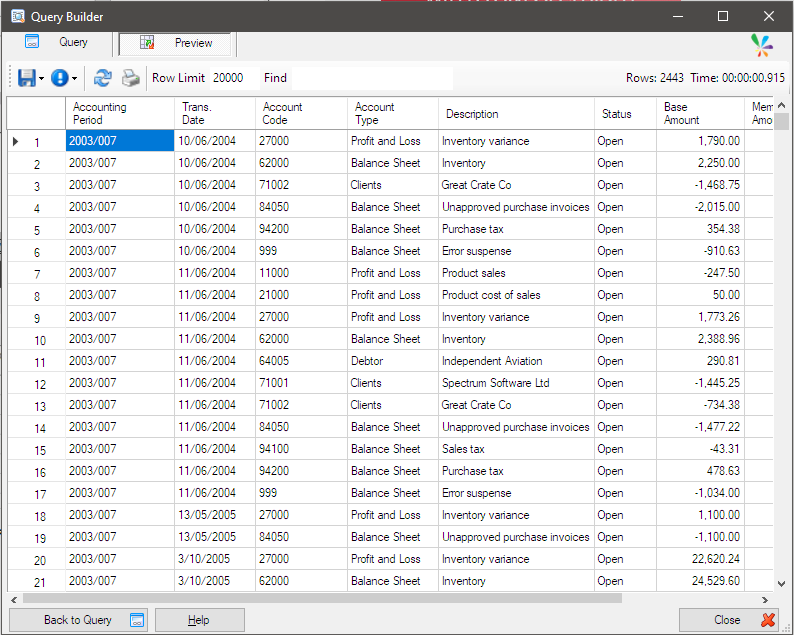
We will preview the above query. The following results will be returned.
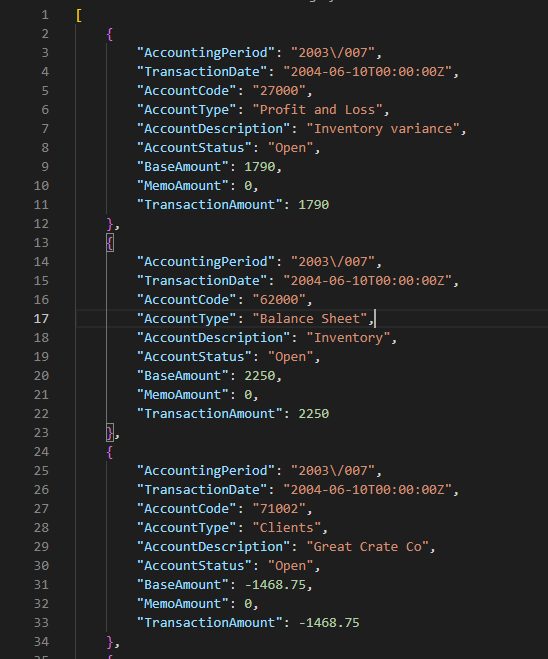
Save this as JSON. Select ‘Save as JSON’ from the right-click menu on the grid.
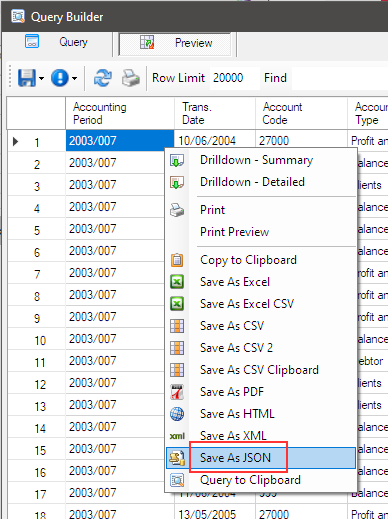
It will be output as a simple JSON format without sub-classes or sub-arrays, as shown.
Save as JSON – Including Sub-classes
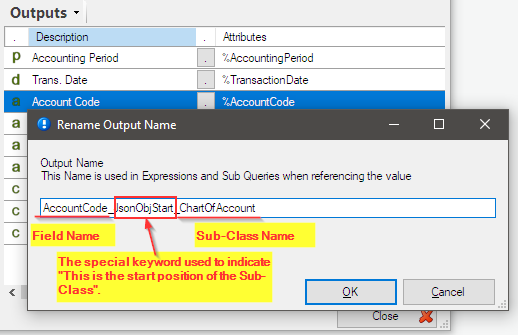
Now, let’s configure sub-classes. The output items of the query, such as Account Code, Account Type, Description and Status are fields from the joined table ‘Chart of Account,’ so we will use these. We will use the output name extension attribute as shown:
{Field Name}_JsonObjStart_{Sub-Class Name}
{Field Name}_JsonObjMiddle
{Field Name}_JsonObjEnd
Use the ‘Change Name‘ option from the right-click menu in the output area to extend these output names.
They will look like this:
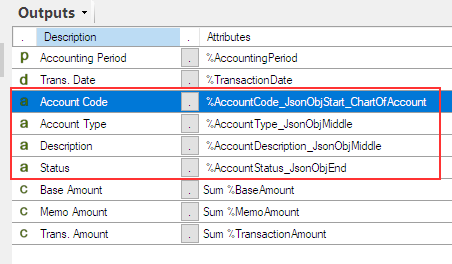
The Sub-Class Name ‘ChartOfAccount’ is only specified to the start position.
AccountCode_JsonObjStart_ChartOfAccount
AccountType_JsonObjMiddle
AccountDescription_JsonObjMiddle
AccountStatus_JsonObjEnd
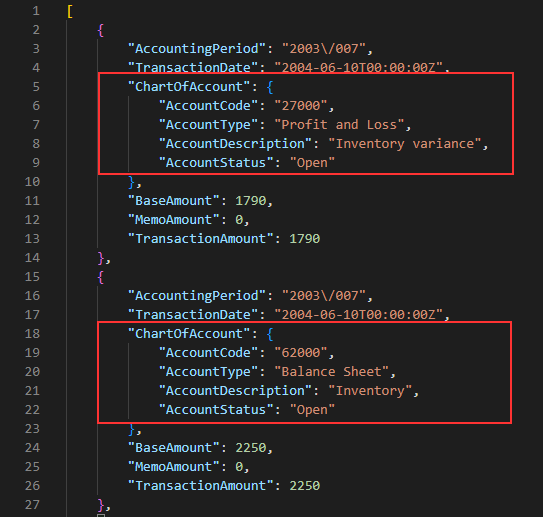
Now, let’s preview it and save it as JSON. You can see that the sub-class has been created.
Save as JSON – Including Sub-array
Let’s create a sub-array. We will output the three amount fields, Base Amount, Memo Amount, and Transaction Amount as an array. We will use the output name extension attribute as shown:
{Sub-Array Name}_JsonArrayStart
{Sub-Array Name}_JsonArrayMiddle
{Sub-Array Name}_JsonArrayEnd
Just like with sub-classes, we will extend the output names.
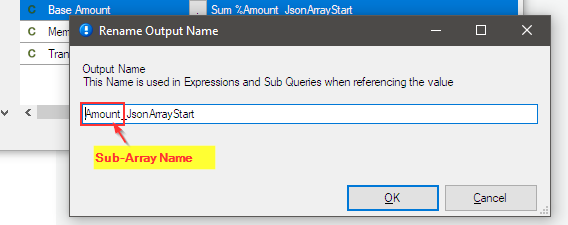
They will look like this:
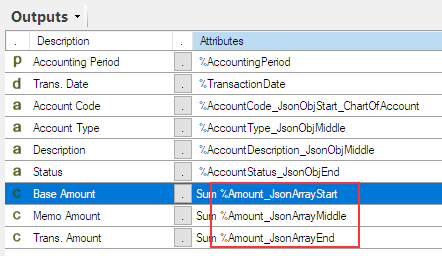
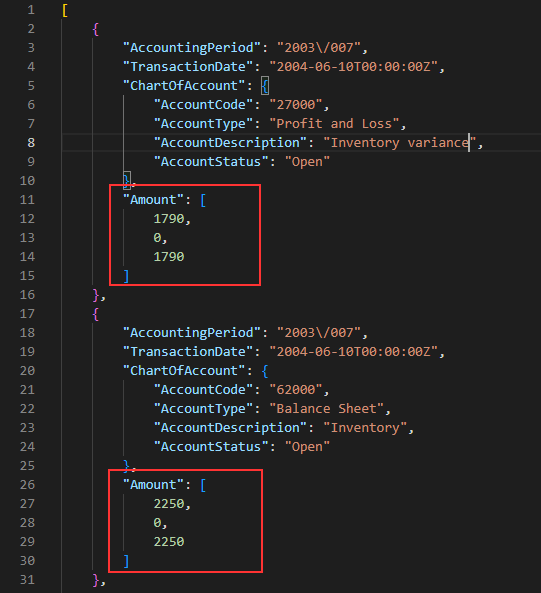
Now, let’s preview it and save it as JSON. You can see that the sub-array has been created.
Save as JSON – Adding Fields
Finally, let’s look at how to add a column to the JSON record by writing an expression. The output name of the extension must be as shown.
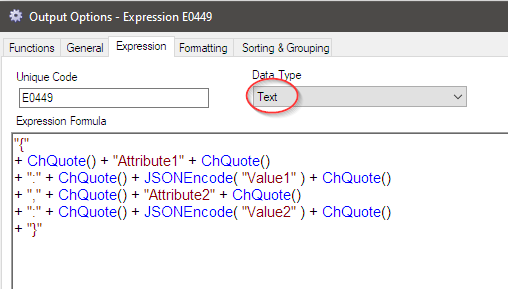
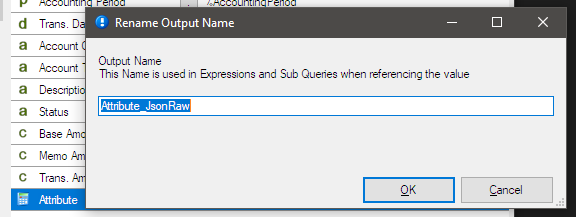
{Field Name}_JsonRawFrom the right-click menu in the output pane, select ‘Add Expression,’ and then write the code as shown.
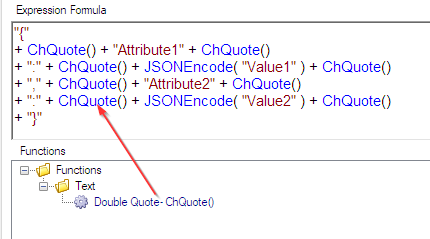
"{"
+ ChQuote() + "Attribute1" + ChQuote()
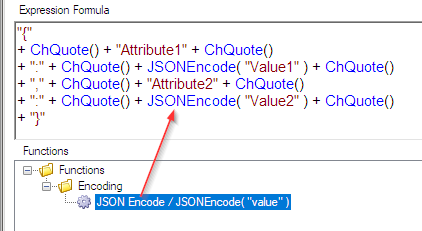
+ ":" + ChQuote() + JSONEncode( "Value1" ) + ChQuote()
+ "," + ChQuote() + "Attribute2" + ChQuote()
+ ":" + ChQuote() + JSONEncode( "Value2" ) + ChQuote()
+ "}"
ChQuote( ) and JSONEncode ( )
Change the output name of the expression as shown below:
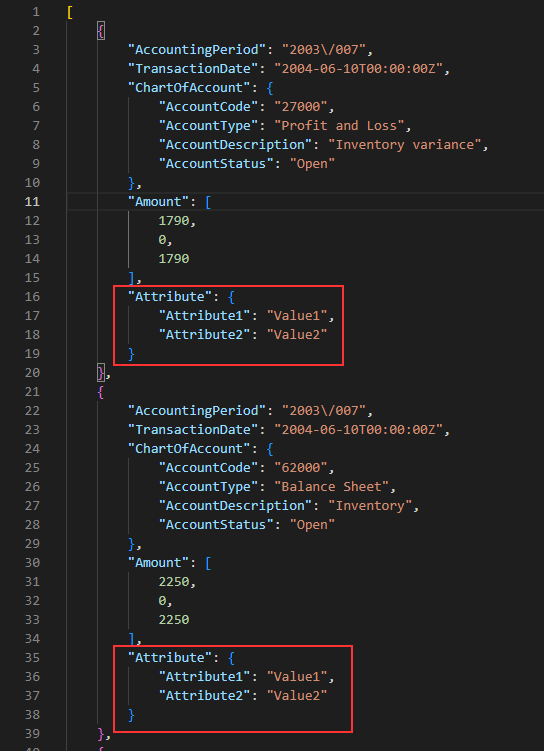
Now, let’s preview it and save it as JSON. You can see that the field added through the expression has been created.
Afterword
With this approach, using the query builder to design datasets and easily output them in the required JSON format can be done as shown above.