Sharperlight – Web Channel Restful Service Writeback using Javascript
With the release of v4.7 it is now easier to create your own customised writebacks in the Web Channel using JavaScript. To assist with this process the Table Writeback Metadata explorer can be used to view the different table writebacks attributes. In addition, you can also obtain working JavaScript for the selected table that can be copy and pasted into Sharperlight Publisher or into some other application or mobile app. The JavaScript POST Full example includes all the writeback fields attributes, including Lookup URL links, Value Lists and sample Save, Delete and Lookup code. This web page is using the System Product Metadata Tables in Sharperlight to query the various writeback tables. Therefore it is possible to create generic JavaScript applications that query and discover the table writeback metadata to generate dynamic data entry forms. If is also possible to query published reports in a similar manner.
This article assumes some knowledge of HTML , JavaScript and AJAX calls.
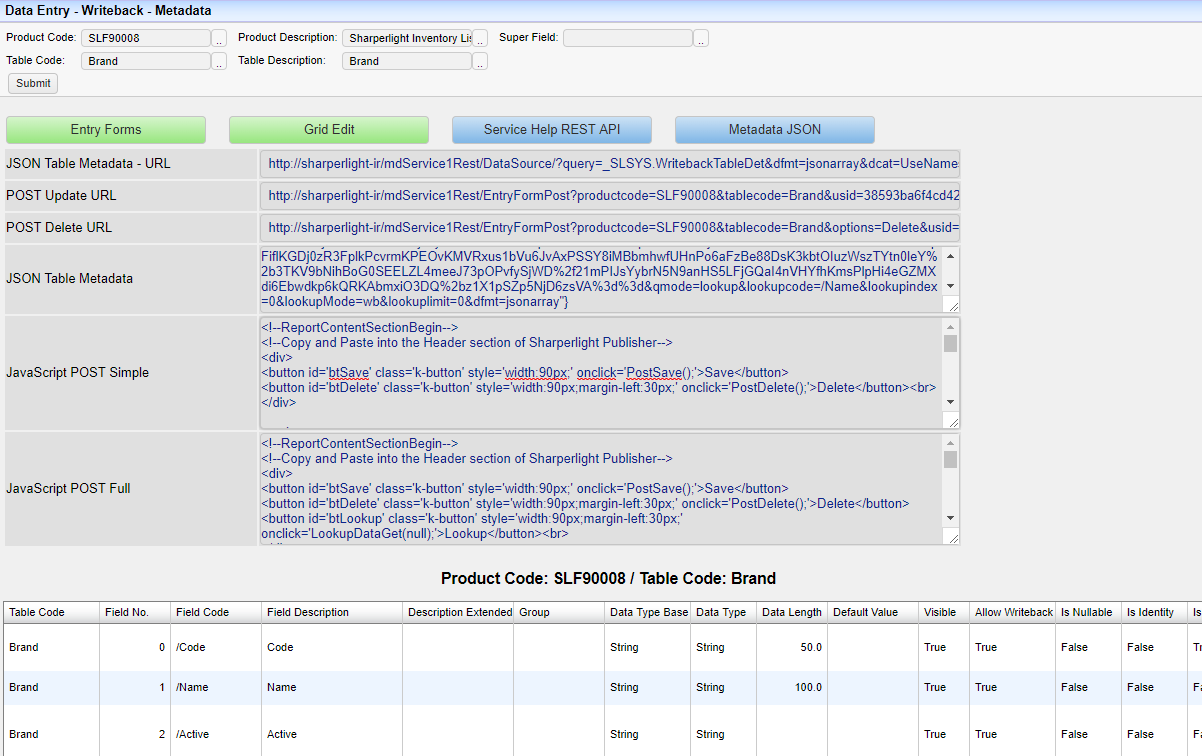
The types of information and code that can be found on this page is as follows
- Data Entry Form URL link that Sharperlight auto generates based on the Metadata
- Data Entry Grid URL link that Sharperlight auto generates based on the Metadata
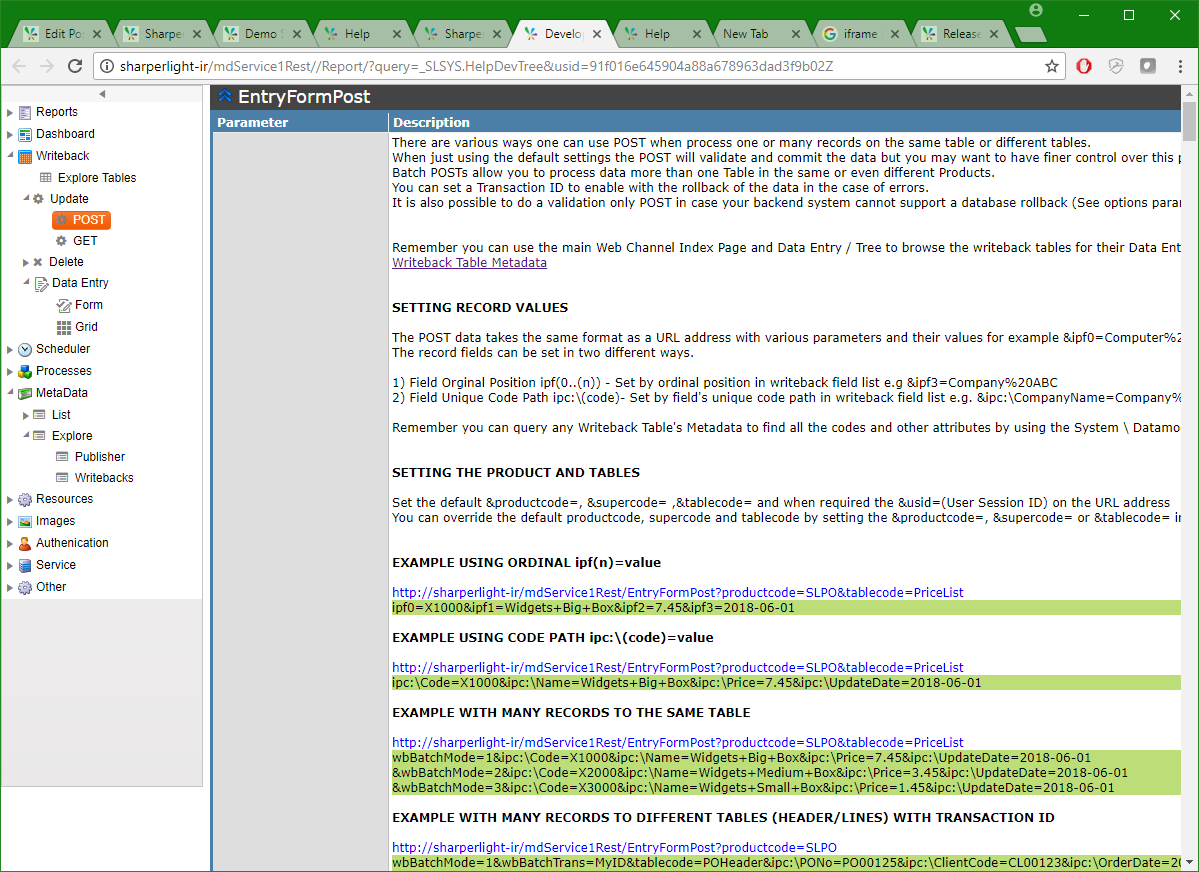
- Restful Service Help link on Writeback POSTs
- Writeback Table JSON Metadata URL Link (This contains all the fields and their attributes)
- Restful Service POST URL link for the selected table – Updating and Inserting data
- Restful Service POST URL link for the selected table – Deleting
- JavaScript working example for the selected table – Simple version with Save and Delete
- JavaScript working example for the selected table – Full version includes all field attributes, Save, Delete and Lookups
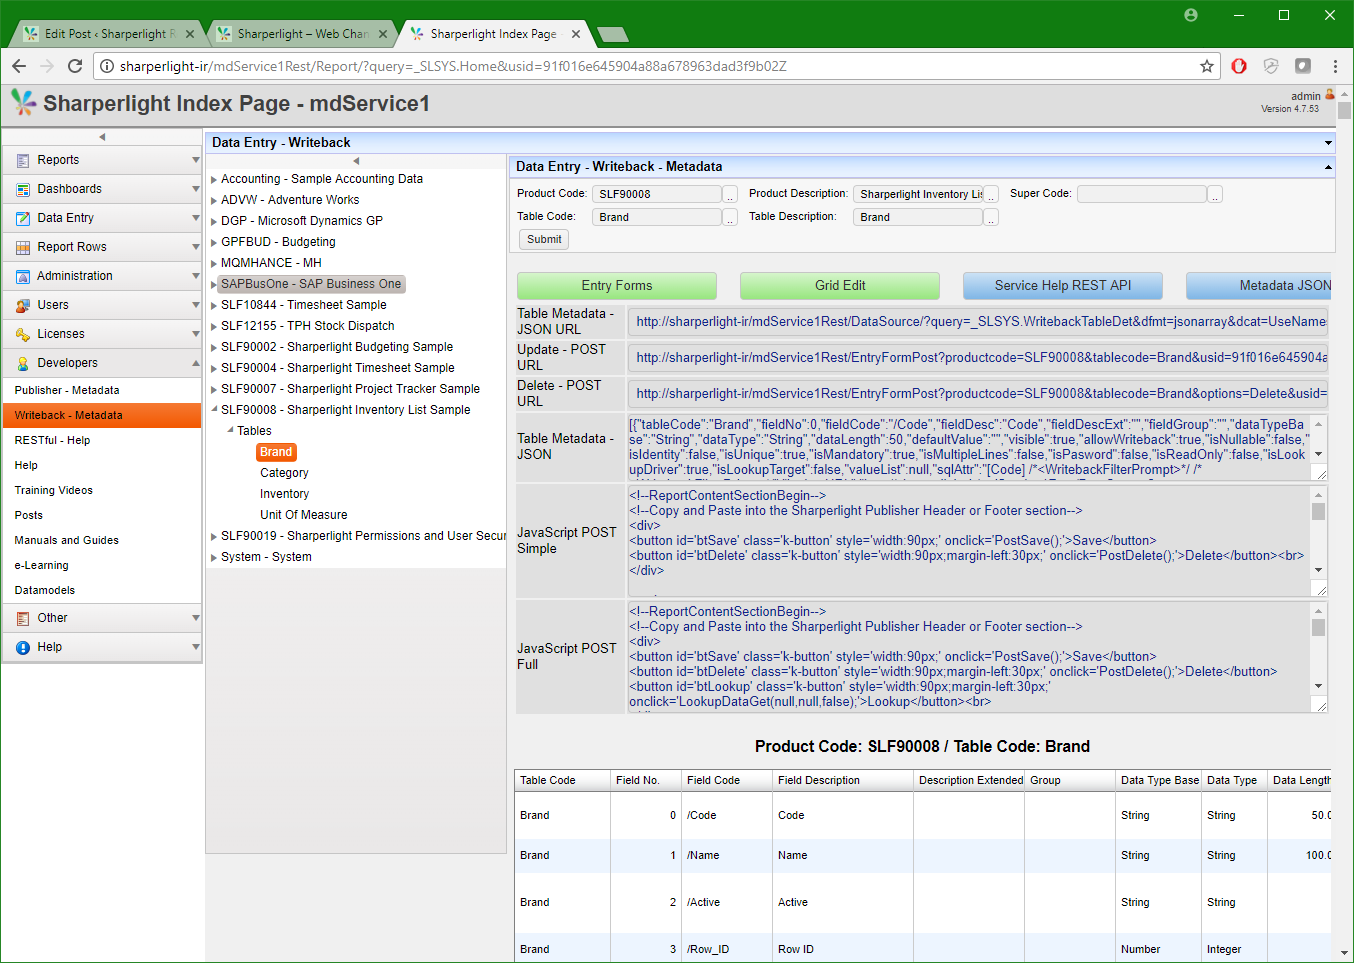
Sharperlight Index Page showing the Developers menu
The developer menu contains links to the various metadata exploring reports, RESTful service help and online resources. In this article we will be focusing on the Writeback – Metadata link that allows one to list all the tables by Product. If the Product has a concept of a Super Field / Company then the tables will be appear under each company. This is because a Super Field value can affect what Tables appear and their attributes.
Use Foundry to create a Application with Writeback Tables
Foundry can quickly create a Application Project with a Datamodel and writeback logic on the Tables. In this example the Inventory Foundry Template was used. If you already have a Datamodel, Custom Table or Materialised Query Table the same principles apply.

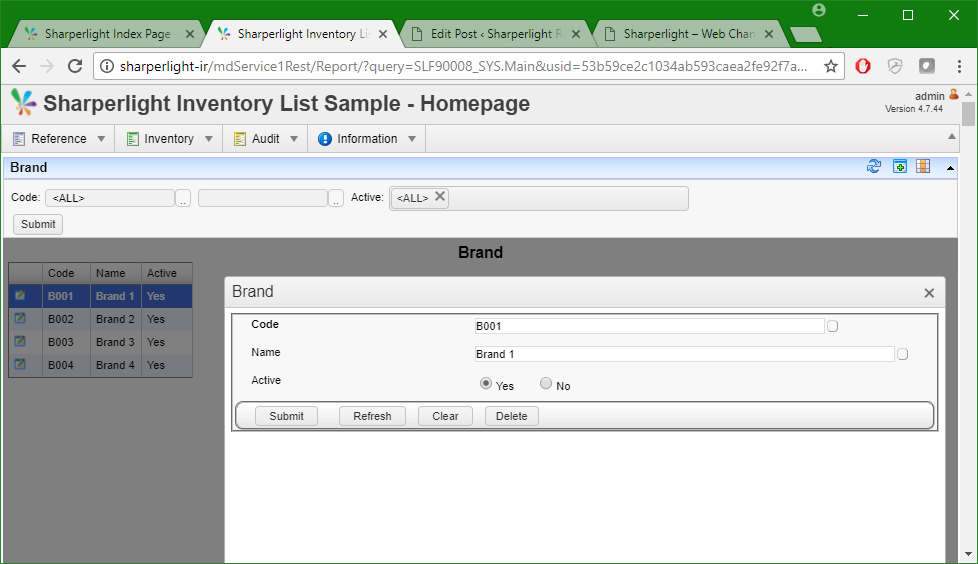
Inventory example showing the Brand Data Entry Form
As you can see the Foundry generates a basic menu and report for each Table including links to Data Entry Form and Data Entry Grid. In the case of the Data Entry Form it passes the identity or primary key to the Data Entry Form so you can edit the records one and a time. It is possible to style the Data Entry Form with URL parameters or even CSS. The URL parameter will also allow one to hide or lock fields. (See the Restful Service Help for details)
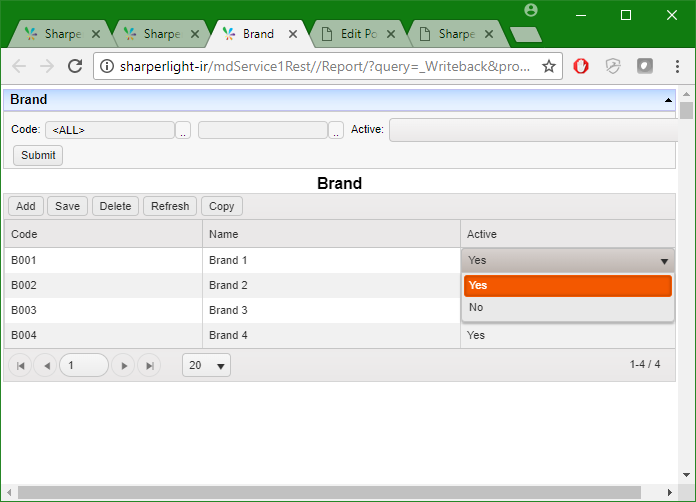
Inventory example showing the Brand Data Entry Grid
Sharperlight auto generates the Data Entry Grid which can be passed filter parameters like any other report. There are URL parameter that will one to hide or lock fields. (See the Restful Service Help for details)
Data Entry Writeback Metadata
In most cases you will simply copy the JavaScript Simple or Full code and paste it into the Publisher / Options / Header section. The Javascript code will work as is and will just require that you set your own values but even without this the code does execute but without setting values you will simply get a validation error on any mandatory fields.
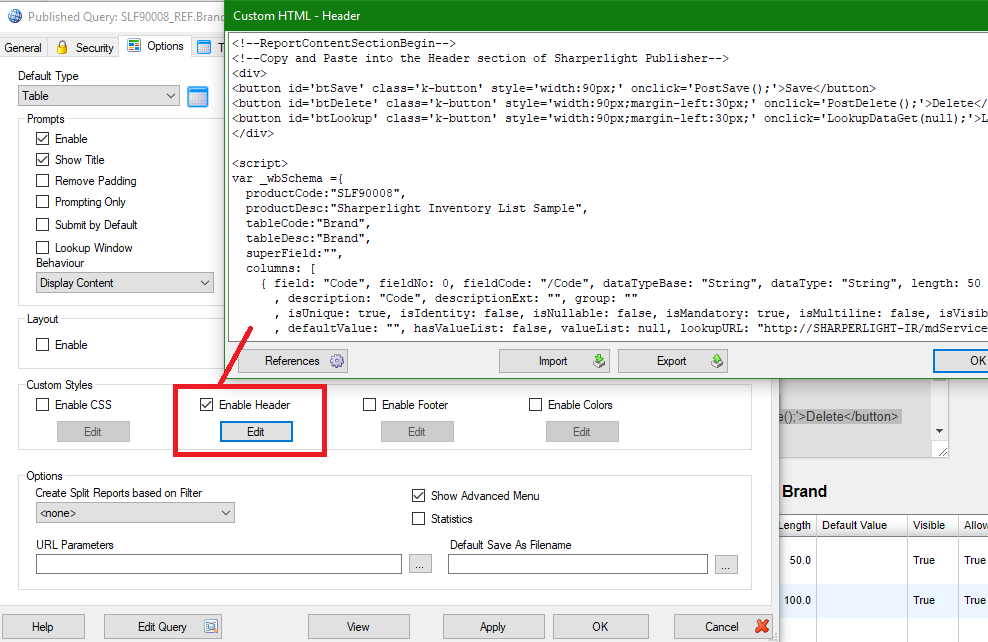
Copy and Paste the JavaScript POST Full or Simple into Publisher
Copy and paste the JavaScript POST Full or Simple into the Publisher / Options / Header. You may want to set some real field data in the PostSave and PostDelete sections of the JavaScript.
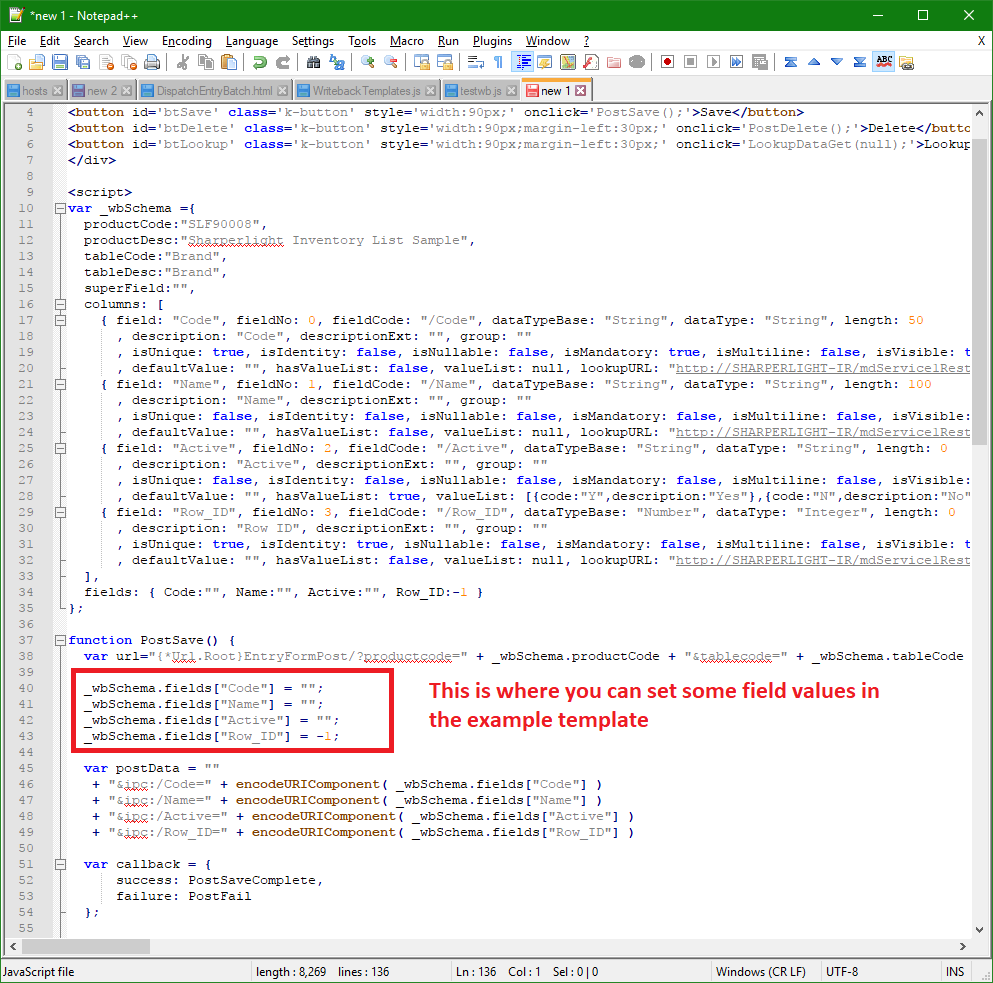
Modify JavaScript POST Full with some test data
You may want to set some real field data in the PostSave and PostDelete functions of the JavaScript.
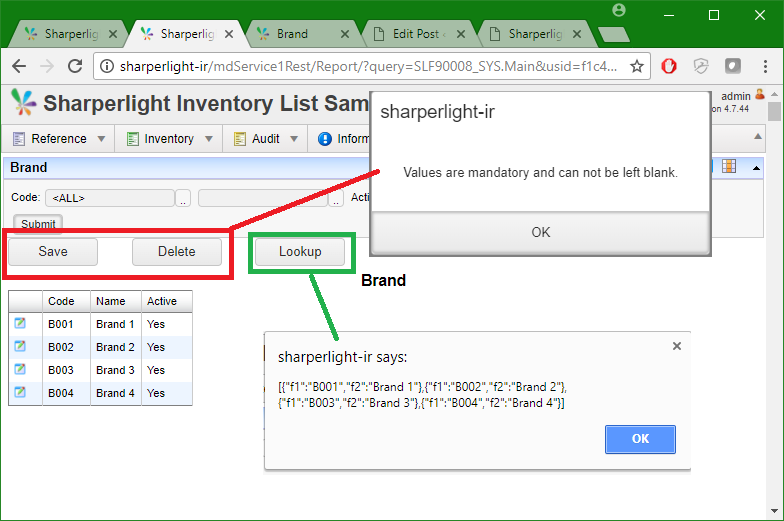
Test the JavaScript but using the Save, Delete and Lookup buttons
If you haven’t set some real field data then you will most likely get a validation error on Save or Delete. You may want to set some real field data in the PostSave and PostDelete functions of the JavaScript. The Lookup Button shows how you can get Lookup values for most fields. In the Full version you will have the full writeback schema in a JSON array with attributes like the data type, length, default values and if there is a value list or not. If for example you want to writeback many records at once or even use transaction ids for rollbacks then refer to the Resetful Service Help section on FormEntryPost and batchMode
RESTful Service Help
You can navigate through the RESTful Service help using the tree on the left. The link can be found under the Developer menu on the Index page.