Scheduler – File Transfer Protocol (SFTP, FTPS, FTP)
File Transfer Protocol – FTP
The standard protocol that is used to transfer files between computers and servers over a network, e.g. the internet. FTP is the language that computers use to transfer files over a TCP/IP network. TCP/IP is the underlying communication language of the Internet. In base terms, TCP/IP allows one computer to talk to another computer via the Internet through compiling packets of data and sending them to the right location.
For example, If someone anywhere in the world wanted to make their files available to download, all they would have to do is simply upload their file to their FTP server and other people can simply connect to that server and download those files using the FTP protocol. In the example, this person is using a dedicated FTP server to share their files. They can configure their own computer to act as an FTP server.
FTP Common Uses
- Transferring Files between computers
- Gives the ability of web designers to upload files to their web server

Getting Started
You would first need Sharperlight running, with a license, and select Scheduler in the applications menu.

Creating a new FTP Task
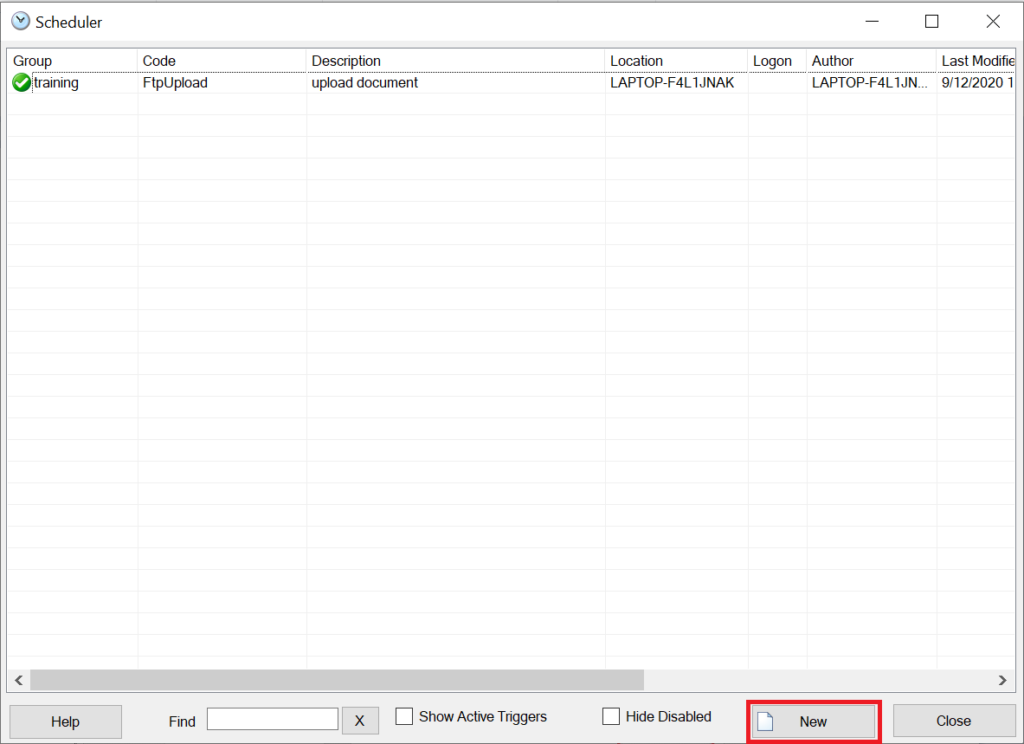
After opening Scheduler, it will lead to you to a screen that displays all the current scheduled tasks that you have. You can choose to edit a scheduled task or create a new one by selecting the “New” box at the bottom.
Labelling the FTP Task
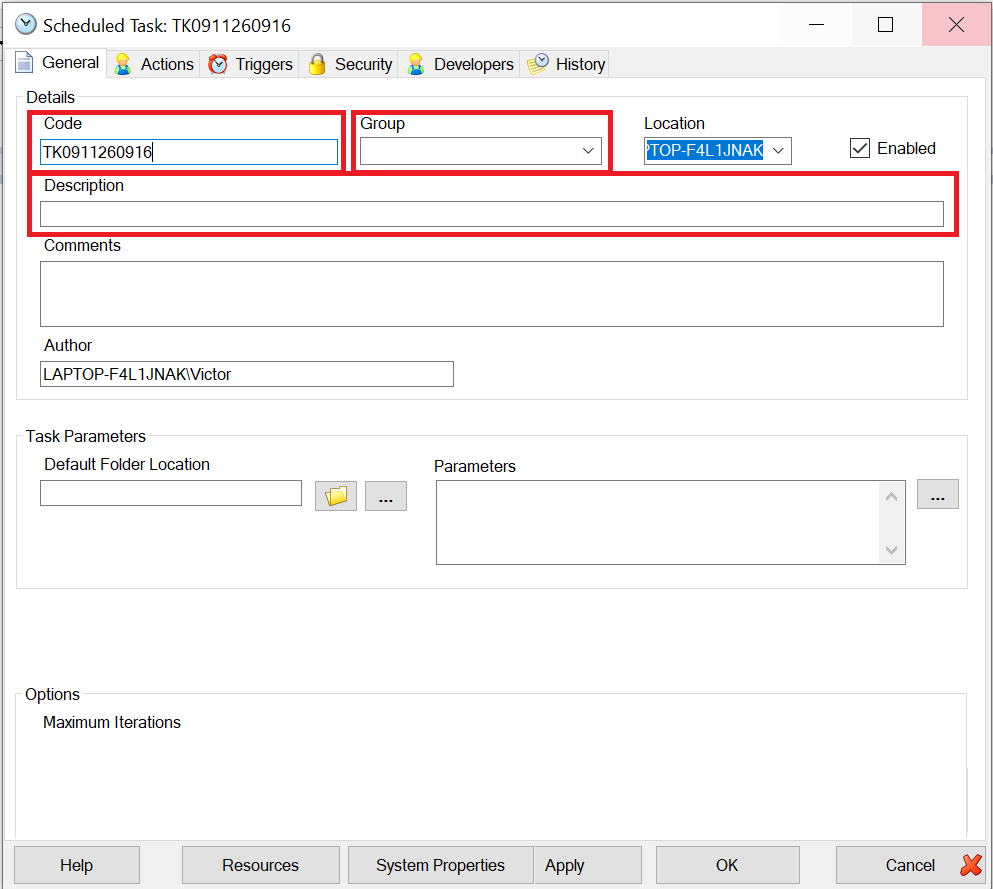
Once you have created a new scheduled task, it will lead you to the General page that allows you to provide an overview of the Scheduled task you would like to perform. The task code and group are combined to create an unique key that identifies the task. You can also write a brief description that describes your task.
Moving to the Actions Tab
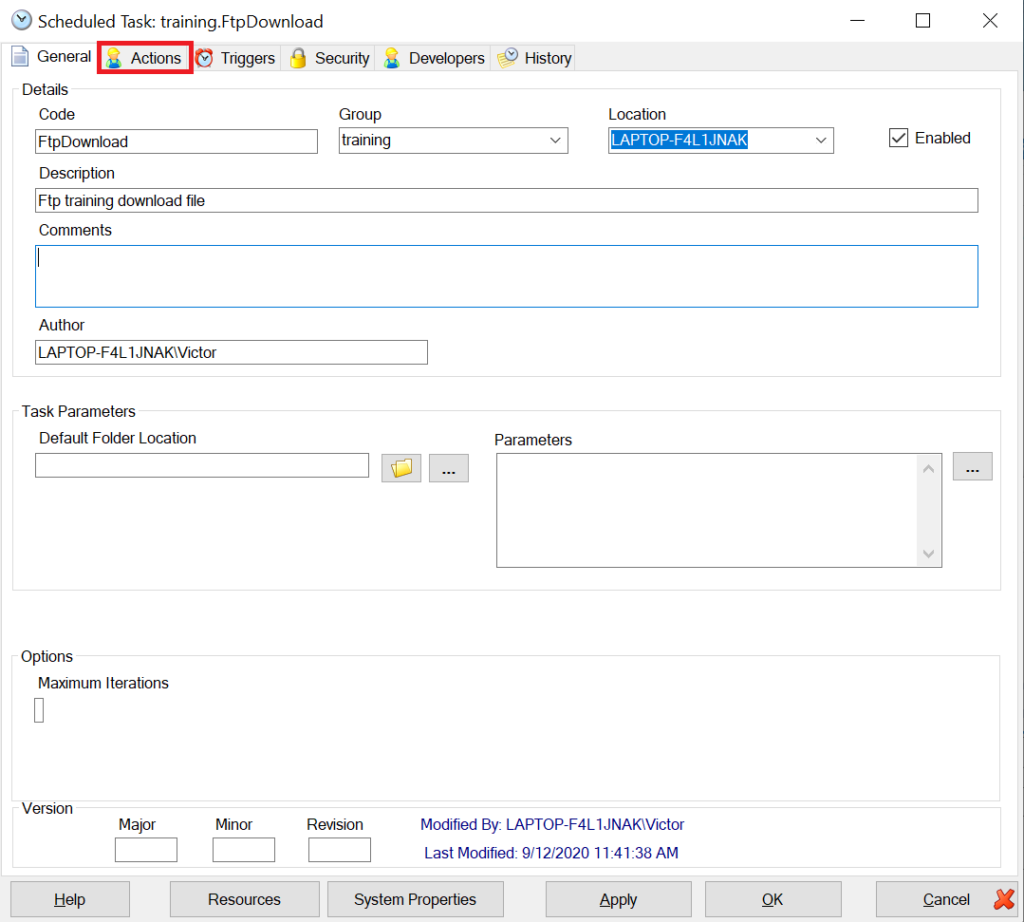
After you have filled in the general page, select the “Actions” tab to edit your Scheduled task.
Selecting the FTP Option in Actions
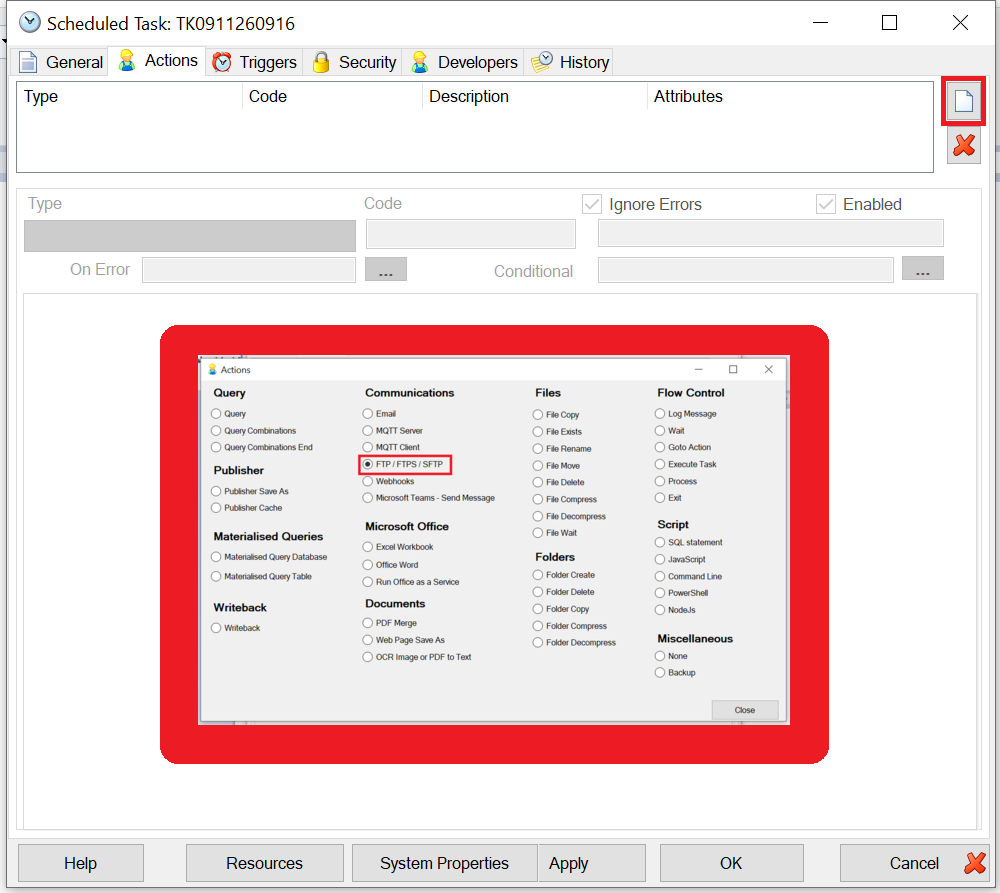
After you have selected the actions tab, start a new action by pressing the icon on the right. Then select the FTP/SFTP/FTPS option under Communications. This means that the task you have created is an FTP task.
Editing the Actions of the FTP Task
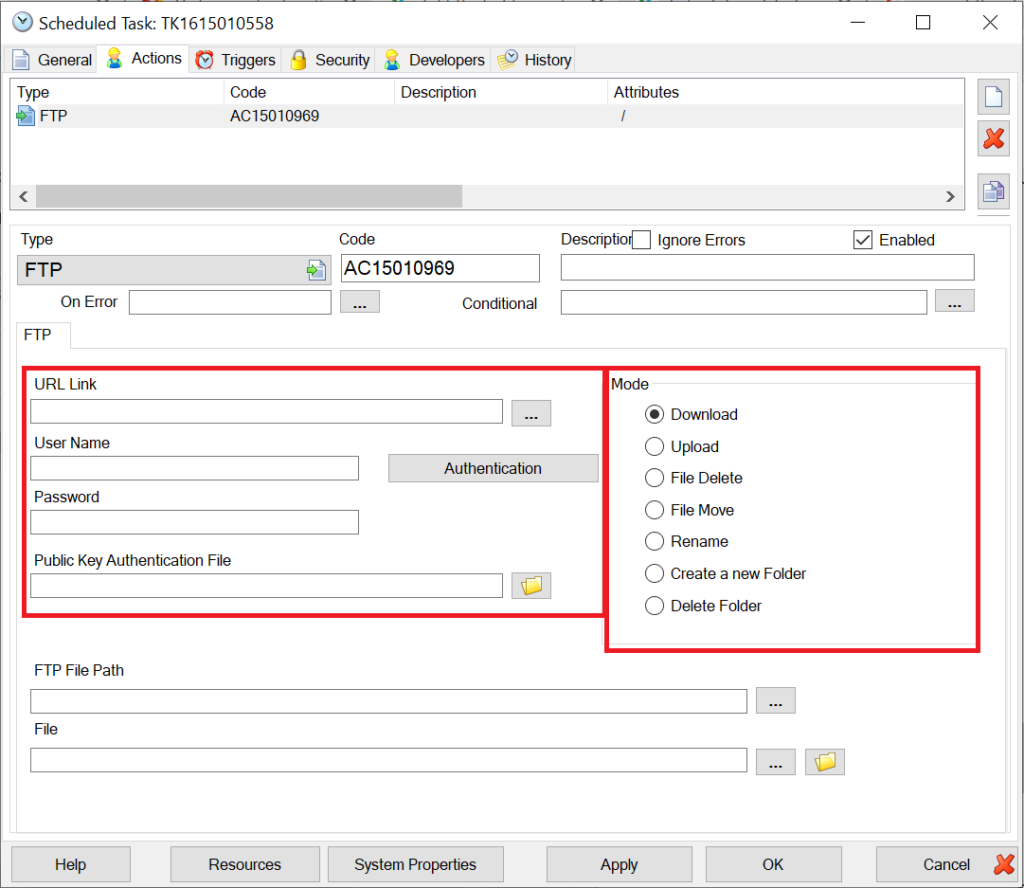
Once you have selected the FTP/FTPS/SFTP tab you can now edit the actions of your task. Firstly, under “mode”, you can select what your Scheduled FTP task is. Then fill out the URL link of the file location and provide a user name and password if required, if not, then just type “anonymous” as username and you can leave the password blank. Some FTP have an added layer of security where an authentication file is require and it can just be added on in the Public Key Authentication File.
Downloading a File
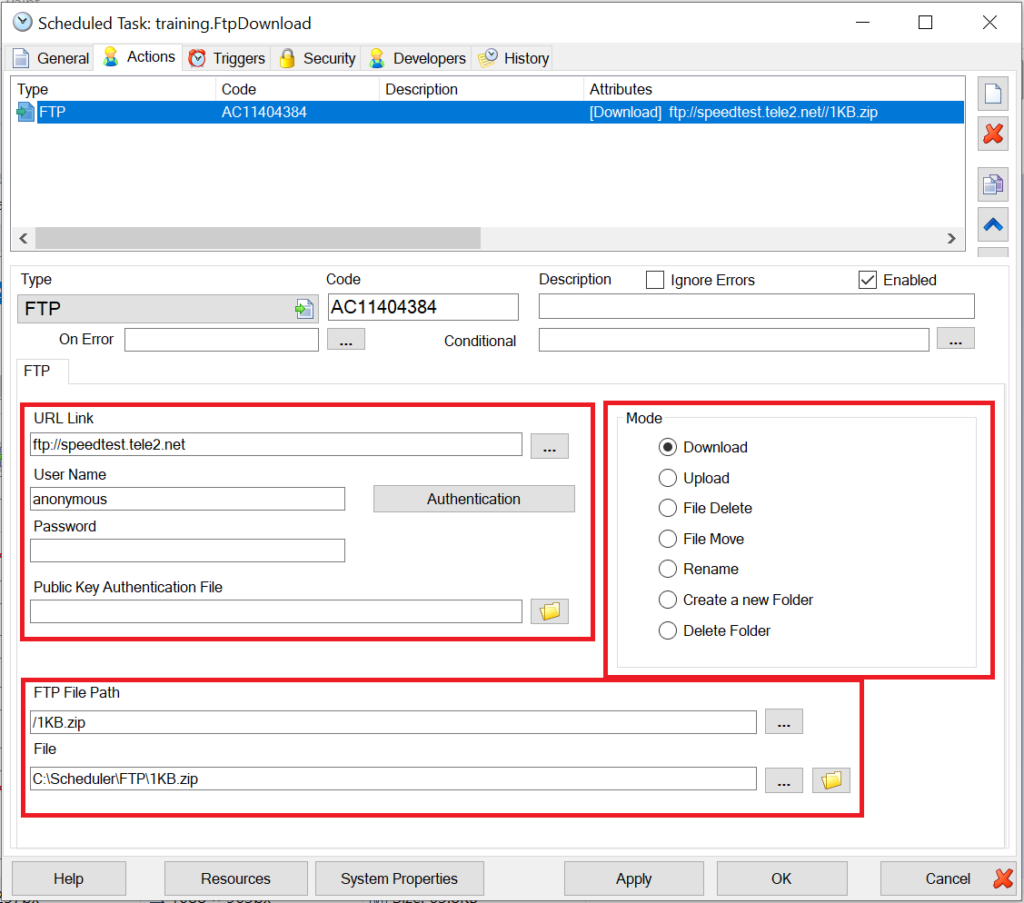
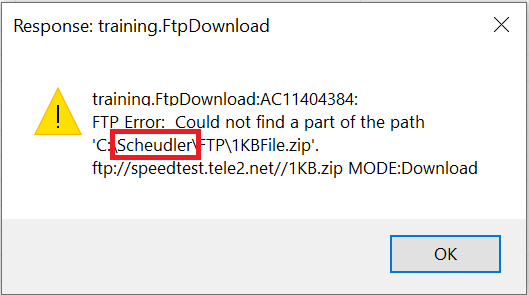
First under mode select “Download”. At the bottom, there is a “FTP file path” and “File” selection. The FTP file path is the location of the file that you wish to download, from the URL link and the File is the location of where you would like to download that file onto your device. In this case, we are downloading the file named 1KB.zip in ftp://speedtest.tele2.net/ and uploading it into our windows drive under C:\Scheduler\FTP\ and naming the file as 1KB.zip.
Uploading A File
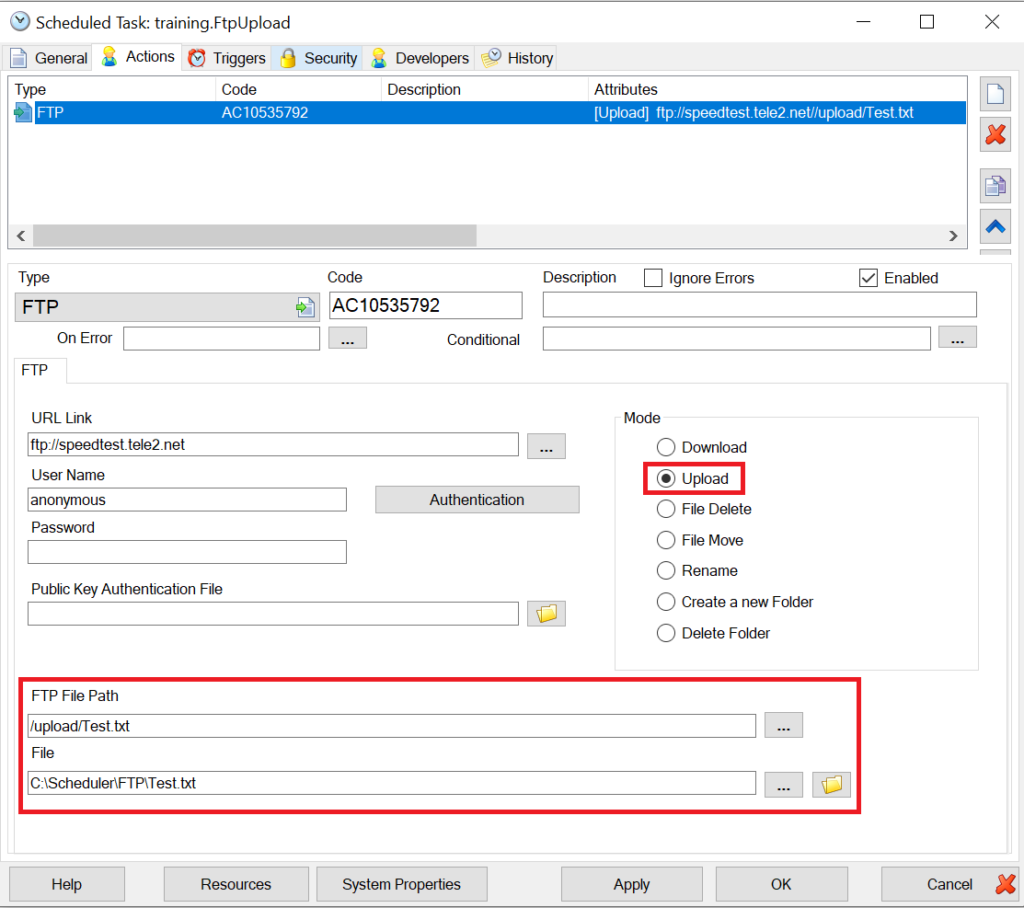
Firstly under mode select “Upload”. If you wish to upload to the same FTP server, the URL link, User Name, Password etc. will stay the same. In the case the “FTP File Path” is where you would like to upload the file and “File” is the file on your computer you wish to upload.
Checking the FTP File Path
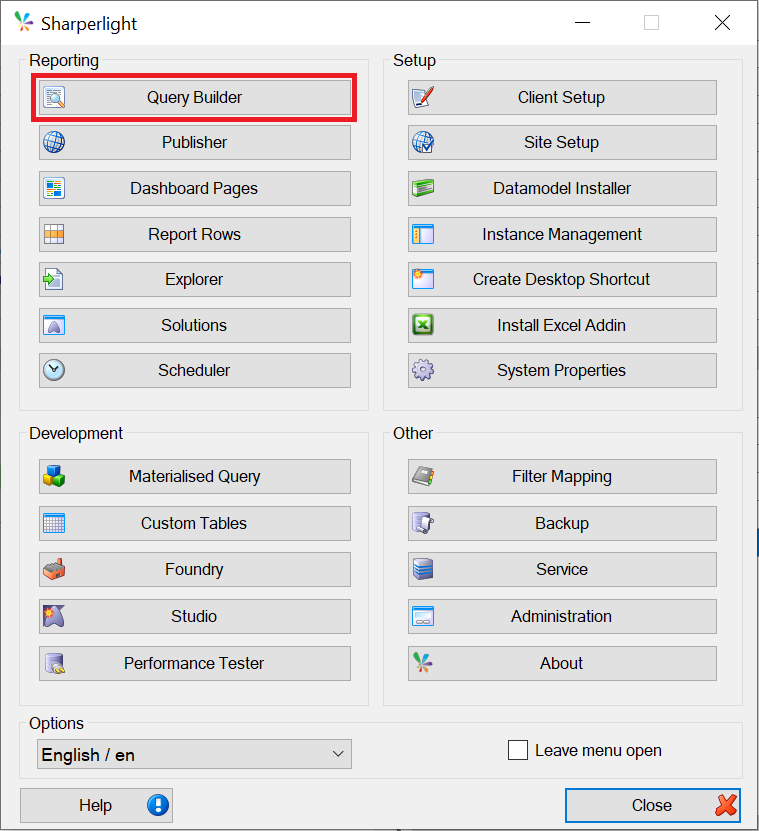
If you are unsure of what the file you want to download or where the folder structure is, you can find out by using Shaperlight Query Builder. First start by opening Query Builder in the applications menu.
Using Query Builder to Discover File List
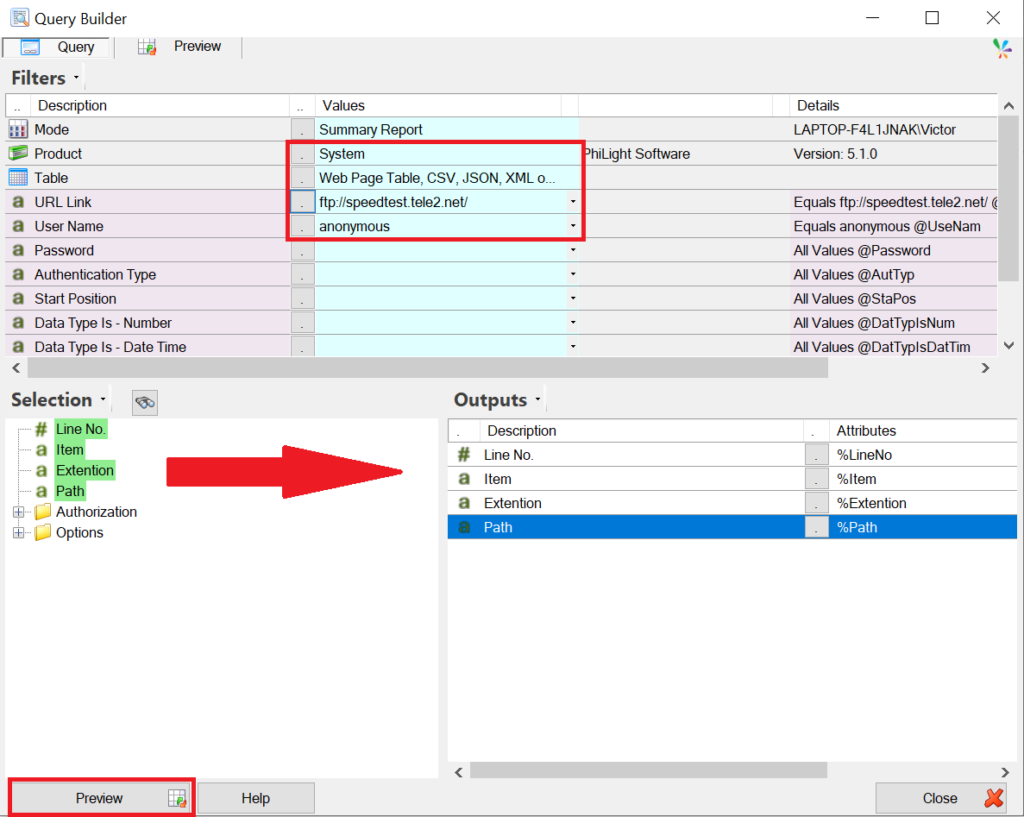
After you have opened your Query Builder, it would open to a Query tab. In the query tab, for Product select system and in Table, under the Internet Folder, select the Web Page Table, CSV, JSON, XML or OData option. Then under URL link input the link for the FTP server and fill out User Name and Password accordingly. Once you have filled those out, towards the bottom of the window under selection, some options will come up (Line No., Item, Extention, Path etc.). Drag these options into the outputs tab to the right and then select the preview option at the bottom of the window.
Displaying the Information Table
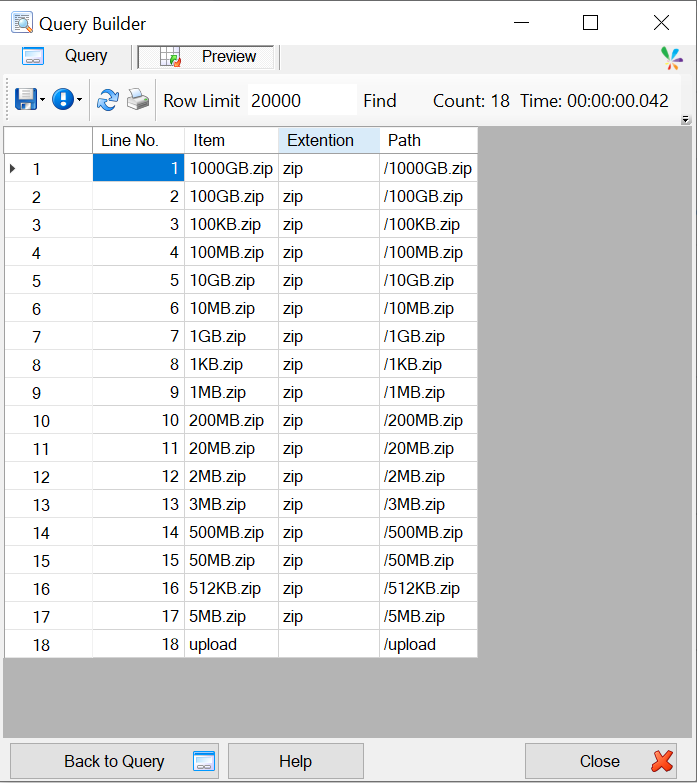
The options and data of the URL link will be displayed in a table.
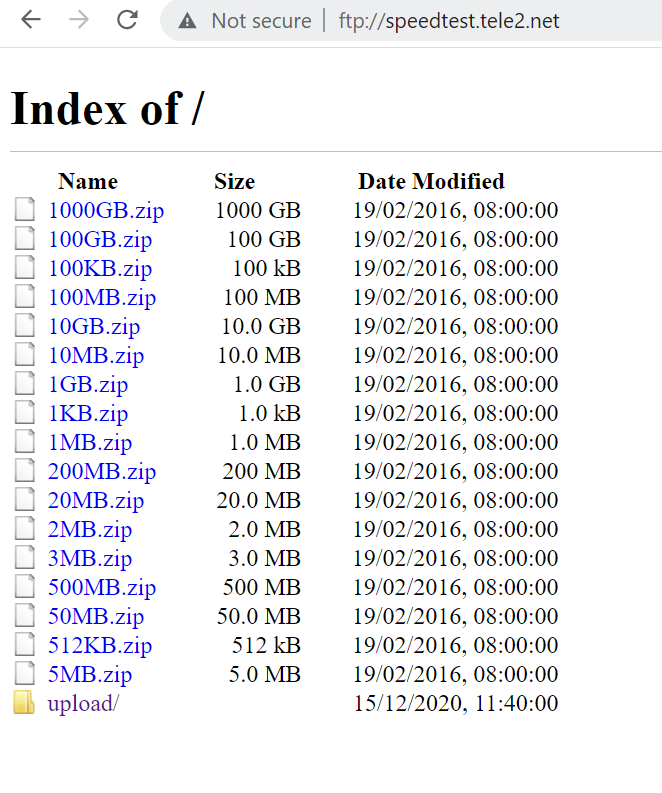
This is what it looks like in the actual FTP server.
Shared User Authentication
If you are running multiple FTP task all under the same User Name and Password or choose not to show your User Name and password the person using your login details, you can choose to save your login details in the Authentication tab.
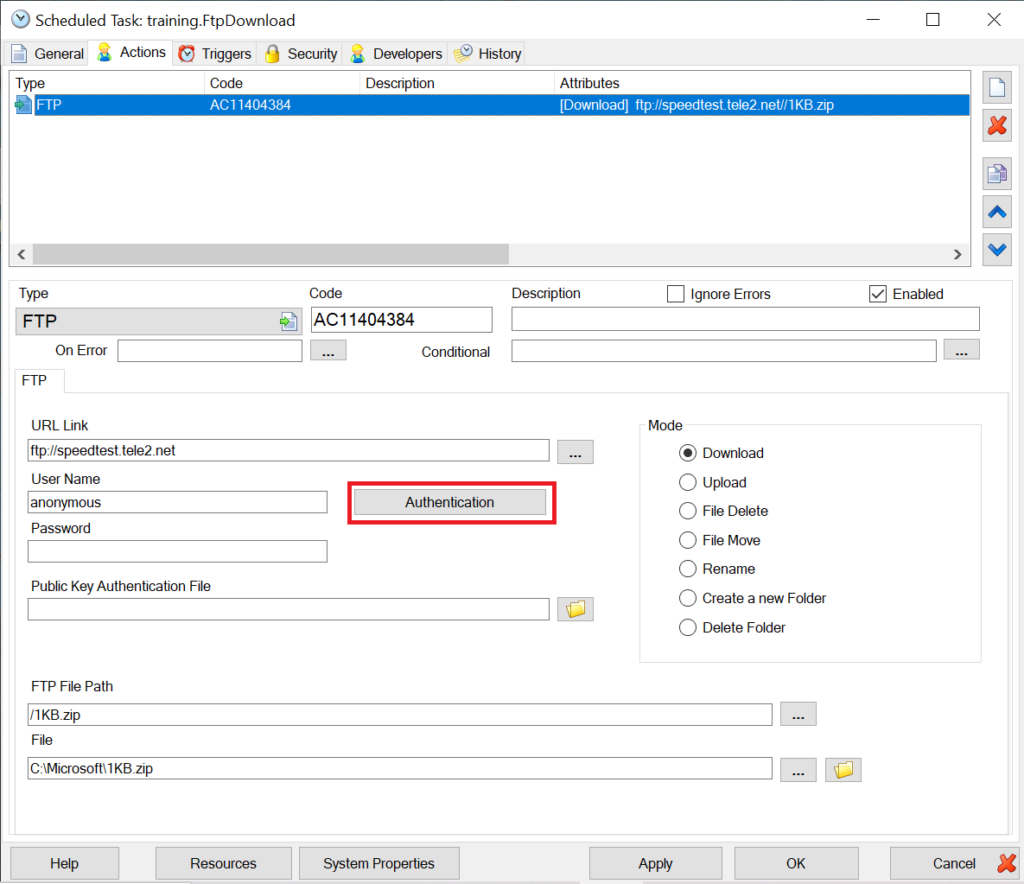
Selecting the Type of Authentication
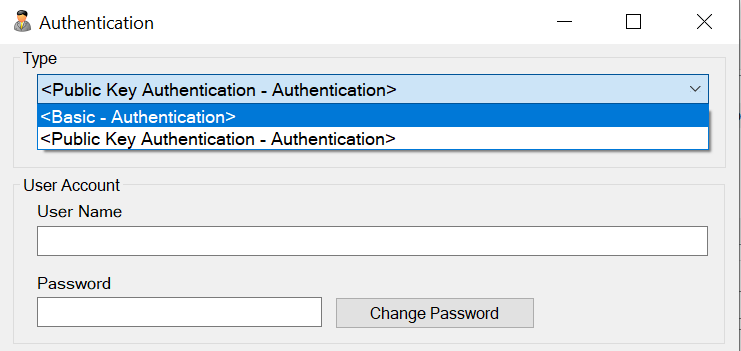
After opening the tab it will open a window. This allows you to create multiple user accounts so that you can just select the type of authentication you are using, whether you just have a basic user name and password login or a login with a Public Key Authentication file.
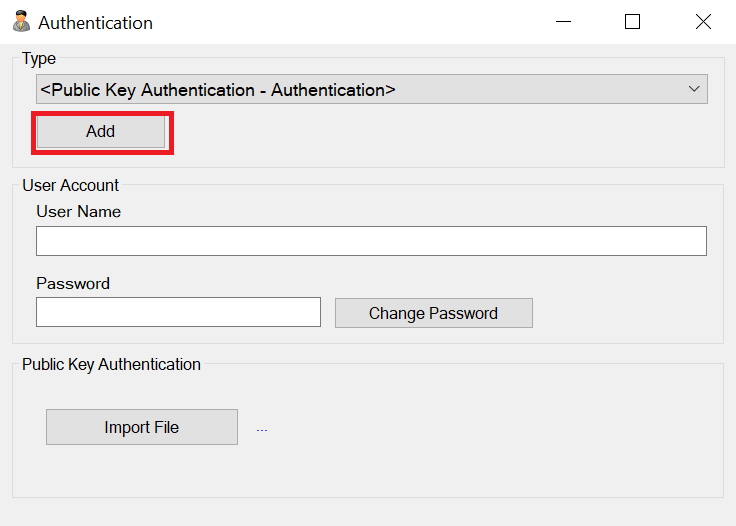
Adding Authentication Account
Once you have selected the type of Authentication, click the add button directly under to add the account, a tab will appear which asks for the code, which is just the name of your login details. Then fill out the login details accordingly.
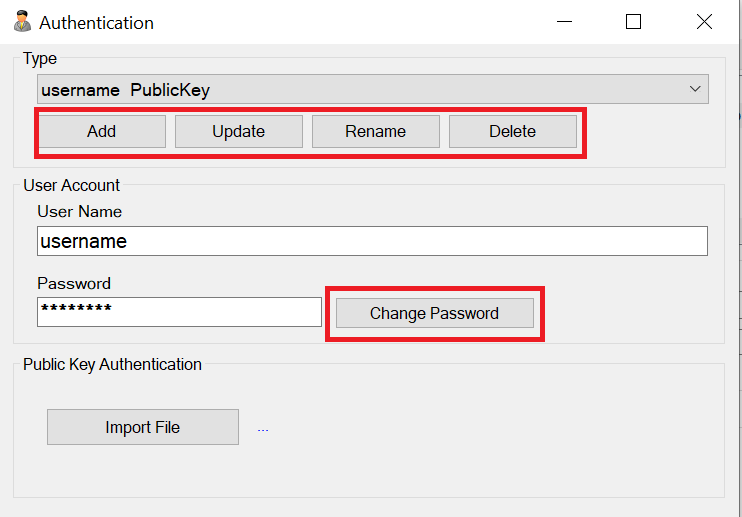
Editing the Shared Authentication User Accounts
After filling out the login details click the update button which saves your login. Now in the future you can just select this login without having to type the username and password for each of the FTP tasks using these details. Also, if the details ever change, you only have to change it under this authentication tab which will then update it for all the tasks using these details.
Executing the Task
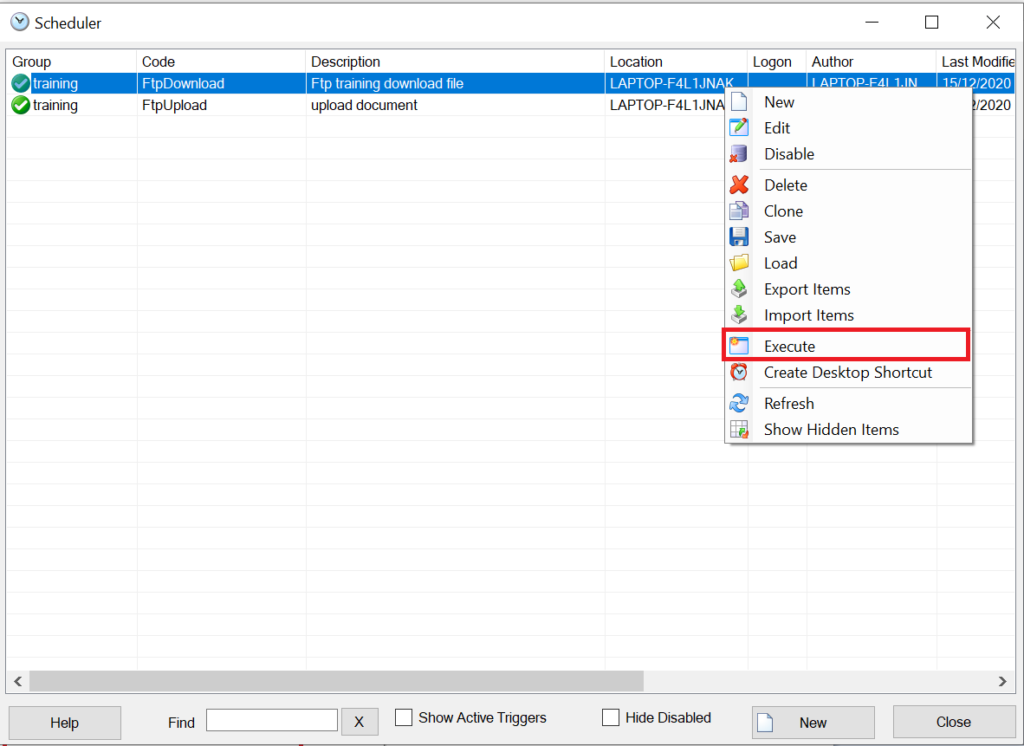
Once you have finished editing your task select the “Apply” box at the bottom of the window and now your task will appear in the menu of Scheduler. To execute the task, right click the task and select “Execute”.
Troubleshooting
FTP Error: Could not find a part of the path
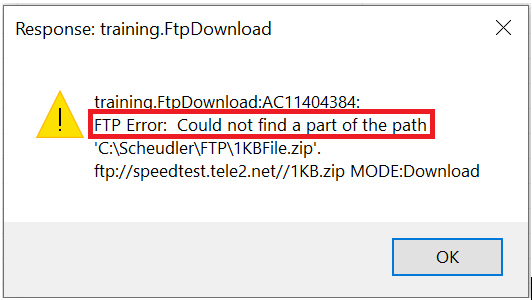
In this case there could be a typo in the folder or the path of folder does not exist.
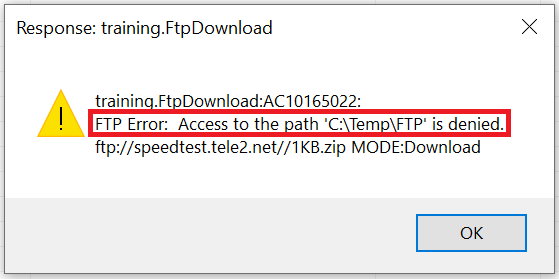
FTP Error: Access to the Path is Denied
Site Setup
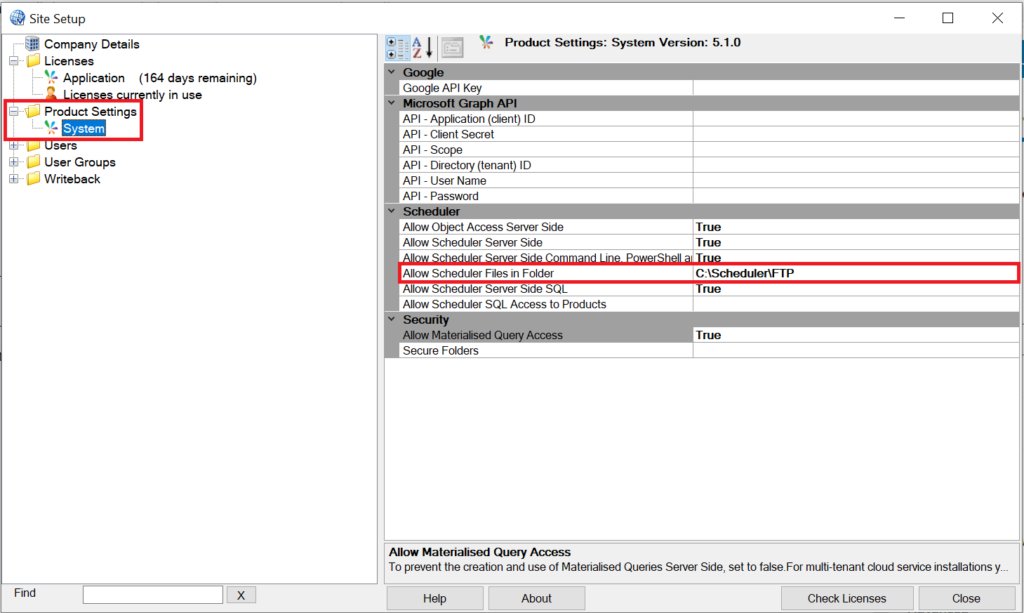
To fix this issue you must go onto “Site Setup” from the Applications menu on Sharperlight.
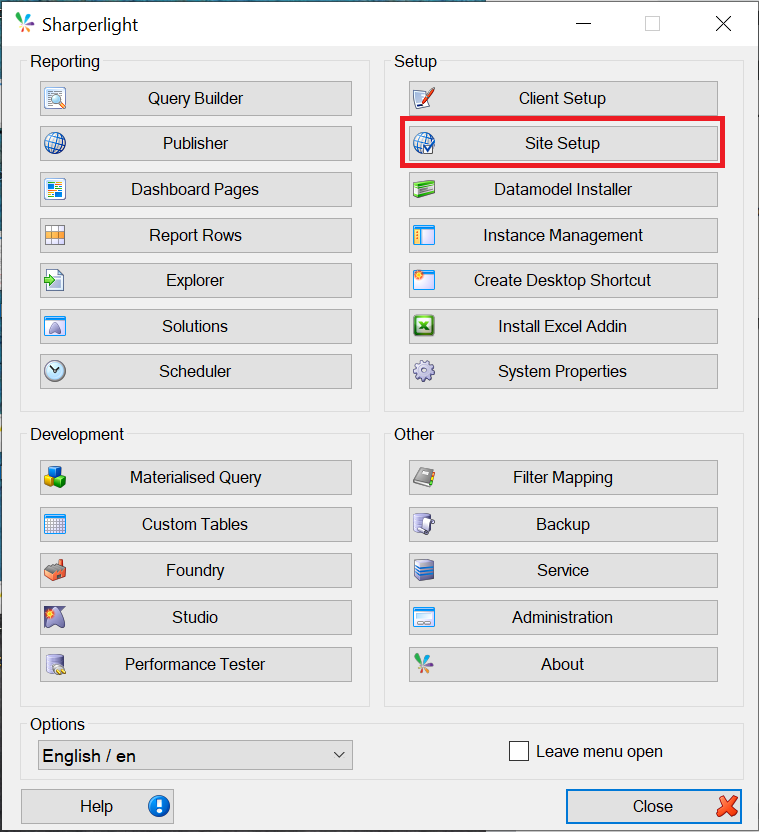
Using Site Setup
After opening opening “Site Setup”, under the “Product Settings” folder select system. In system, under the Scheduler tab there will be a row that says “Allow Scheduler Files in Folder”. In this case, the Folder that we have allowed access to is only C:\Scheduler\FTP, which is why access to C:\Temp\FTP was denied. To allow access, just add in the folders you wish for Scheduler to have access to.