Installation – Unattended Upgrade / Install Options
The Sharperlight desktop installer is distributed in a standard Microsoft Software Installer (MSI) package, which supports a variety of command line options for logging, automating and customising the install of the Sharperlight client.
Common use cases for running the installation via command line include:
- Automated installation of the ‘Client’ desktop installation on a new end-user environment
- Bulk installation or upgrade on multiple end-user environments via PowerShell script
- Customising the feature set of the installation
- Including the Sharperlight installation as part of a series of ‘headless’ or ‘quiet’ operations
To execute a basic installation of Sharperlight via command line with no extraordinary options, the command is msiexec /i followed by the filepath and filename of the Sharperlight .msi executeable.
msiexec /i "C:\Installer\Sharperlight 5.3.12 64bit.msi"

Additionally, it is possible to include parameters to specify a myriad of different options, such as determining the amount of user-interaction is required to complete the installation process.
/quiet
Quiet mode is ideal for automated scripts or headless installation, as the installer will run the installation without displaying a user interface or requiring any user interaction. The user cannot cancel the installation once it has been started.
msiexec /i "C:\Installer\Sharperlight 5.3.12 64bit.msi" /quiet
/passive
Similar to quiet mode, however the installer will present a visual progress bar. The user cannot cancel the installation once it has been started.
msiexec /i "C:\Installer\Sharperlight 5.3.12 64bit.msi" /passive
/norestart
If the installation overwrites files which are in use or locked by the operating system, it may be necessary to reboot in order to complete the installation. There are a number of options to alter the reboot policy used by the installation, and for situations requiring a quiet installation, or where multiple installations are being carried out consecutively, a ‘no restart’ policy can be useful. It is important to note that a manual reboot will be required after all operations have been completed.
If no reboot option is specified, running the installer with in /quiet or /passive mode will result in the computer restarting whenever necessary, without warning or prompt.
Also of note may be /forcerestart to force the installer to reboot the machine after every installation, and /promptrestart which, should a restart be required, will display a prompt instead of automatically restarting as per default behaviour (does not work with quiet mode).
msiexec /i "C:\Installer\Sharperlight 5.3.12 64bit.msi" /quiet /norestart
/lv “filepath\logname.log”
Writes logging information into a log file at the specified existing path. While there are many different logging options, lv (log verbose) provides most information useful to the Sharperlight installation. The path to the log file location must already exist; the installer does not create the directory structure for the logfile.
msiexec /i "C:\Installer\Sharperlight 5.3.12 64bit.msi" /lv "C:\Installer\SL_Install.log"
For more information and additional command line options, please consult the Microsoft Windows Installer documentation.
Product Options
Sharperlight includes two basic modes of installation, ‘Client only’ for end-user machines, and the ‘Full install’ for Servers and development environments. By default, using no command line options (such as in the above examples) the installer will opt for a ‘Client only’ installation, which does not include the installation and registration of the Sharperlight Windows Service module, and also omits shortcuts to development tools such as Foundry and Studio (amongst others).
In order to specify which install mode is used, the additional command line option ‘InstallLevel‘ can be used. The syntax for this property is PROPERTY=VALUE, e.g. InstallLevel=3 or InstallLevel=1000
msiexec /i "C:\Installer\Sharperlight 5.3.12 64bit.msi" /quiet /lv "C:\Installer\SL_Install.log" InstallLevel=1000
| InstallLevel | Result |
|---|---|
| N/A (Not specified) | Standard “Client Only” installation, however will leave ‘Local Connections’ visible inside the Client Setup interface. |
| 3 | Standard “Client Only” installation, however will hide the ‘Local Connections’ in Client Setup as per standard installer behaviour. |
| 1000 | “Full Installation” for Server or Developer environments. Will install the Sharperlight Windows Service. |

Furthermore, it is possible to select precisely which components are installed via use of the ‘AddLocal‘ command line option. The syntax for this is similar to the above InstallLevel, but allows for multiple comma delimited values: PROPERTY=VALUE1,VALUE2,VALUE3 etc.
msiexec /i "C:\Installer\Sharperlight 5.3.12 64bit.msi" /quiet /lv "C:\Installer\SL_Install.log" InstallLevel=3 AddLocal=AppShortCut,MQShortCut
| Feature Code | Dependency | Title | Type | Description |
|---|---|---|---|---|
| Core | Complete | Query Engine | Functionality | The core query engine, connectivity and client tools. |
| XBAP | Server | Browser Client (XBAP) | Functionality | |
| Server | Complete | Server | Functionality | Adds the Sharperlight Service to the Windows Services. |
| XL | Complete | Excel Add-in | Functionality | Installs the Sharperlight XL Add-in and adds the registry keys to auto-load the Add-in into Microsoft Excel. Supports Microsoft Office 2007 through to 2016 |
| AppShortCut | Core | Applications Menu | Shortcut Only | The main application for Sharperlight which shows a menu to each component and has a utility to create desktop shortcuts. |
| FoundryShortcut | Core | Foundry | Shortcut Only | Rapid prototyping tool for creating database schema, data access layer and web interface from the one project definition. |
| StudioShortCut | Core | Studio | Shortcut Only | The development studio for constructing and maintaining Datamodels. |
| ClientSetupShortCut | Core | Client Setup | Shortcut Only | For the setup of remote and local data connections, and the service settings on an application server. |
| DMInstallerShortCut | Core | Datamodel Installer | Shortcut Only | Graphical interface for adding, deleting, updating and recompiling Datamodels. |
| ExplorerShortCut | Core | Explorer | Shortcut Only | Data explorer that can be used stand-alone or actioned from the Preview pane in the Query Builder and from Query Formulas in Microsoft Excel. |
| XLInstallerShortCut | XL | Install Excel Addin | Shortcut Only | This will register the Sharperlight XL Add-in for the current user. |
| MQShortCut | Core | Materialised Query | Shortcut Only | This transformation tool can convert queries into physical tables in a SQL Server database. These materialised tables are then accessible as a virtual datamodel in the Query Builder. |
| PublisherShortCut | Core | Publisher | Shortcut Only | Maintains the shared catalogue of queries that have been published to the web. |
| RRShortCut | Core | Report Rows | Shortcut Only | A user interface for maintaining row layouts that can be bound to output columns in the Query Builder. The row templates can allow filtering, grouping, re-ordering and totals that are not possible with the existing data structures. |
| SchedShortCut | Core | Scheduler | Shortcut Only | Automation interface for the execution of tasks on a recurring and ad-hoc basis. |
| SiteSetupShortCut | Core | Site Setup | Shortcut Only | The central window for licencing, setting up users and groups, changing global settings and securing functionality and Datamodel access. |
| SolutionsShortCut | Core | Solutions | Shortcut Only | A launch menu that includes shortcuts to System Properties, Scheduler and other menu items can be deployed from within a Datamodel and Page Designer reports can be added from a right hand mouse click menu. |
| QueryBuilderShortcut | Core | Query Builder | Shortcut Only | Common query interface for accessing a Datamodel to create and maintain queries. |
| VCRedist | XL | Visual C++ 8.0 Runtime | Redistributable | |
| Complete | Sharperlight | Package | All Sharperlight Modules | |
| Developer | Complete | Developer | Package | Adds program shortcuts to all Datamodel development tools and extended deployment features. |

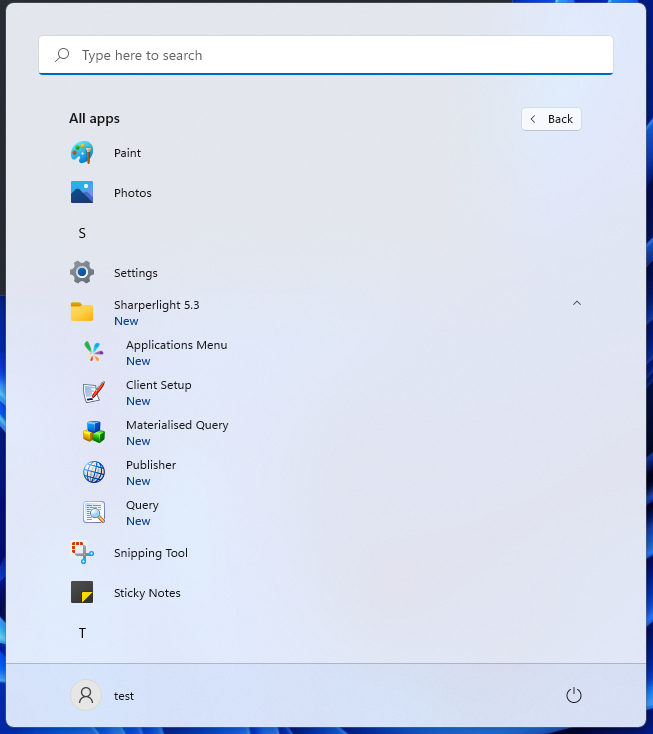
Post-installation Configuration and other considerations
Once a regular ‘Client only’ installation is complete, during a typical install procedure the connection details within Sharperlight’s Client Setup interface would need to be filled out in order for the user to successfully connect to the Sharperlight service and begin using the software.
Since this process would normally require some level of user interaction, an automated install may wish to include a script to automatically copy or patch the connection details directly.
All connections set in Client Setup are stored in a series of XML files located within Sharperlight’s ProgramData directory. For example, for a typical installation on the C:\ drive, the Client Settings folder would be located at “C:\ProgramData\Sharperlight\ClientSettings“.
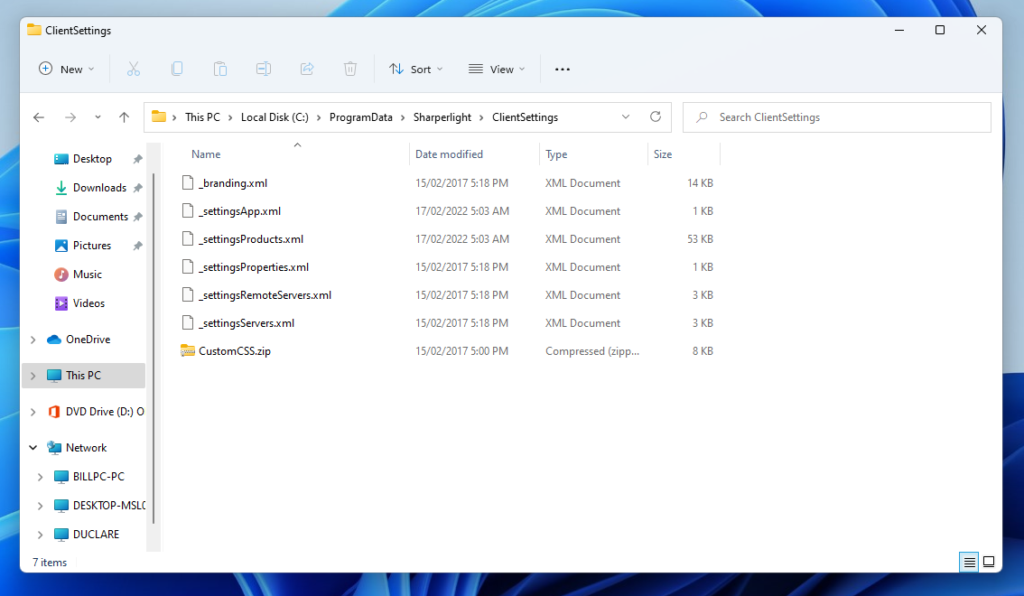
Once you have successfully configured a single client install, these files can be used as ‘templates’, and copied across to another user environment after completing the install process. In this way, the same connection details and client configurations can be rolled out to multiple users without necessitating direct user interaction.
Finally, the Excel Add-in which is included with the product should be automatically installed and registered during the installation process. If the Excel process was still running while the installation took place, or if the Excel add-in failed to register due to some other environmental factor, you can run the “Install Excel Addin” executable to correct this. Standard install location for this executable is: “C:\Program Files\Philight\Sharperlight\bin\md.InstallExcelAddin.exe“
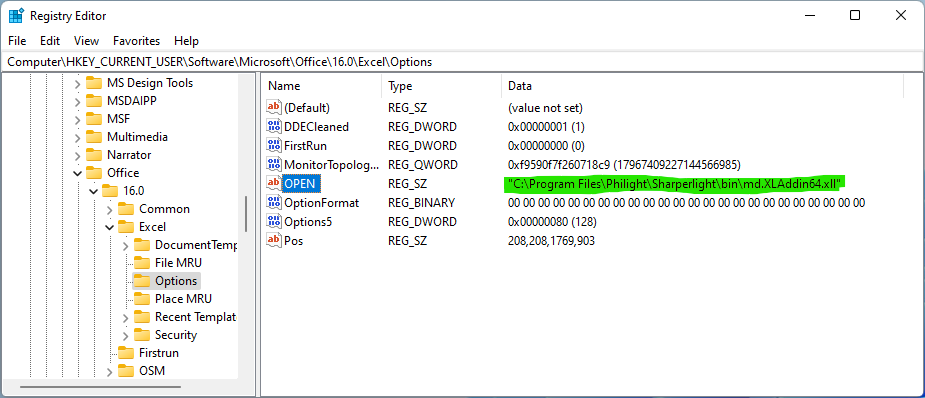
While not recommended, due to extenuating environmental circumstances it has occasionally been required to directly add the Excel add-in Windows Registry key either manually or via script. The OPEN property is the only strict requirement for Excel to register the Add-in upon next launch. It is recommended that the correct registry entry be determined by first installing on a comparable environment.
Depending on the version of Office installed on the machine, the registry path will differ, for example:
HKEY_CURRENT_USER\Software\Microsoft\Office\16.0\Excel\Options