
Customizing the Data Entry Form with Foundry Adv.
Introduction
We can see some customizations of the data entry form in the post “Customizing the Data Entry Form with Foundry“.
In this post, we will explore the customization using JavaScript.
Practices
Let’s start with the one we created with the post “Customizing the Data Entry Form with Foundry“.
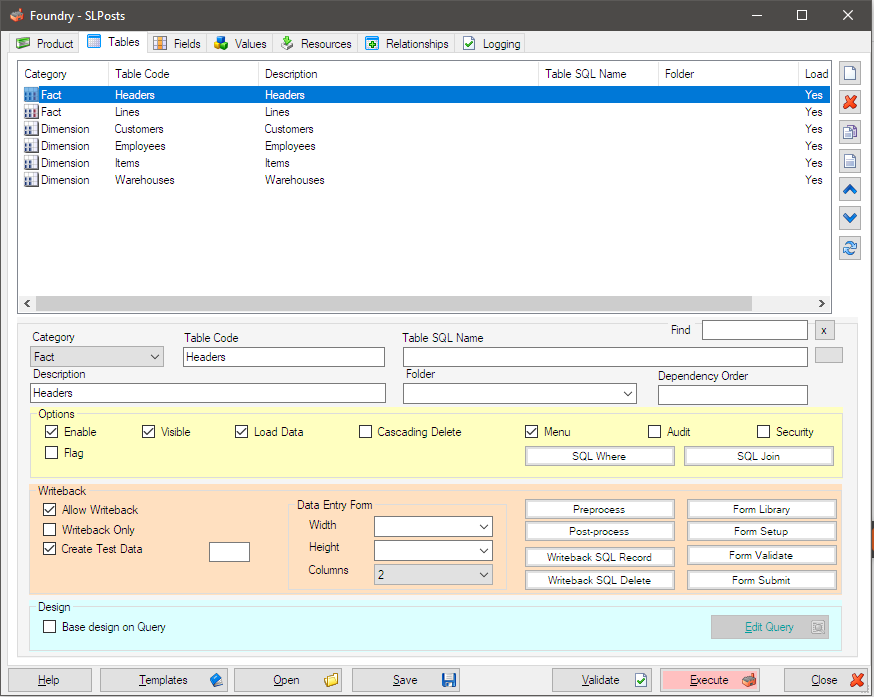
Next, I will add a grid control to the header’s data entry form to manage its line information.
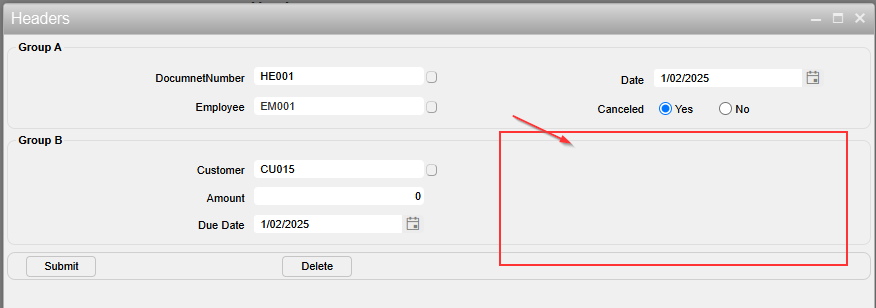
Form Setup
Add a <div> element that will serve as the anchor for the Grid control. (I am using the KENDO Grid control, as the KENDO JavaScript library is bundled with Sharperlight.)
Go for Headers table definition and open “Form Setup” editor, where we can define some code that will be executed when the data entry form is loaded.
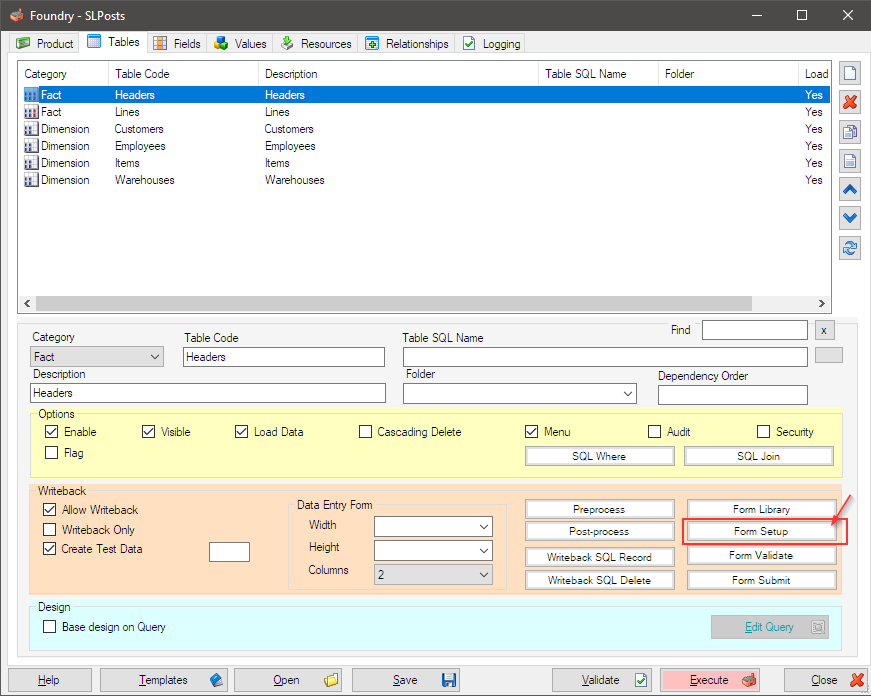
In the “Form Setup” editor, write code to add a <div> element like this and execute it to compile the foundry definition.
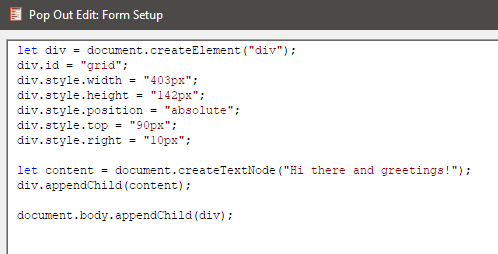
let div = document.createElement("div");
div.id = "grid";
div.style.width = "403px";
div.style.height = "142px";
div.style.position = "absolute";
div.style.top = "90px";
div.style.right = "10px";

let content = document.createTextNode("Hi there and greetings!");
div.appendChild(content);

document.body.appendChild(div);
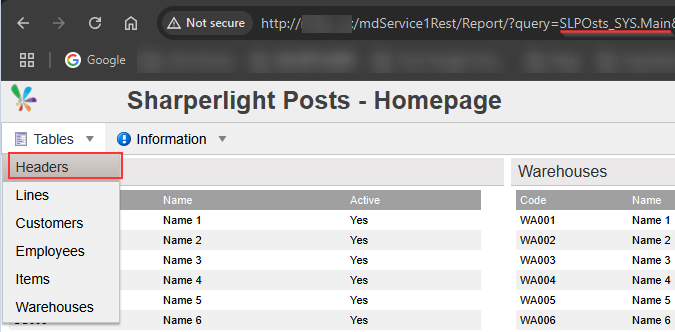
Open the data entry form by navigating from the main page generated by the foundry.
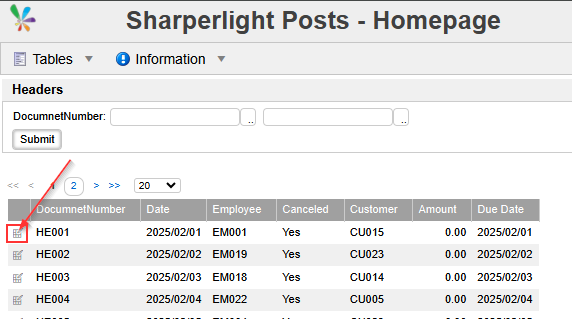
Click the icon to open the data entry form.
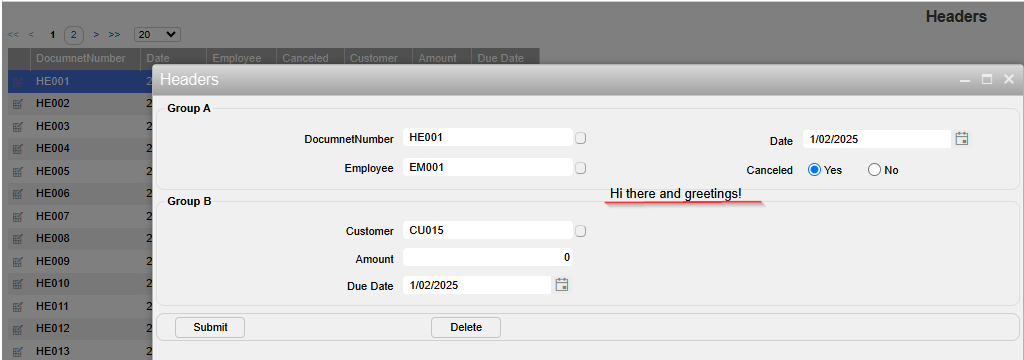
The code I added is executed when the form is loaded, and I can see where the element is positioned; it will become the top-left corner of the grid control.
Use your browser’s Developer Tools to adjust the width, height, top and right.
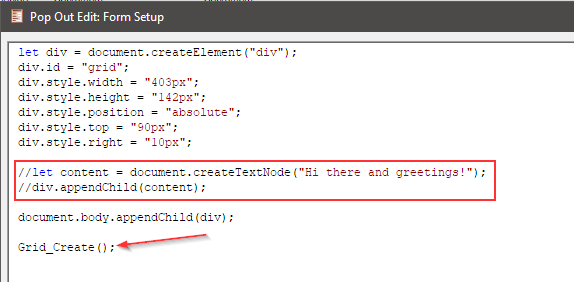
To add a KENDO Grid, update the code in the “Form Setup” and call a function to define the KENDO Grid.
Also commented out the code for adding text to <div> element as not required.
let div = document.createElement("div");
div.id = "grid";
div.style.width = "403px";
div.style.height = "142px";
div.style.position = "absolute";
div.style.top = "90px";
div.style.right = "10px";

//let content = document.createTextNode("Hi there and greetings!");
//div.appendChild(content);

document.body.appendChild(div);

Grid_Create();
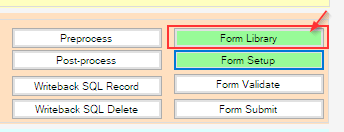
Form Library
The body of the function Grid_Create() is defined in the “Form Library“, where we can also define global variables, common functions, etc.
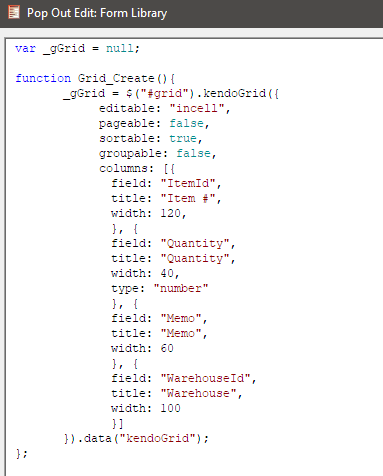
var _gGrid = null;

function Grid_Create(){
	_gGrid = $("#grid").kendoGrid({
            editable: "incell",
            pageable: false,
            sortable: true,
            groupable: false,
            columns: [{
        	field: "ItemId",
        	title: "Item #",
        	width: 120,
        	}, {
        	field: "Quantity",
        	title: "Quantity",
        	width: 40,
        	type: "number"
        	}, {
        	field: "Memo",
        	title: "Memo",
        	width: 60
        	}, {
        	field: "WarehouseId",
        	title: "Warehouse",
        	width: 100
        	}]
	}).data("kendoGrid");
};
Now it’s time to compile and see the result. Don’t forget to restart the Sharperlight service after compiling
It should be like this:
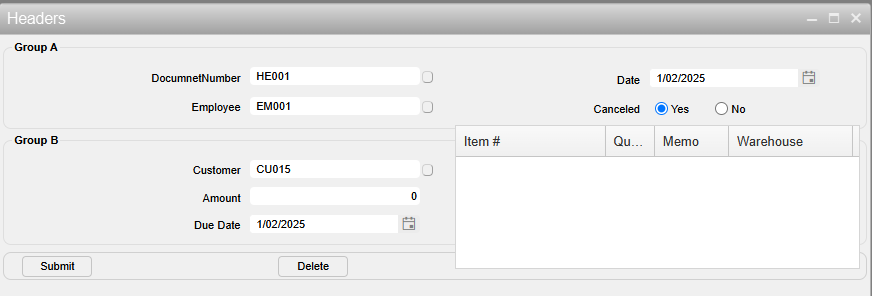
All that’s left to do is create a data source and add the necessary code to make the KENDO Grid work.
Here, I will show the code for defining the KENDO DataSource and feeding data to the grid using the DataSource. They are defined in the “Form Library” and called from the “Form Setup“.
You can see that the URL of a published report is used as an endpoint to feed a dataset to the grid.
In this way, public reports are not just reports, but also serve as API endpoints.
function Lines_DataSource_Define(editId){
	let xUrl = "{_rootURL}DataSource/?query=SLPLYG_DAT.Lines"
       	        + "&usid={_userSessionId}"
            	+ "&fltHeaderId=" + encodeURIComponent(editId)
            	+ "&dfmt=jsonarray&dcat=UseNames";

	let xDs = new kendo.data.DataSource({
       	transport: {
            read: {
                cache: false,	// This is important to make request every time
                datatype: "jsonp",
                url: xUrl
            }
        },
        schema: {
            model: {
                id: "Id",
               	fields: {
                    LineNo:		{ type: "string" },
		    ItemId:		{ type: "number" },
		    ItemCode:		{ type: "string" },
                    ItemName:		{ type: "string" },
                    Quantity:   	{ type: "number" },
                    Memo: 	        { type: "string" },
                    WarehouseId:	{ type: "number" },
                    WarehouseCode: 	{ type: "string" },
                    WarehouseName: 	{ type: "string" },
		    HeaderId:		{ type: "number" }
                }
            }
        }
    });
    return xDs;
};

//**************************************
// Read DataSources
//**************************************
function Lines_Grid_Refresh(){
	// Read data
       _gLines_DataSource.read().then(function () {
       	_gGrid.setDataSource(_gLines_DataSource);
            	_gGrid.refresh();
	});
};
Those functions are called from the “Form Setup” like this: (A static ID of 5 is passed to Lines_DataSource_Definition() as an example here.)
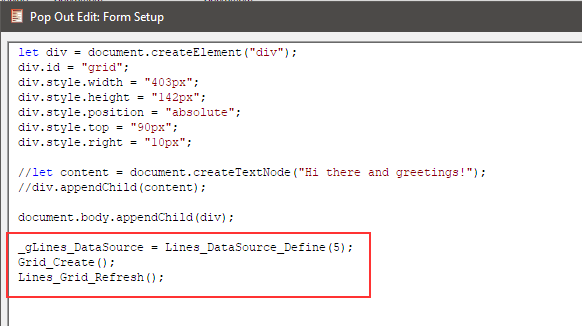
let div = document.createElement("div");
div.id = "grid";
div.style.width = "403px";
div.style.height = "142px";
div.style.position = "absolute";
div.style.top = "90px";
div.style.right = "10px";

//let content = document.createTextNode("Hi there and greetings!");
//div.appendChild(content);

document.body.appendChild(div);

_gLines_DataSource = Lines_DataSource_Define(5);
Grid_Create();
Lines_Grid_Refresh();
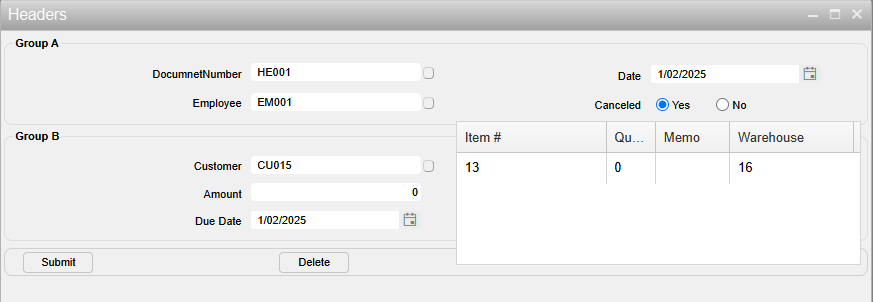
The result is shown below, and it only displays IDs, etc. You can write more code to add KENDO DropDownList controls in the cells.
At the end of this post, I will show you what the final form looks like.
Form Validate
As well as in the “Form Library” and “Form Setup“, you can write code to validate the entered data before submitting.
The code written here will be executed after the Submit button on the data entry form is clicked, and before the data is submitted.
Form Submit
The code written here is executed after the main data (Header’s data, in this example) is submitted.
Therefore, we can write code to submit the edited dataset in the grid to the database here.
Sample Completed
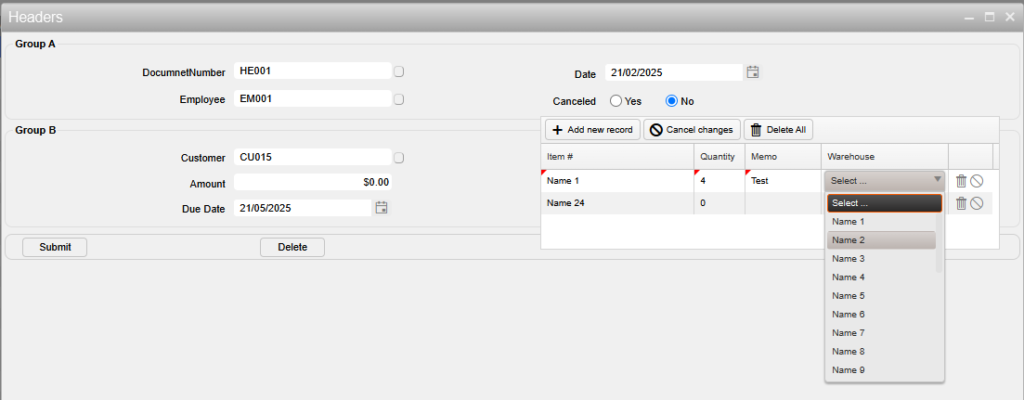
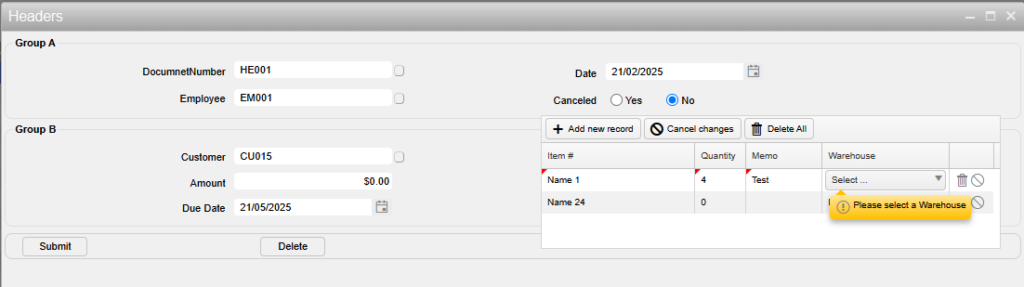
The completed version of the sample used in this post looks like this:
Afterword
The features described in this post bring significant flexibility to Sharperlight’s standard data entry forms. With knowledge of HTML, CSS, and JavaScript, you can bring your solution closer to your ideal.