
Resources with Foundry
Introduction
In this post, I show you how to use “Resources” with Sharperlight Foundry.
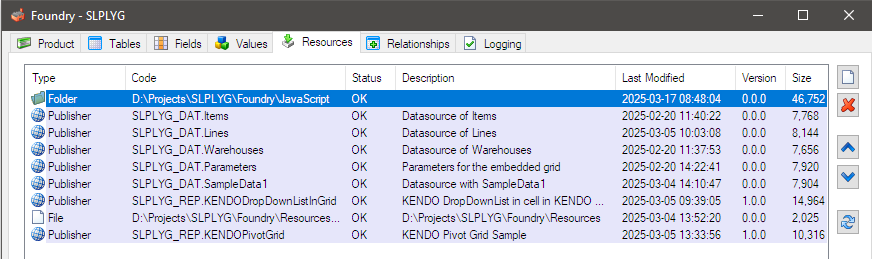
I use the example used in the post “Customizing the Data Entry Form with Foundry Adv.“.
Practices
In the post ‘Customizing the Data Entry Form with Foundry Adv.‘, JavaScript code was added to the ‘Form Library’ and ‘Form Setup’ options.
This works fine if the code size is small, but editing more complex code becomes challenging due to the simple text edit boxes provided in these options.
In that case, we can write code using a code editor such as ‘Visual Studio Code‘, save it as .JS files, and then import those files as resources into Foundry.
Then, by using a special control tag, we can incorporate the reference into the ‘Form Library’ and ‘Form Setup’ options.
Importing Resources
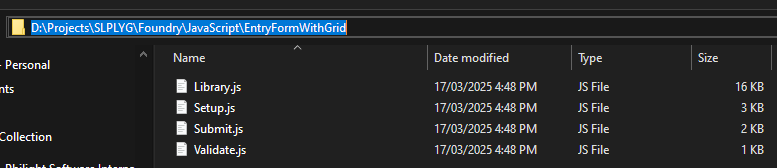
I write JavaScripts with ‘Visual Studio Code‘ and save into a folder like this.
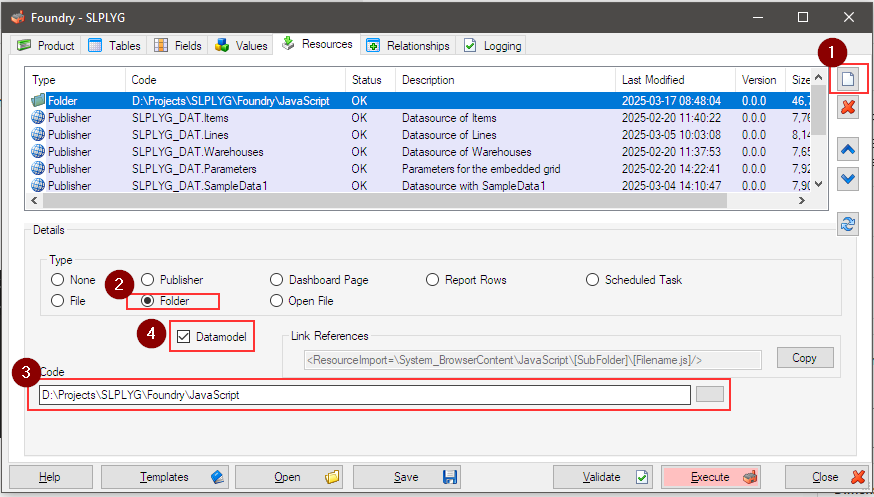
Then go for Resources tab in Foundry, (1) click New icon, (2) select ‘Folder‘ type, (3) specify the folder where the JavaScript files are. This time I specify the following path.
"D:\Projects\SLPLYG\Foundry\JavaScript"When you want to import these resources into the datamodel as well, select this (4) Datamodel option.
Using Imported Resources
Using the ‘Form Library’ option, write the following syntax.
<ResourceImport=\System_BrowserContent\JavaScript\EntryFormWithGrid\Library.js/>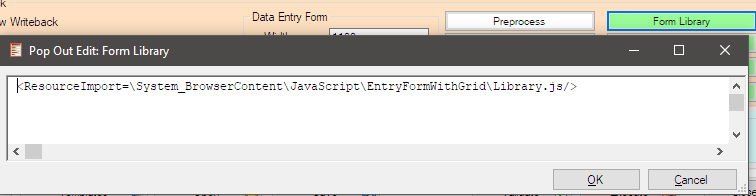
For the ‘Form Setup’ option,
<ResourceImport=\System_BrowserContent\JavaScript\EntryFormWithGrid\Setup.js/>For ‘Form Validate’ option,
<ResourceImport=\System_BrowserContent\JavaScript\EntryFormWithGrid\Validate.js/>For ‘Form Submit’ option,
<ResourceImport=\System_BrowserContent\JavaScript\EntryFormWithGrid\Submit.js/>
Then, save the Foundry definition and execute it to rebuild all Sharperlight objects for this product.
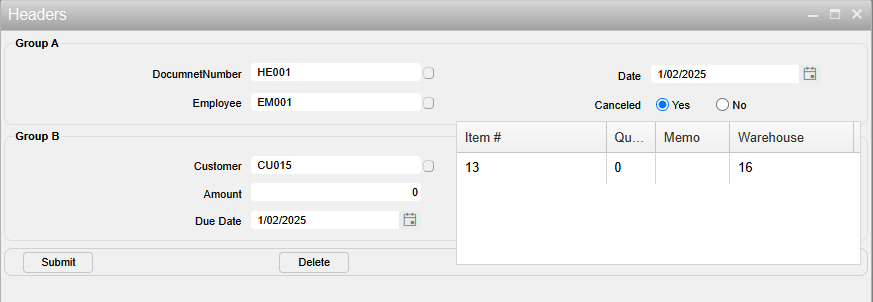
The standard Data Entry Form for the table where this JavaScript code was applied looks like this.
Afterword
This functionality makes handling files related to the product much easier.